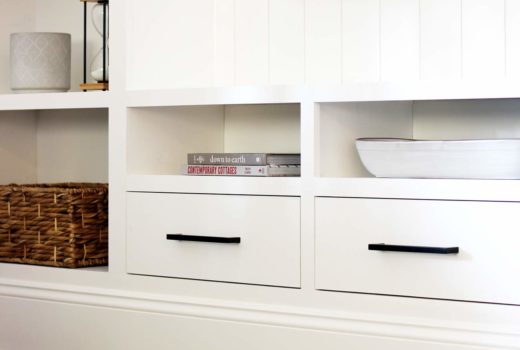
Media Wall Built-ins are a great way to add character to a room. I recently built some in our basement, and they completely transformed the space! Before, we had our TV sitting on a small media stand, which had the room feeling kind of empty. So this was a major upgrade!
In this tutorial, I’m going to show you how to build your own!
Before you get started, I recommend that you get our premium printable plans for this project. It makes things so much easier when you have the instructions right beside you as you are building. The plans include a detailed cut list for each step and the Sketchup 3D file.

Tools
- Angled Finish Nailer
- Miter Saw
- Table Saw
- Tape Measure
- Wood Glue
- Jig Saw
- Drill/Driver (1″ drill bit)
Materials
- (13) 1×12 x 8 ft poplar or primed pine
- (3) 1×6 x 12 ft poplar or primed pine
- (4) 1×3 x 8 ft poplar or primed pine
- (6) 1×2 x 8 ft poplar or primed pine
- (1) 16 ft baseboard
- (1) 16 ft crown molding
- 1 1/4” 16 ga Finish Nails
- 2” 16 ga Finish Nails
- 2” wood screws
- 3 sets of drawer slides
- 3 drawer pulls
- (8) 4” x 10ft shiplap boards
Step 1: Build the End Shelves for the Media Wall Built-ins

Glue and nail the boards together as shown using 1 1/4” finish nails. You’ll need to build two of these.

Glue and nail the 1x3s in place as shown above. Do this on both shelf units.

Place the two shelving units against the wall and space them apart 72 inches. Then use 2” wood screws to fasten them to a wall stud through the top and bottom 1x3s. These will keep the media wall built-ins in place.
Step 2: Build Connecting Lower Shelves


Glue and nail the 1x12s as shown above. Make sure all the boards are joined at 90-degree angles.

Place it between the two shelving units and nail it into place.

Glue and nail the 1x12s together as shown above. Make sure all the boards are joined at 90 degree angles. Use a jigsaw to cut a notch in the back middle of the 1×12.

Add some wood glue to the bottom and place it as shown above. Then nail it to the left and right shelving units.

Nail the two 1x12s to the sides of the shelving units as shown above.
Step 3: Build Connecting Upper Shelves

Glue and nail the 1x12s together as shown above. Make sure all the boards are joined at 90 degree angles.

Nail it into place as shown above.
Step 4: Add Boards to the Face of the Media Wall Unit

Glue and nail the 2 1x3s in place as shown.

Before gluing and nailing the 1x6s in place, make sure they are level and flush with the vertical 1x3s.

Glue and nail the 1x3s in place as shown. The edge should be flush on the TV side and overhang on the shelf side.


Glue and nail the 1x2s in place as shown. The top edge of each should be flush with the 1×12.


Glue and nail the 1x2s in place as shown. Start with the 7 3/4” ones on the bottom. The ones above should line up.

Glue and nail the 1x2s in place as shown. The top edges should be flush with the 1x12s and the ends should be flush with the vertical 1x3s.

Nail these boards in place using 2” finish nails except for the 12 1/4 1x2s. Add glue on the ends before placing them. They should be a tight fit. Add 2 2” screws into each stud that the 1x12s overlap.
Step 5: Add the Vertical Shiplap

The gap between the two middle pieces of the shiplap should be in the center. Drill a 1” hole in the two middle pieces as shown before nailing in place. Nail all of the shiplap boards in place. Use a table saw to rip cut the last two end pieces to the correct width.
Step 6: Add Drawer Slides

Mount drawer slides to the left and right side of each drawer opening. Mount them 1 1/2” up from the bottom edge of the opening and even with the back edge of the 1×2. Measure the width between the two drawer slides and subtract 1/16”. This will be the width of your drawer.
We have a separate tutorial for building the drawers.
Finish off the built-ins with baseboard and crown molding. Once you’ve completed the building process, you’ll want to fill all of the nail holes, caulk the cracks, and paint the media wall built-ins a color of your choice. We used Sherwin Williams Pure White, one of our favorite interior white paint colors.

If you would like a more detailed version of this tutorial, you can get the printable plans. It also includes the Sketchup 3D file.


2 Comments
What size is your TV in your media wall? Just wanted to get a sense of the spacing between the TV and the cabinet. Thanks!
June 11, 2021 at 2:26 pmHow would I go by making it 18in dww0 instead of 12 the way you have it??
May 4, 2022 at 3:24 am