We decided to install picture frame moulding on a couple of walls in our home office. This is something we had originally planned on doing during our build, but we had to put it off due to time constraints. But now we finally had time to take on this project and give our home office a bit of an upgrade. In this tutorial, I’m going to show you exactly how I did it!
What is Picture Frame Moulding?
Before we get into the how-to, you might be wondering what it is. Picture frame moulding is usually made with base cap moulding, but other narrow mouldings can be used. They are formed into squares or rectangles uniformly on a wall, resembling empty picture frames. There are many different ways this can be done, but the most common is adding them to the lower 1/3 of the wall and adding a chair wail above. This look is meant to simulate the appearance of wainscoting. Picture frame moulding can also be added to the full height of a wall, usually with a smaller frame on the bottom and a taller one on top. This is our favorite way it’s done, so we decided to go with this style for our office.
Tools and Materials
- Narrow Moulding (we used a 2-inch window trim)
- Tape Measure
- Miter Saw
- Nail Gun
- Cross-line Laser Level
- Pencil
- Painters Tape
- Construction Adhesive
- Caulk Gun
- Caulk
- Paint
- Paint Brush
Step 1: Measure the Wall
Before you do any cutting or even buy any materials, the first thing you should do is design the layout of the picture frame moulding. This is done by first measuring the wall. I measure our office wall from the top of the baseboard to the bottom of the crown moulding. This gave me the height. Then I measured the width of the wall.
Step 2: Determine the Layout
After I had my measurements, I looked for any obstacles that I might have to work around. This includes things like light switches and electrical outlets. The wall had two outlets. Instead of trimming around these, I decided it would be much easier and look better if placed the lower picture frames right above the outlets. This would place the bottom of the lower picture frames 9″ above the top of the baseboard. So I decided to use 9″ as my horizontal and vertical spacing for all of the frames.
If you have read any of my other tutorials, you probably know that I am a big fan of using Sketchup to design my projects. For this type of project, it is a big help.
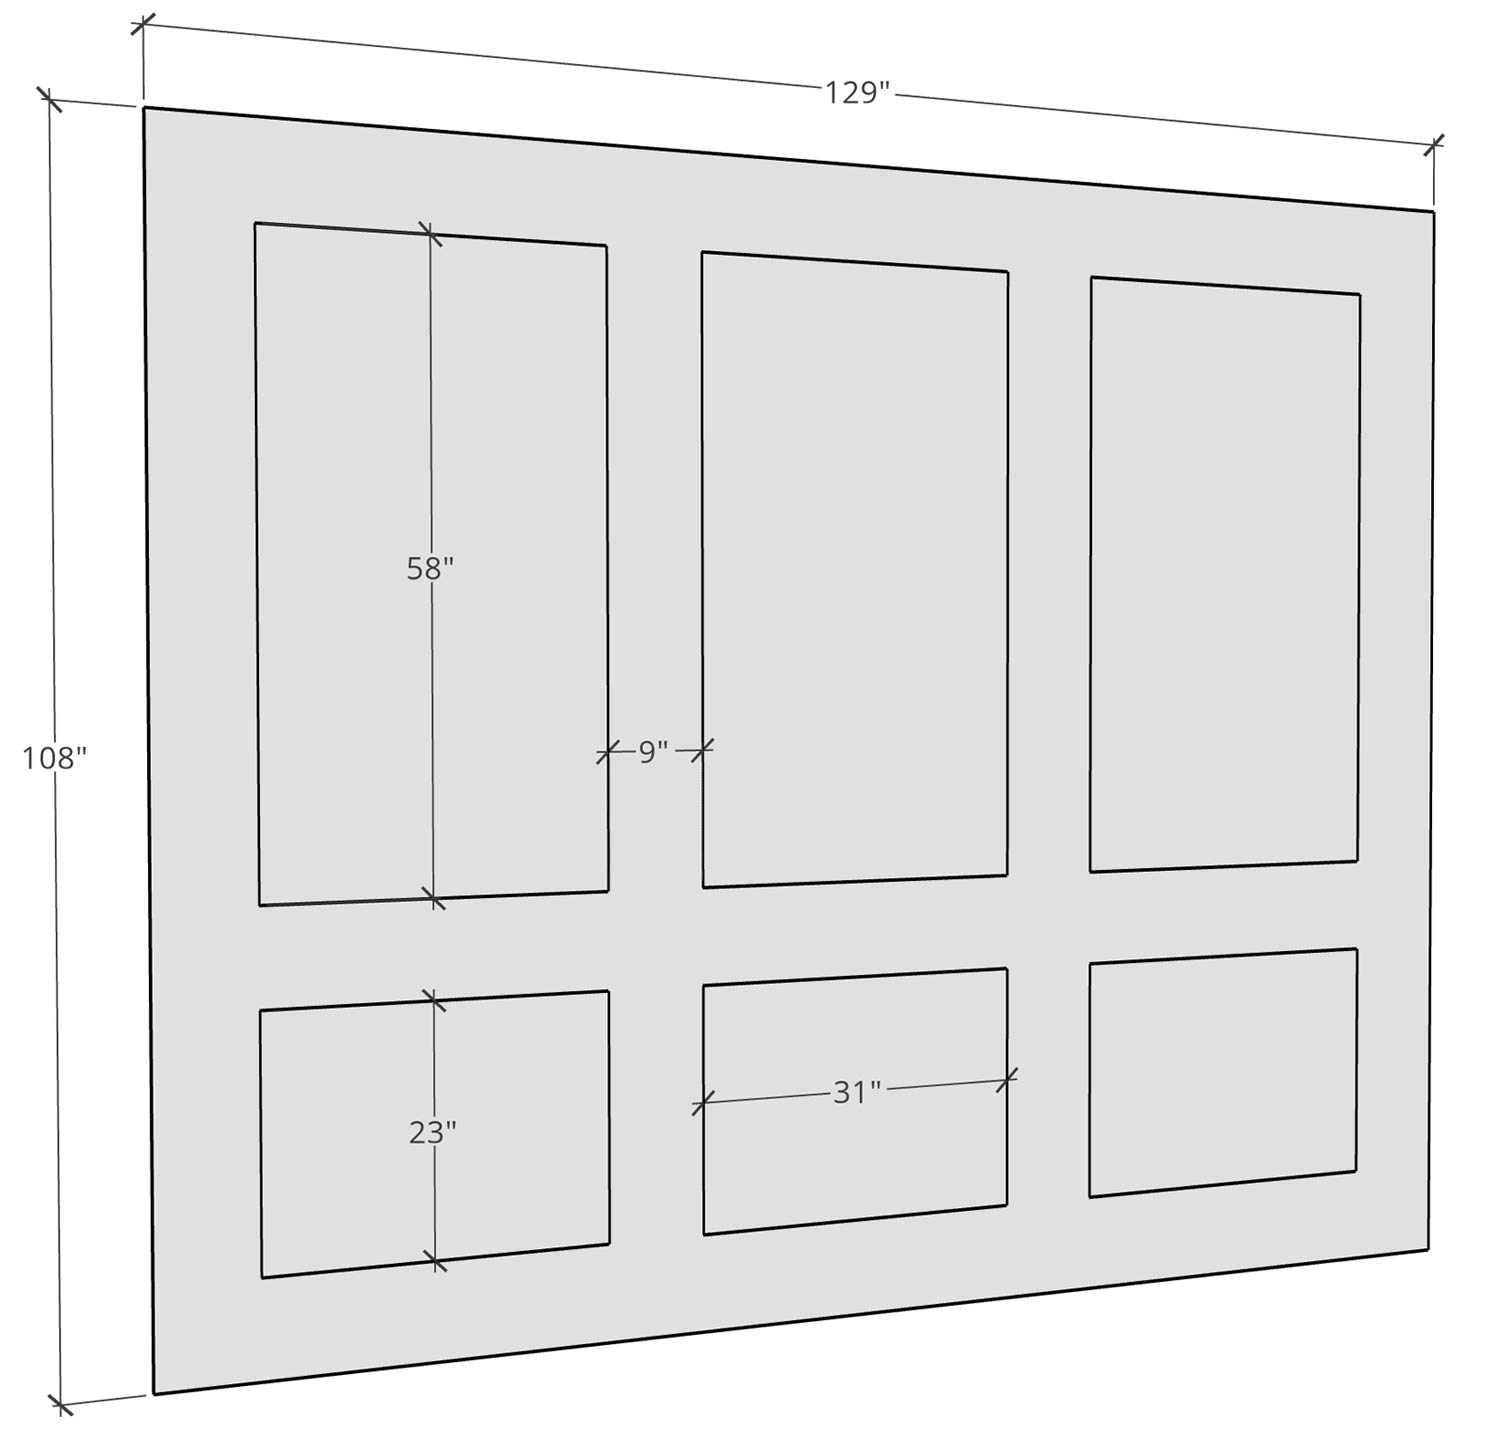
In Sketchup, I drew the wall using the dimensions I measured. This allowed me to play around with different numbers of picture frames to come up with the best look. I eventually decided on adding 3 across, which meant I would need to add 6 total.
Here’s where I had to do a little math to figure out the correct width for each frame. I multiplied 4 (the number of horizontal spaces) by 9. Then subtracted that from the width of the wall, and divided it by 3. This gave me the width I needed for each picture frame. Then I laid them all out in Sketchup to figure out what heights would look best. Here’s what I came up with.
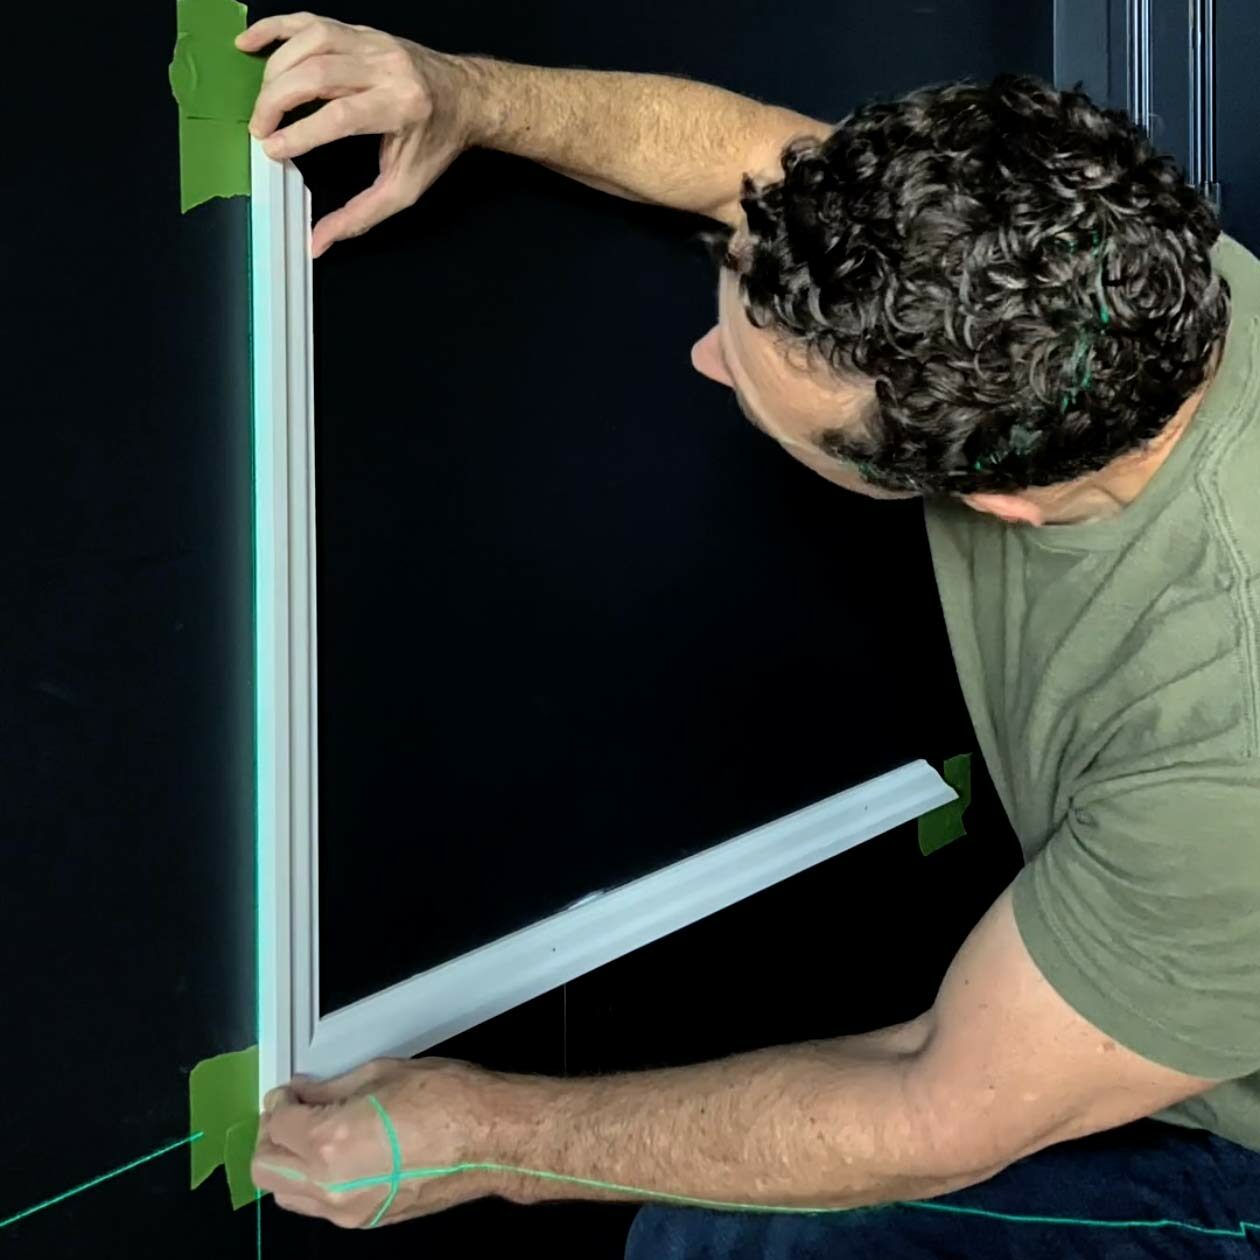
Step 3: Mark Locations on the Wall
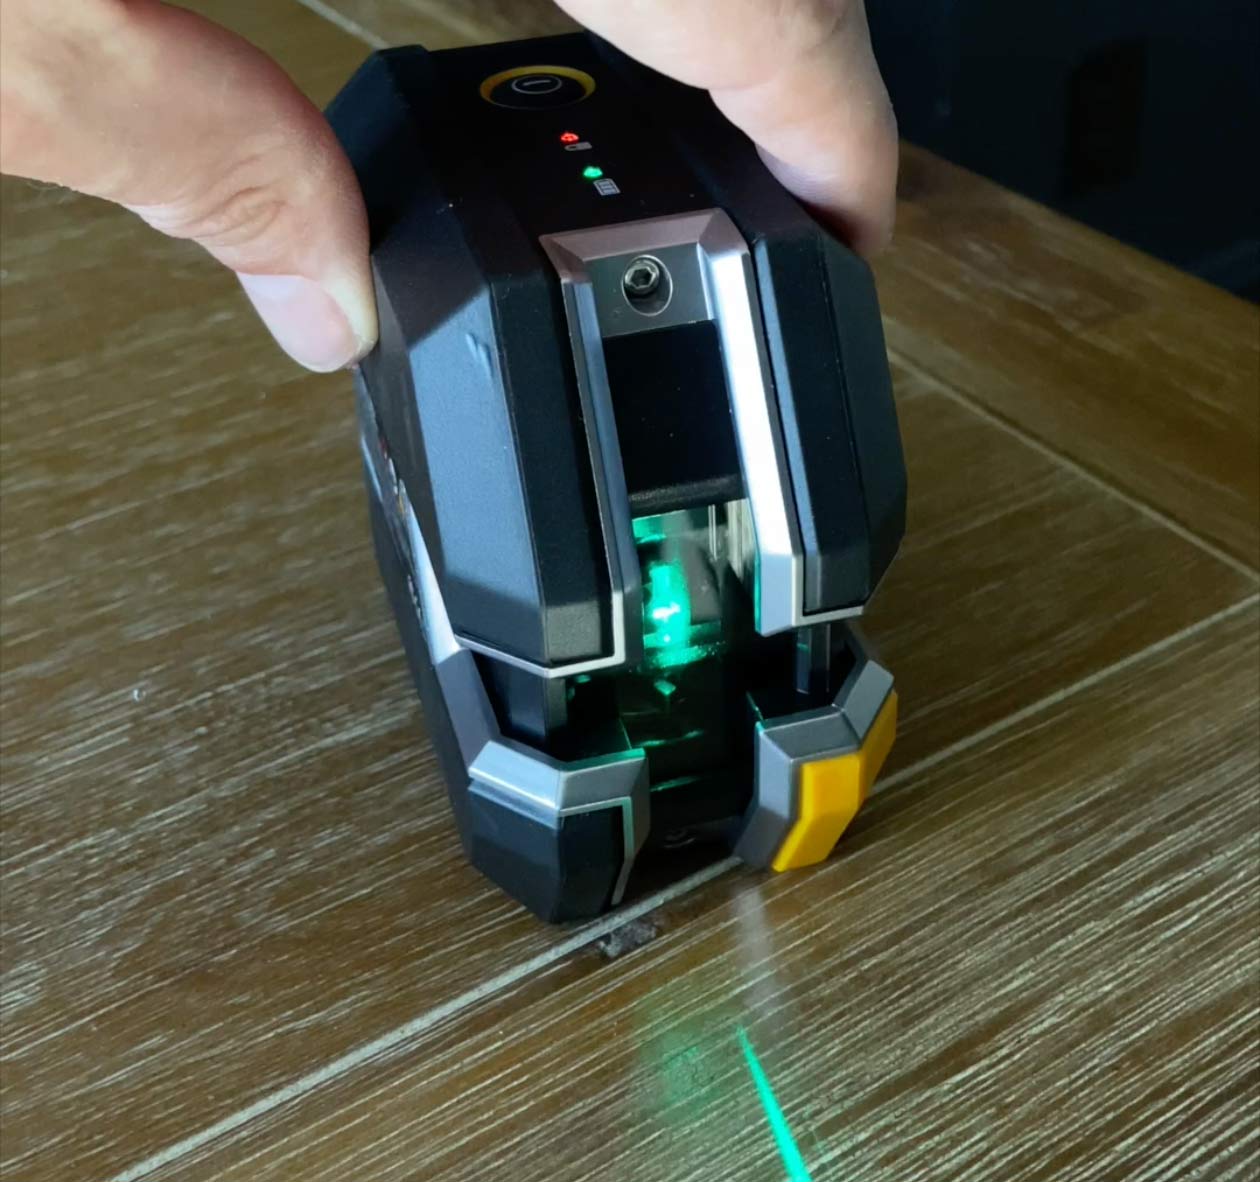
For this step of the process, I used a cross-line laser level. I can’t recommend using one of these enough. It projects a self-leveling vertical and horizontal line on the wall. I used this to make sure my marks were level and plumb. It made the job so much easier.
I started with the lower right picture frame. I measured and marked all of the corners using a tape measure and the later lines as a guide. You can use a pencil to make your marks, but I used painter’s tape since the office walls were so dark. The pencil marks didn’t show up that well. I repeated this for the rest of the picture frames.
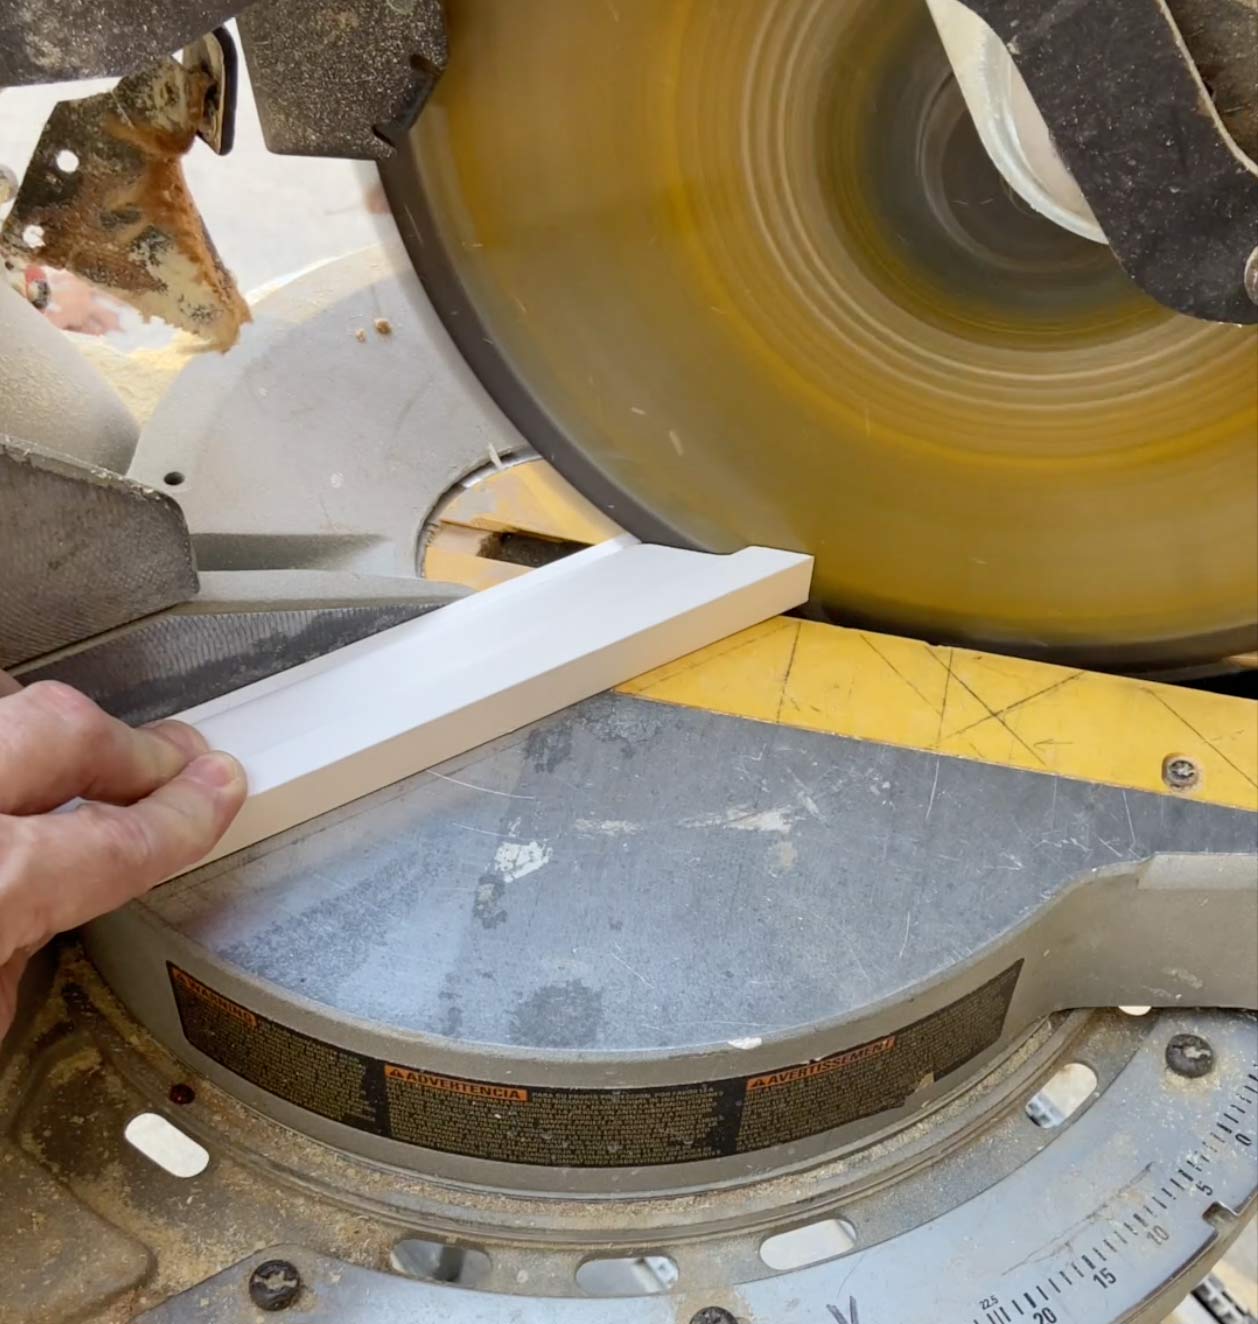
Step 4: Cut All of the Moulding
After I had marked all of the corners, I then made all of my cuts. I cut all of the corners at a 45-degree angle.
Step 5: Attach Moulding to Wall
I worked with one frame at a time, starting with the bottom piece first. I applied construction adhesive to the back of the moulding and placed it on the wall, making sure to line it up perfectly with my marks.

Then I put a couple of nails in it. I did the same with the two vertical pieces, and then the top piece.
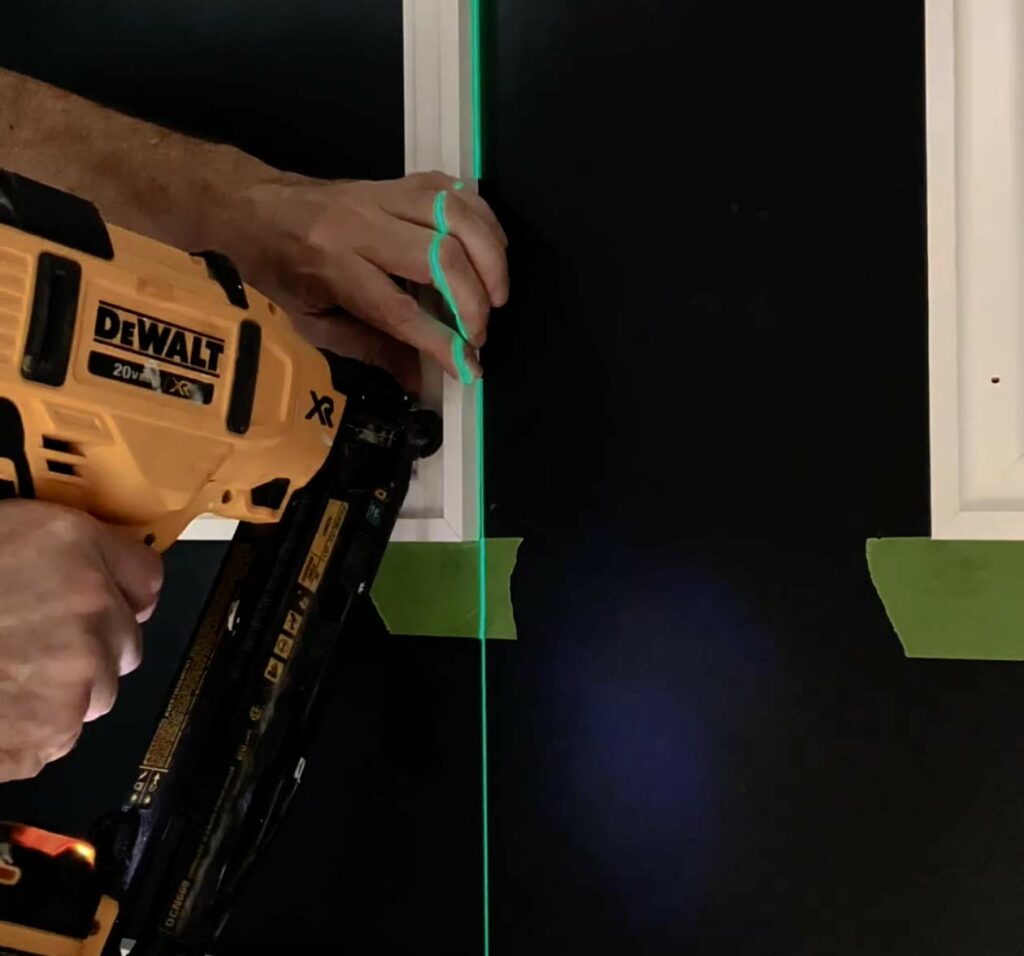
I did this for all six picture frames.
Step 6: Caulk and Fill Holes
After I had all of the moulding attached in place, I caulked and filled all of the holes with spackling. And after it dried I sanded the packing until it was smooth.
Step 7: Paint the Picture Frame Moulding
Then I painted all of the trim to match the walls.

Our Office Furniture
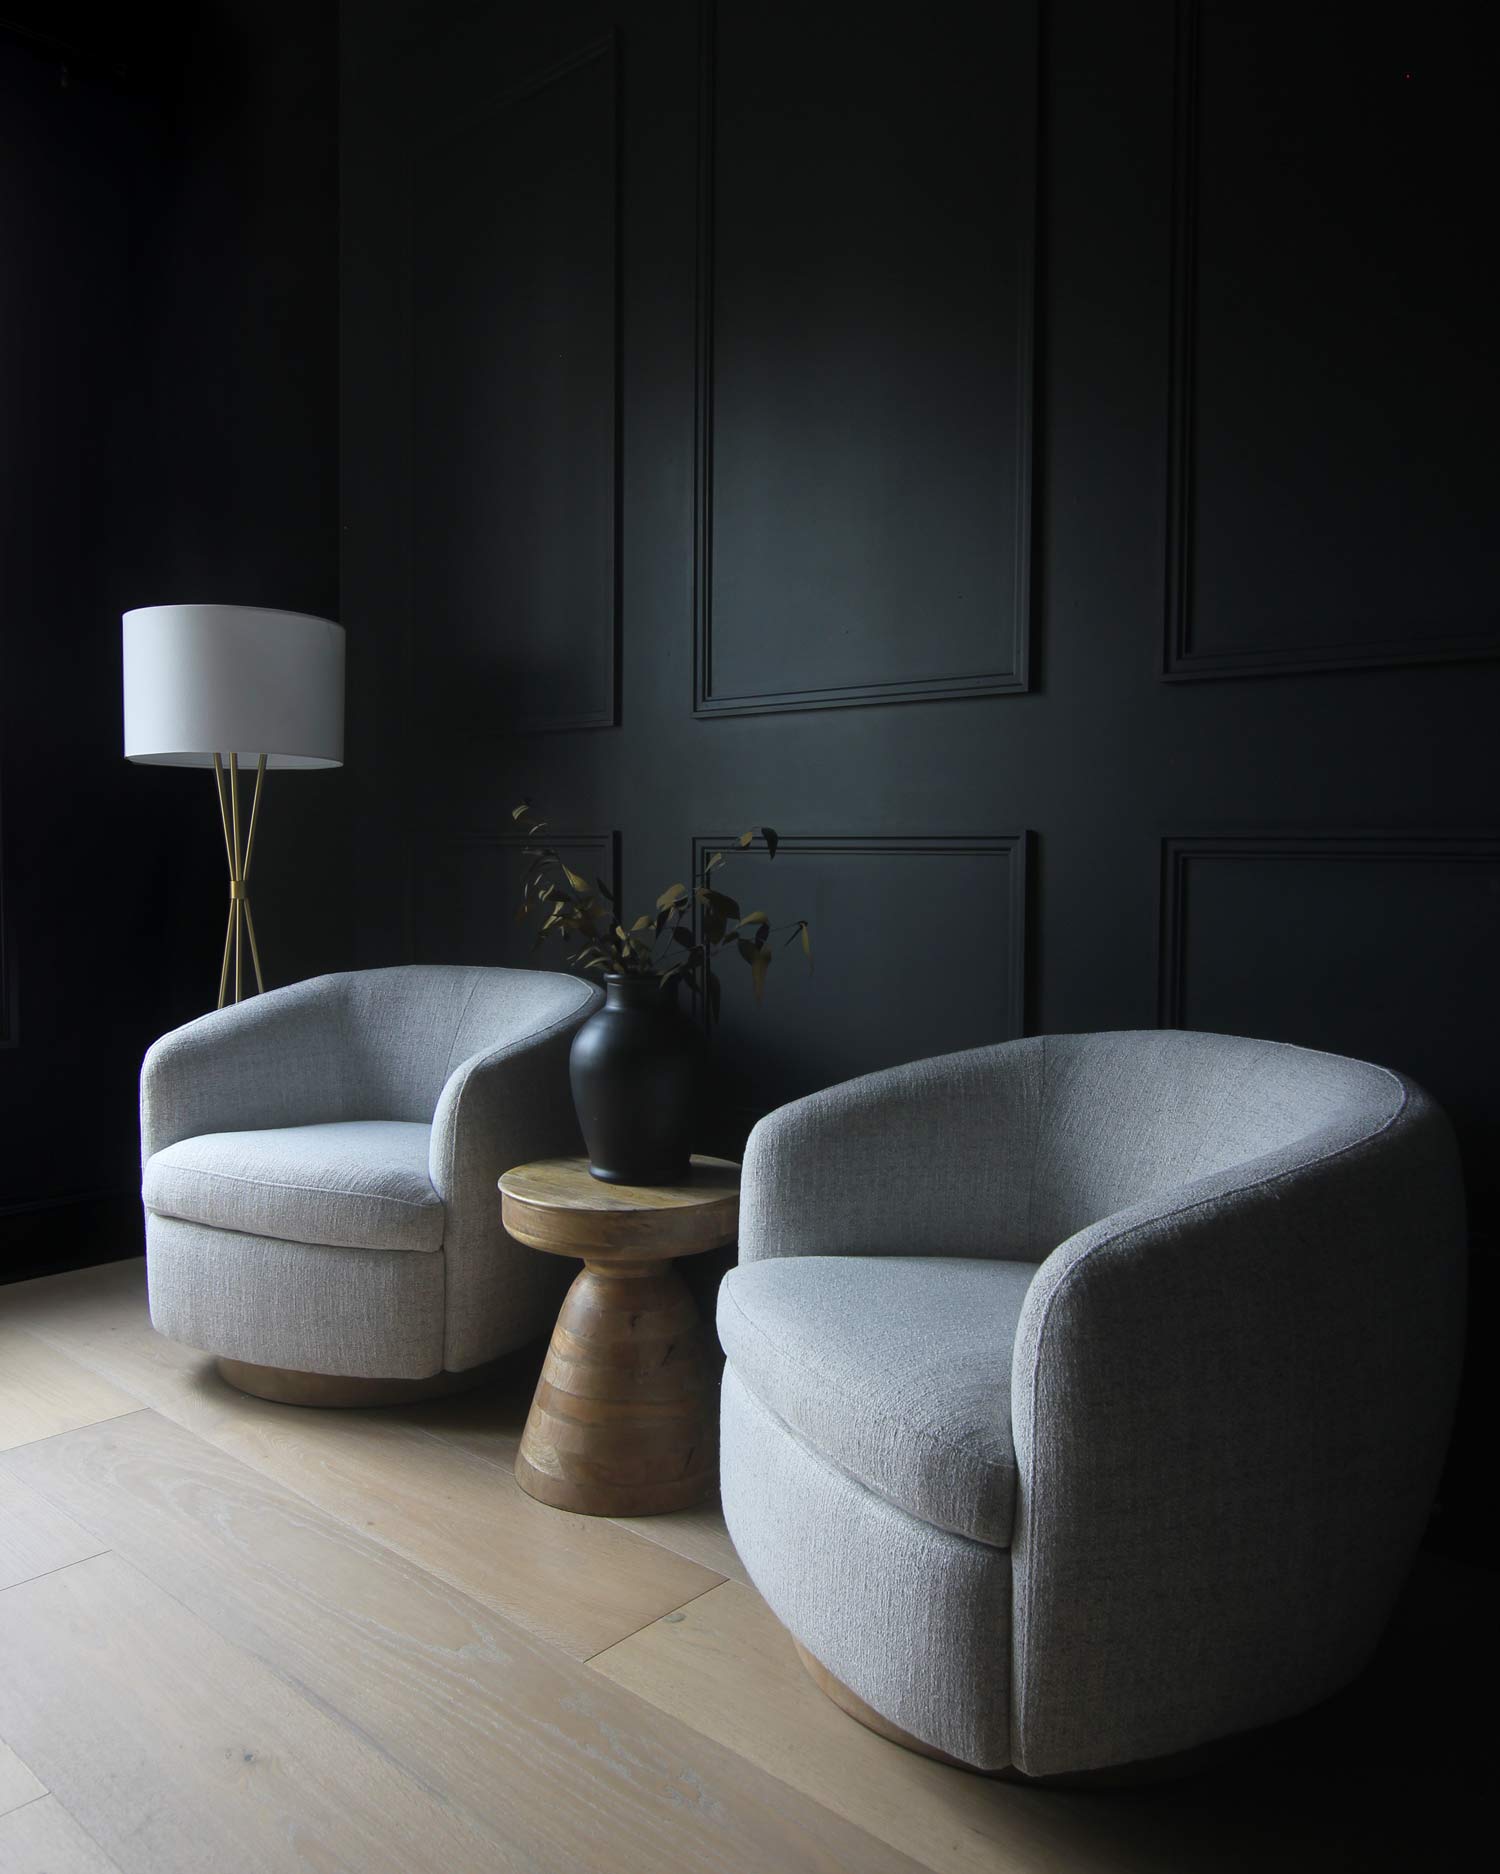
Our office decor is designed to balance functionality and style, perfectly complementing our picture frame moulding wall. The two swivel chairs are ideal for welcoming clients or enjoying a quiet reading time, blending comfort and elegance. A brown wooden pedestal accent table sits gracefully between the chairs, offering a convenient spot for coffee and standing out beautifully against the dark wall. Adding a touch of nature, a black porcelain table vase filled with greenery brings life and color to the space. To top it all off, an antique gold tripod floor lamp provides warm lighting, creating a cozy yet sophisticated atmosphere that makes our office both inviting and inspiring.
Final Thoughts
We couldn’t be happier with the way this project turned out! The picture frame moulding added a layer of dimension to the room as well as an element of sophistication. I would say that the most important step of the process to the planning. Getting that part right, makes the rest of the project much easier. And the most valuable tool is the cross-line laser level– a must have for this type of work!
*This page contains affiliate links. If you make a purchase through one of these links, we earn a small commission at no additional cost to you.


2 Comments
I really would love to try this sometime after we move in our new to us home. Yours is so beautiful.
November 7, 2022 at 5:33 pmHi! Did you do this one wall or all walls in the office? I would love to replicate this in my office but am not sure how to carry it around to the walls with doors/windows.
April 25, 2023 at 5:14 pm