
The wonderful family that is buying our house and patiently waiting for us to finish our new house, has adorable twin girls. Their mother had been dreaming of a bunk bed for their new bedroom and asked if we would be willing to design and build them one. How could I say no?
We’ve completed the project and posted a full reveal, which led to a lot of people asking for a tutorial. So here it is! In this article, I’m going to provide the plans and instructions on how to build this built-in bunk bed.
Keep in mind that some dimensions will probably need to change based on the width and height of the room you are working in.
Here’s what you’ll need:
- Finish Nailer
- Tape Measurer
- Wood Glue
- Jig Saw
- Miter Saw
- Sand Paper
- 1 1/4″ Finish Nails
- 2″ Finish Nails
- Framing Nailer
- Framing Nails
Wood
Since room dimensions vary, I’m only providing the types of lumber and millwork needed.
- 2×4’s
- 2×6’s
- shiplap boards
- engineered hardwood or another type of floor covering
- 1×6’s
- 1×10’s
- 1×4’s
- 1×12’s
- pine t&g
- plywood
- quarter round
Measure the Room
The first step is to measure your room. The room I built this bed in, was wide enough to accommodate a queen-size bed. If your room isn’t wide enough, you might need to switch it to a twin bed or make the side a bit more narrow.
Once I had the width of the room and ceiling height, which is 11′ 2″ and 10′, I was able to start designing the bunk bed. Here is what I came up with:

This model includes the back wall. The bedroom has a sloped ceiling, so it was important to factor that in for the railing.
Step 1: Frame the Walls
With this type of bed, it’s important that it is strong and sturdy. It will need to support the weight of people on the loft and support the weight of a person climbing the ladder.
For that reason, I used framing lumber to build the main structure. Using 2×4’s, I framed two walls each for the left and right columns.

I started by framing the front wall for the left side.

Using a framing nailer, I nailed together the 2×4’s as shown above.


I added extra blocking to the bottom and top of the wall. This would ensure that I would have something solid to anchor the ladder to.

Once I finished the first wall, I started on the second. With the position of the wall sconce in mind, I positioned the middle stud so that light would be center of the wall.


After I completed the second wall, I stood them both up into place. Then nailed them together using the framing nailer.

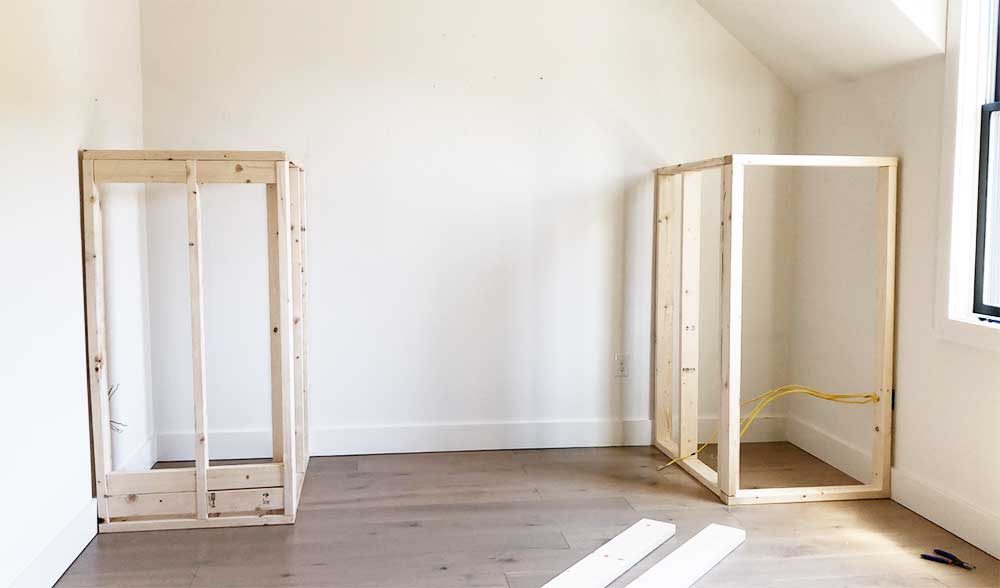
Here you can see the framing for both sides completed. On the front wall on the right side, I did not add a middle stud. This is where the built-in shelving will go.
Step 2: Frame the Loft Floor
The next step was to frame the flooring for the loft.

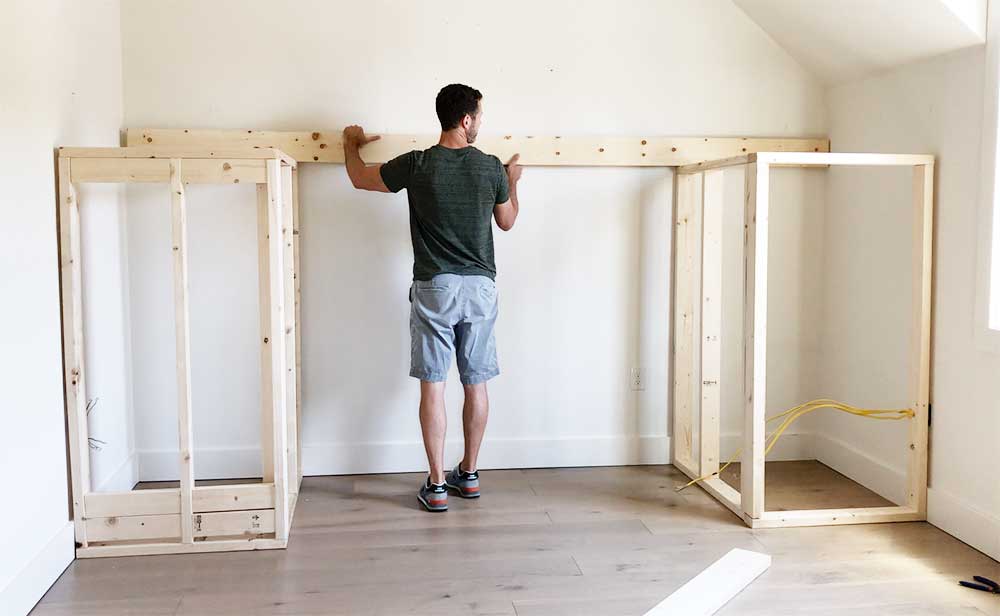
Again, I wanted to make sure that the loft was strong and sturdy. I placed a 2×6 along the back wall as shown in the picture above.
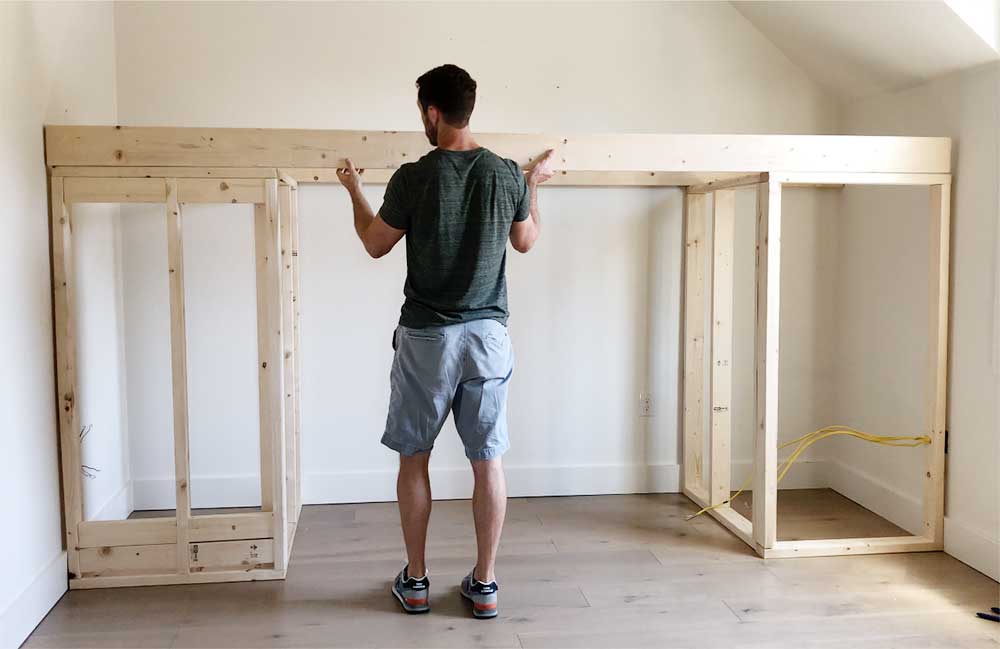
Then I placed another 2×6 on top of the front wall as you can see in the picture above.


Using a stud finder, I located and marked all of the studs on the back wall of the room, and also on the side walls.

Then I anchored the framing to the wall with screws.
Step 3: Wiring

I won’t go into all of the details of wiring for this tutorial, but give you an overview of what I did.
Since I was covering up an outlet on each side, I came off of those to provide electricity for the new outlets and wall sconces. You can see what I did in the picture above. I did this myself, but if you are not confident in your wiring ability, you should hire a licensed electrician.
Step 4: Add Trim and Shiplap
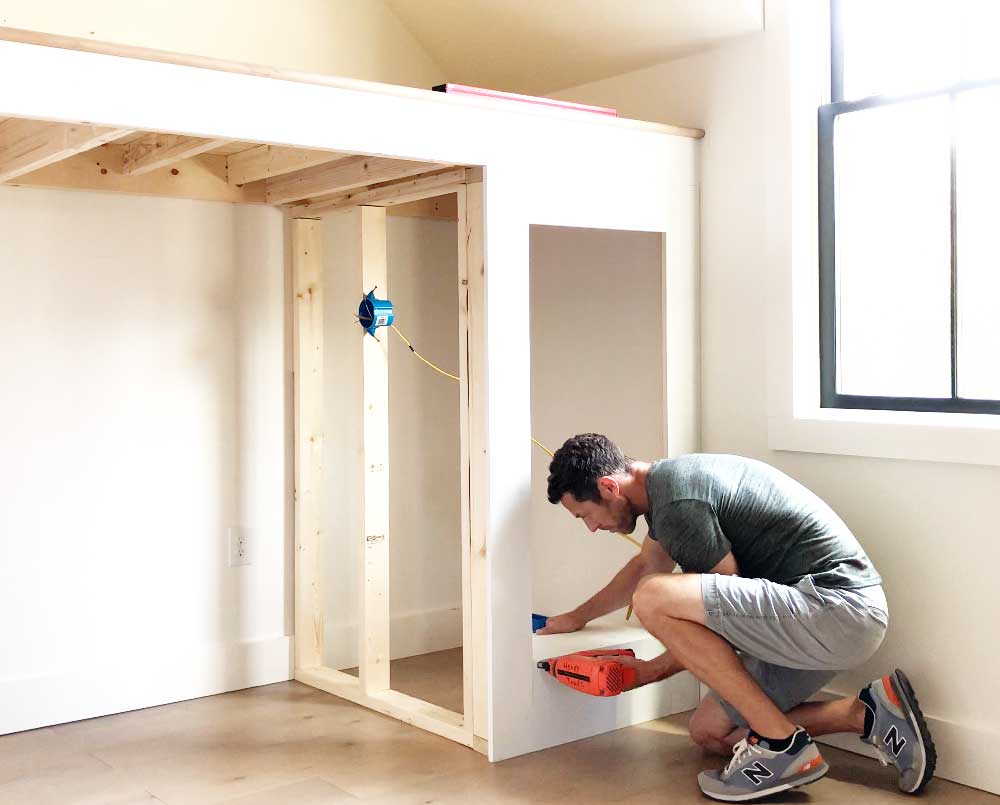
Once I had all of the framing completed, I started wrapping it with trim and shiplap. I used a piece of oak landing tread along the front edge of the loft floor.
For the loft flooring, I put down a layer of plywood for the subfloor. Then installed engineered flooring on top of that. I had a few boxes

Using a finished nailer, I nailed a piece of primed 1×6 to cover the front of the loft floor.

On the right side, I used 1x’s to build the nook for the built-in shelves. I use wood glue and a finish nailer. I let it hang over 1/2″ on the left side to cover the ends of the shiplap boards.

Here you can see the backside where I used 1×10’s to build the sides, top, and bottom of the shelf nook.

I covered the back of the built-in shelves nook with pieces of shiplap.

For the shelves, I cut 1×10 boards to the correct width and nailed a piece of 1×2 on the front to give them more thickness.
To determine the spacing for the shelves, I measured the height of the nook, and divided by four. I drilled sets of four holes in the sides of the nook for each shelf and placed a shelf peg in each one to support the shelves.

Then I wrapped the left side and back wall and right side with pieces of shiplap. I attached them with a finish nailer.

I used a jigsaw to cut around the light and outlet boxes.
Step 5: Build the Lower Bed


I framed the bed out of 2×6’s and used screws to attach the horizontal boards to the side boards as shown in the picture above. The new owners wanted to use a mattress only. So I made the bed frame extra sturdy.

Then I trimmed the frame with 1×12’s and 1×6’s. I mitered all of the corners.
Step 6: Finishing Touches
Once I had the bed framed and trimmed, I filled all of the nail holes, sanded, and put on two coats of paint.

For the bottom side of the loft, I used a thin pine tongue and groove board. I simply nailed it to the floor joists above and used 1×2 and quarter round to trim around the edges.
I contracted a local fabricator to make the ladder and railing. Check out the pictures below for the finished product.


30 Comments
What type of shelving design did you use and how did you hang the shelves in the book nook?
November 19, 2019 at 5:57 amHi Tara. Sorry about that. I left out the image for that part. It’s there now.
November 19, 2019 at 6:55 pmAre those shelves suspended in the nook or was there some structure other than 1x to keep them together?
August 24, 2020 at 2:23 amWhere did you get the ladder and top bunk guard rail?
December 5, 2019 at 2:23 amHello Jim! We actually had it custom made by an individual in our town. Are you local?
December 5, 2019 at 3:55 pmWhere are you located? And are these metal? Thanks so much!
May 5, 2020 at 4:30 pmI have a room I want to make and put the bed in. 2 walls are 12 ft and the other Ones are 15 ft. Do you think that I could make the bed that small? And also, the ceiling is about 8 ft tall. Is the bed too big?
January 18, 2021 at 12:50 amDid you nail the wood to the floor as well?
December 5, 2019 at 11:01 pmI used screws to secure the walls to the floor.
March 19, 2020 at 2:34 pmSorry, I’m referring to the structure you created in step 1.
December 5, 2019 at 11:03 pmWhere did you guys get you lighting? also where did you get the ladder and guard rail?
January 14, 2020 at 2:44 amThe lighting is from Amazon and a local fabricator mad the rai and ladder.
March 19, 2020 at 2:34 pmThis is a beautiful project! I’m looking to have a similar ladder and railing made. Do you have any advice for how to find someone locally? I don’t even know what to search for.
May 31, 2020 at 4:02 pmHi! I’m wondering about the specifications for the ladder, I understand you had it fabricated. Can you give me the dimensions you used? TIA it’s beautiful!
March 15, 2020 at 2:59 pmI love this bed!! I would love to create something similar!!
March 22, 2020 at 4:26 amDo you remember, roughly, how much this cost in supplies to build? Trying to decide if it would be cheaper to build our own like this, or buy a bunk bed! Thanks!
April 8, 2020 at 1:31 amIt was right around $2000 for all material including the ladder and rails.
May 11, 2020 at 6:01 pmHello,
May 10, 2020 at 9:57 pmHow much did this cost in supplies to build? Thanks!
It was right around $2000 for all material including the ladder and rails.
May 11, 2020 at 6:01 pmLove this! How tall are the ceilings in this room?
June 22, 2020 at 5:34 amThey are 10 ft.
June 24, 2020 at 1:32 amHow much did it cost minus the custom ladder and rails?
July 20, 2020 at 2:06 pmWhere did you get the bedding?
July 24, 2020 at 2:21 pmHi. Congratulations- it’s a great design and very inspirational! I noticed that with the baseboards the way they are this means the back frame and side frames won’t be flush to the wall when they are anchored to the wall studs. Is that a problem? What size screws did you use to anchor the 2×6’s to the wall studs. Thank you
July 27, 2020 at 3:02 pmWhat was the width of this room
October 1, 2020 at 11:35 amThanks.
Ya know the plans show the right side trim put together differently than the video? The plans show the bottom 1×10 spanning the width of the frame and the 1×6 resting on the top, and the video shows the 1×6 going all the way to the floor and the 1×10 spanning the width between the 1×6’s.
October 13, 2020 at 4:14 pmHi Henry
March 17, 2021 at 8:17 pmCan you tell me what size mattress was used on the top bunk, depth and width? Also, how much in materials minus the custome rails? Thanks!
Amazing! I am also thinking to make a bunk bed for my daughters. What kind of lumber species did you use? I heard bunk beds frame must use hardwood instead of soft.
Thanks!
April 17, 2021 at 7:26 amNice job but i think you “loose“all the storage space in the two big cubes? I would have done long drawers instead of the book shelf.
August 1, 2021 at 3:59 amWhere is the bedding from if you don’t mind me asking? Thanks!
May 10, 2022 at 8:54 pm