

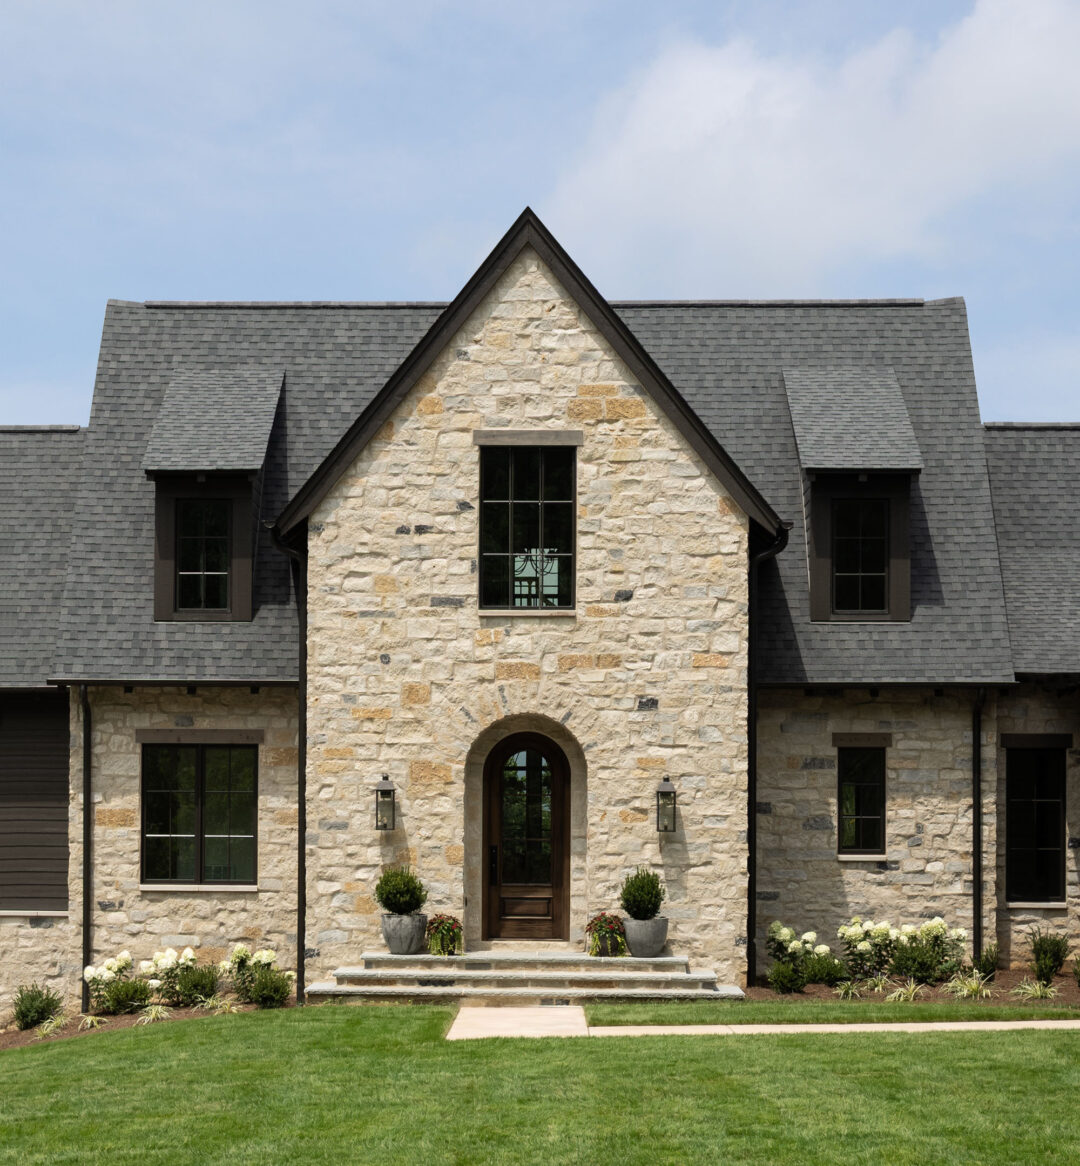
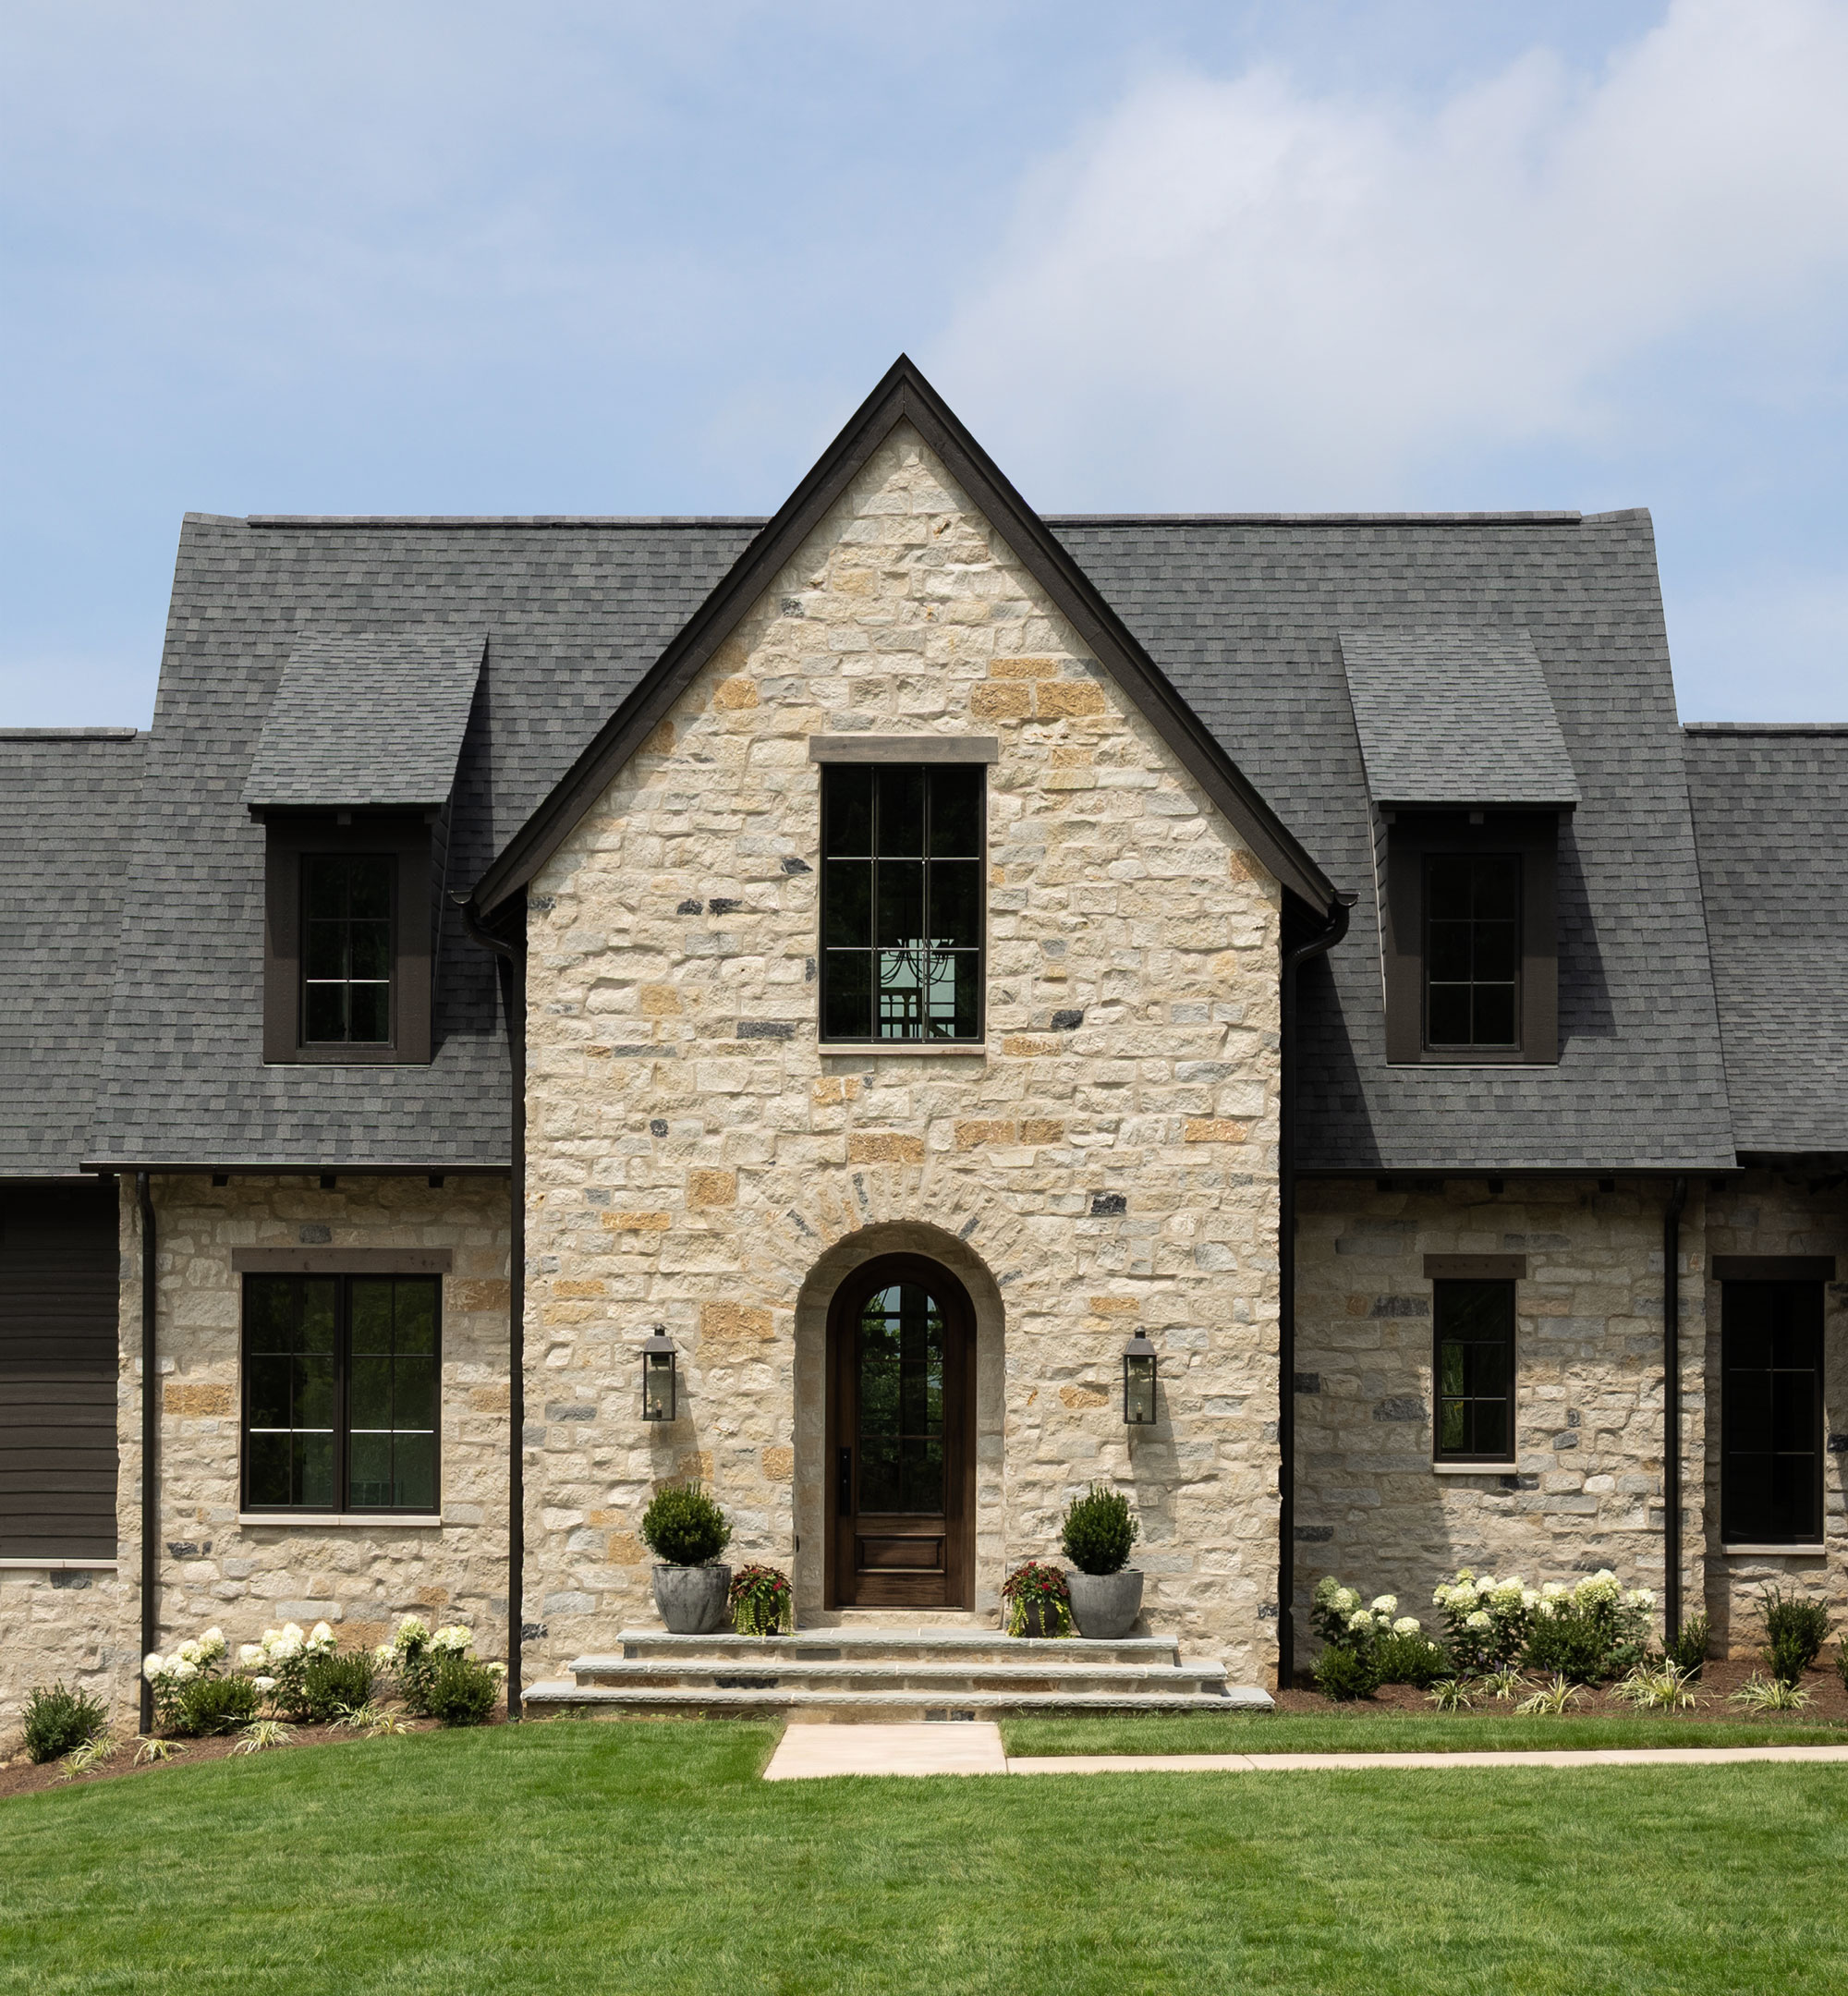
The stone is one of our favorite parts of the outside of our house. We wanted it to look like it had been there for a hundred years, not like it went up last spring. To get there, we used thin natural stone, an overgrouted joint, cedar headers over the windows, limestone sills, and an arch around the front door. Here’s how each of those came together.
If you’ve been following along, this is the same house from our exterior design inspiration post, and it’s built from our Summit house plan.
Our Stone Exterior at a Glance
- Stone: thin natural stone veneer (real quarried stone, cut thin)
- Joint: overgrouted, with mortar pushed out over the edges of the stones
- Window headers: 1×8 cedar, with a second 1×8 behind it to build it out to the thickness of the stone
- Window sills: limestone
- Front door: a stone arch around the entry
Why We Chose Thin Natural Stone
Thin stone is real stone. It’s quarried like any other natural stone, then sawn down to about an inch thick. It goes on the wall over a mortar bed, the same way manufactured stone does, but you get the color and texture of actual rock.
Full-size stone is closer to four inches deep, and it needs a brick ledge on the foundation to sit on. Thin stone doesn’t need one, and it’s much lighter. We didn’t want to give up the look of real stone, and thin stone let us keep it.
Manufactured stone can look good from the street, but up close you often see the same few shapes repeating, and the color is only on the surface. With natural stone, every piece is a little different, and that variation is a big part of why an old stone house looks the way it does.
[PHOTO PLACEHOLDER: close-up of the thin natural stone, showing the color and size variation]
What Is Overgrouted Stone?
Overgrouting is a way of finishing the mortar joints. With a standard joint, the mortar is tucked back behind the face of the stone, so each piece stands out with a shadow around it. With an overgrouted joint, the mortar is filled out flush with the stone, then pushed over the edges so only the face of each stone shows through.
It’s what you see on old European farmhouses and cottages, where the stone was laid with lots of soft lime mortar and the walls have weathered for generations. The stone looks set into the wall instead of stacked on top of it. You may also hear it called a mortar wash or German schmear. Those terms get used loosely, and the look can range from a light overgrout to almost fully covered stone.
How the overgrout is done
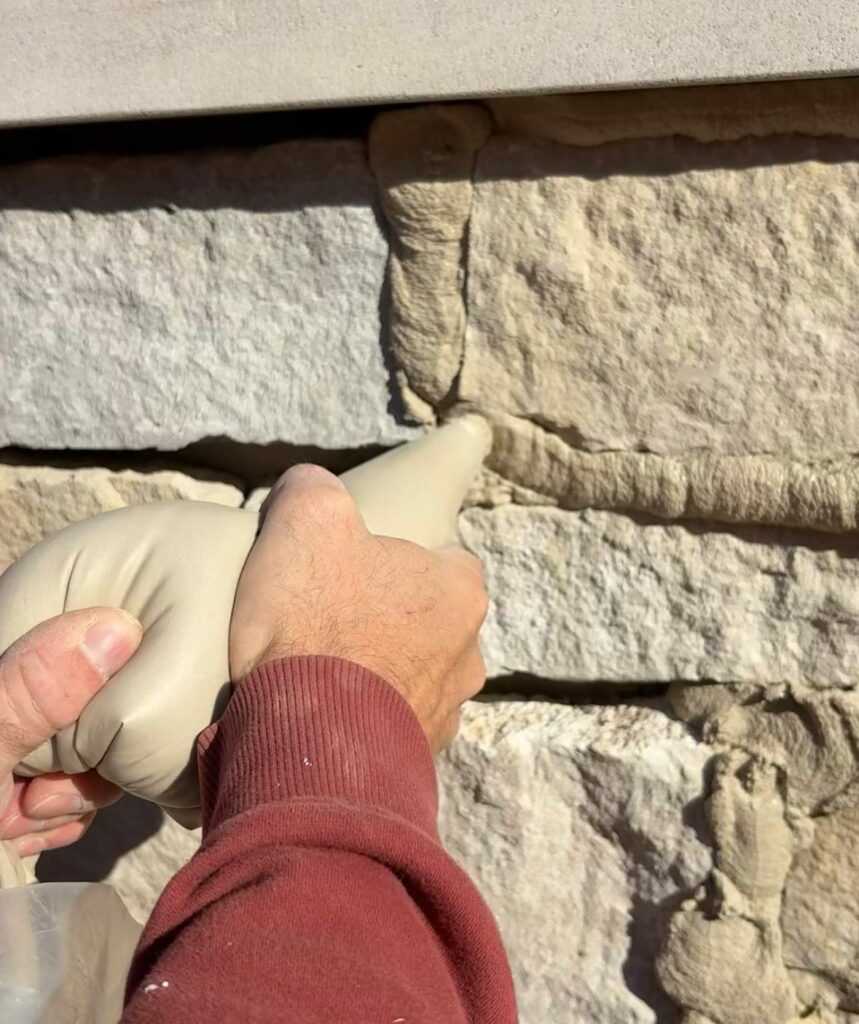
The stone is set first. Then the joints are packed full of mortar, usually with a grout bag, so the mortar sits proud of the stone. Once it has firmed up a bit but is still workable, it’s pressed and smoothed out over the edges of each stone by hand or with a brush. Our mason used a wood shim to do this. Timing matters. Work it too soon and it smears across the stone; wait too long and it won’t move.
We wanted enough stone showing that you can still tell it’s real stone, with plenty of mortar around it to soften everything. If you’re trying this on your own house, it’s worth having your mason do a sample panel first so you can adjust how much of the stone gets covered before they do the whole wall.
Cedar Headers Over the Windows
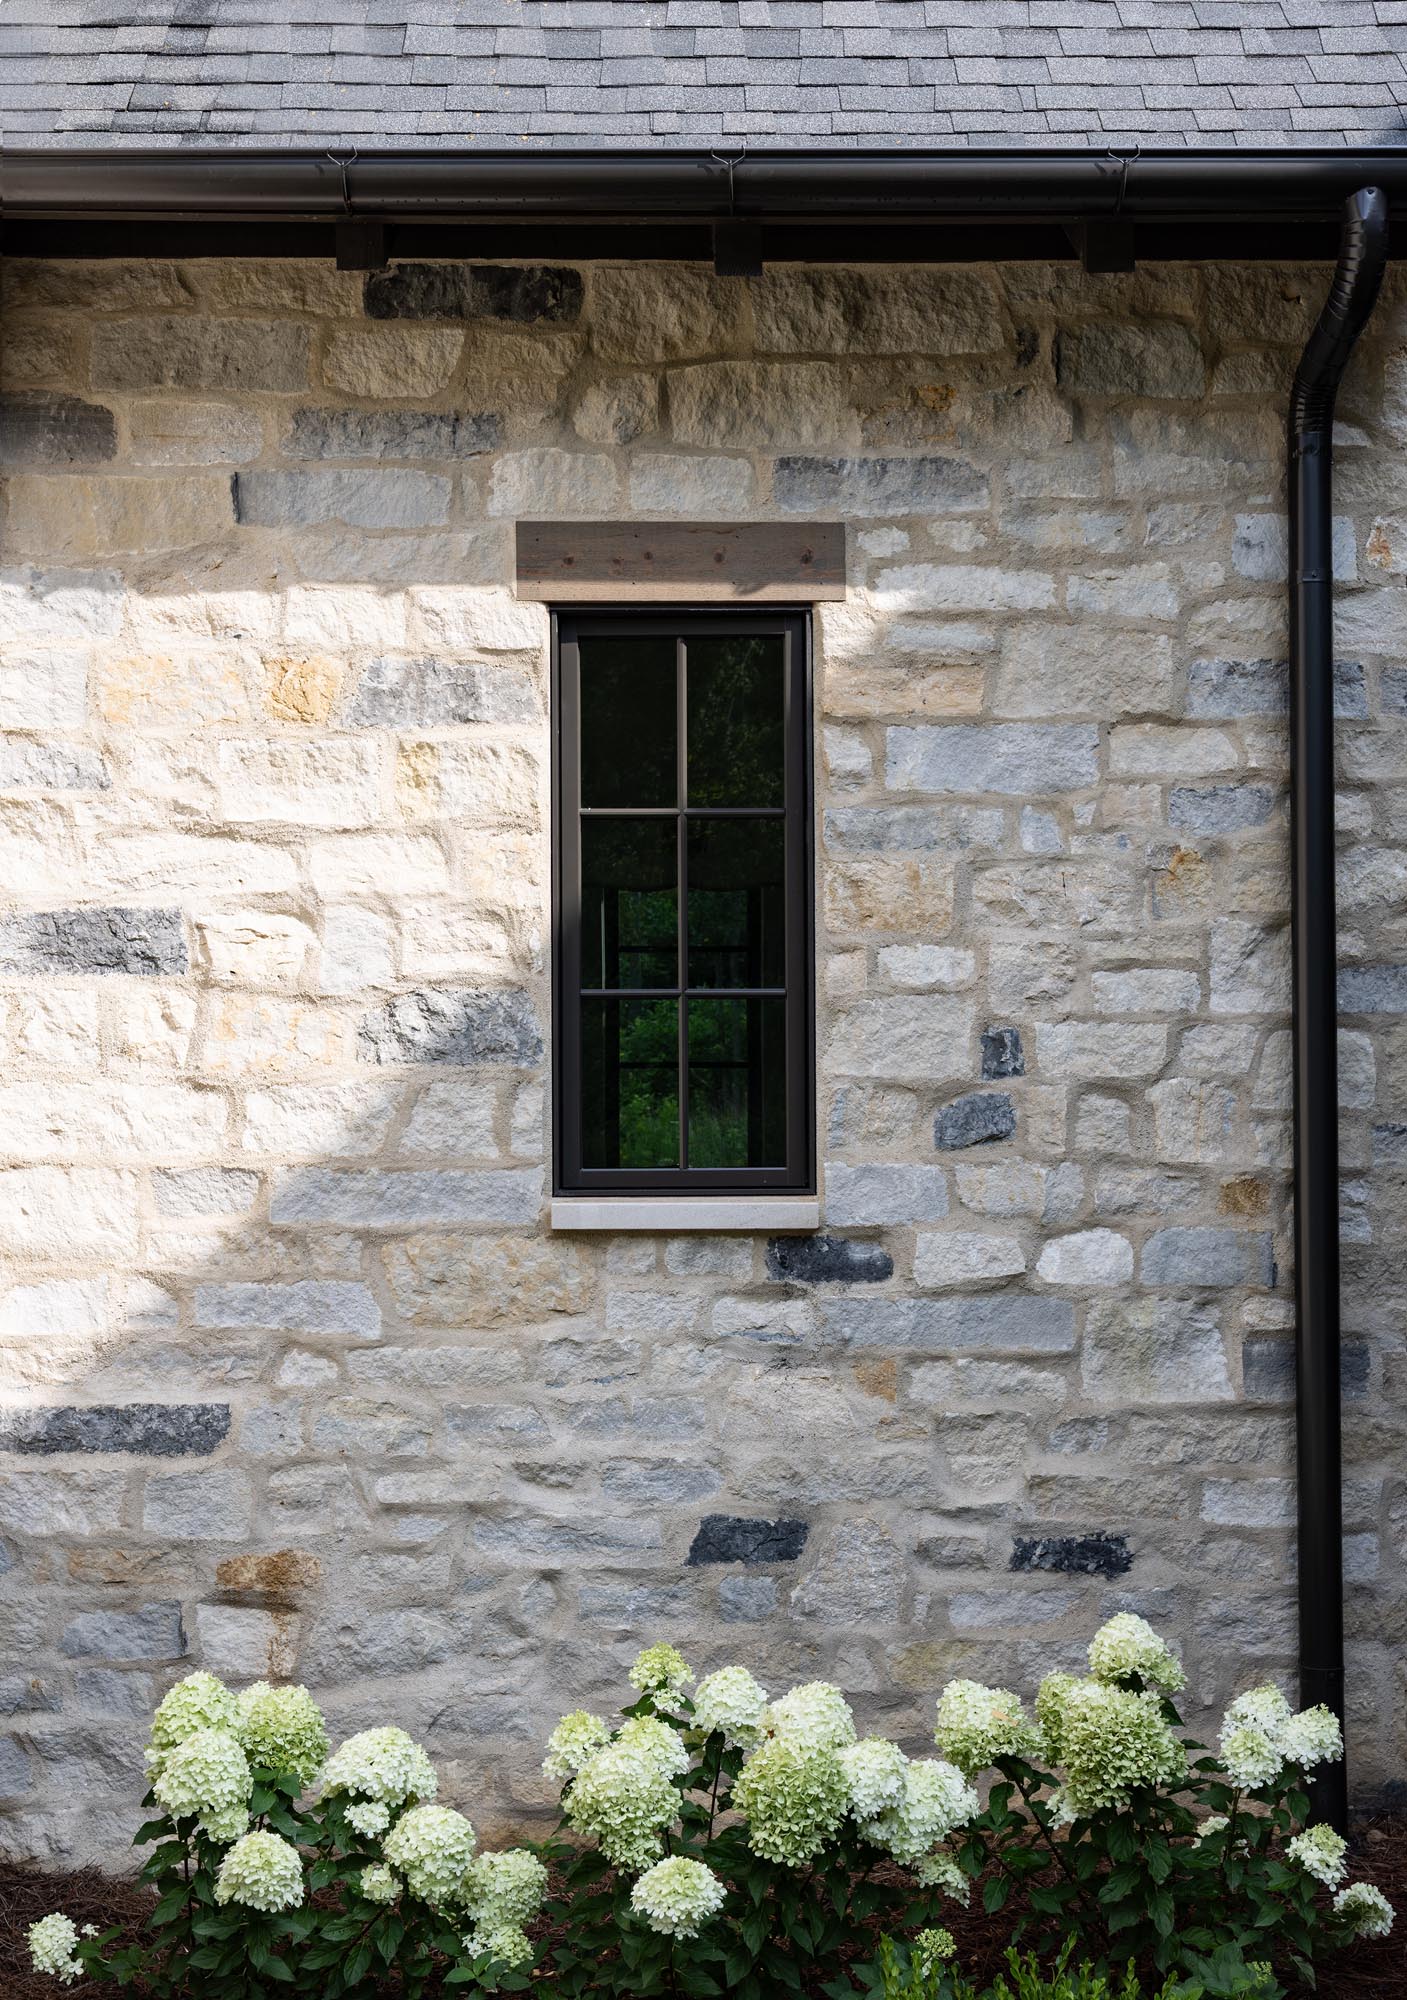
A wood header over a window is a simple detail you see on a lot of old stone houses, and it felt right for the style of this house. We used 1×8 cedar for the headers. Cedar holds up well outside.
A single 1x board isn’t thick enough to sit out at the same face as the stone. To fix that, we put a second 1×8 behind the cedar to build it out to the thickness of the stone. That way the stone runs right up to the header and both finish on the same plane, so the header looks like it’s carrying the stone above the window instead of being stuck on top of it.
Limestone Window Sills
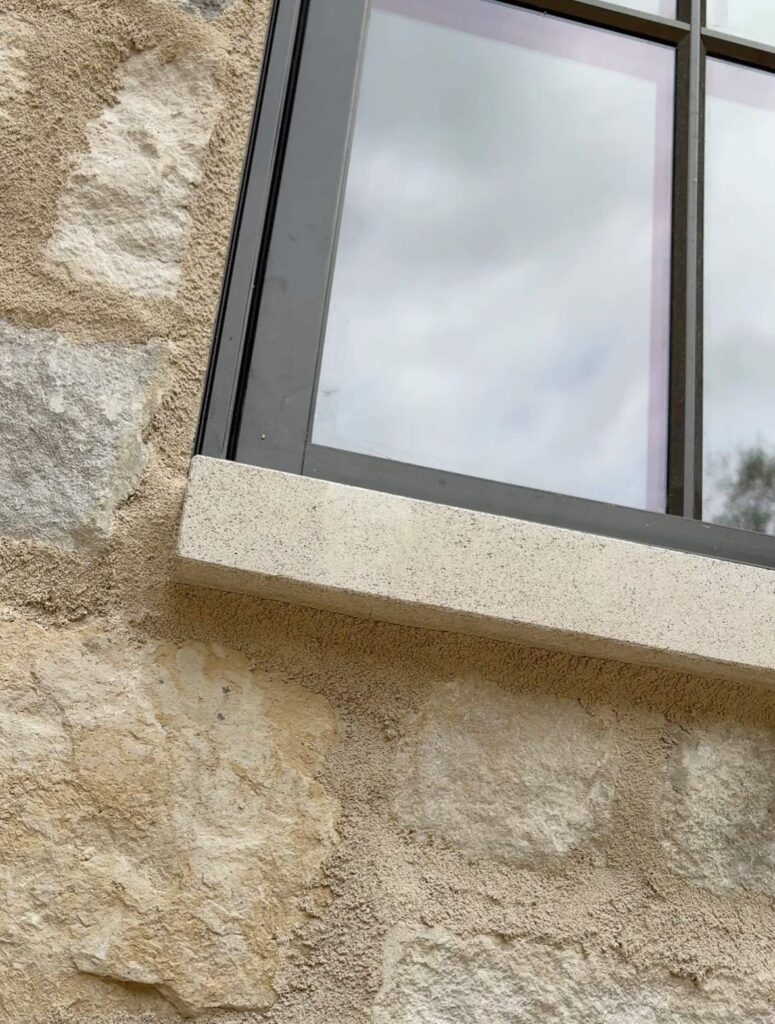
Under the windows we used limestone sills. They cap the stone below the window and give each opening a clean, finished edge, and they shed water away from the wall. We liked how the smooth, pale limestone looks against the texture of the stone and mortar.
Limestone sills are a classic detail on stone and brick houses, and they’re one of those things that make an exterior look complete. Between the cedar above and the limestone below, each window is framed without adding a lot of trim.
The Arch Around the Front Door
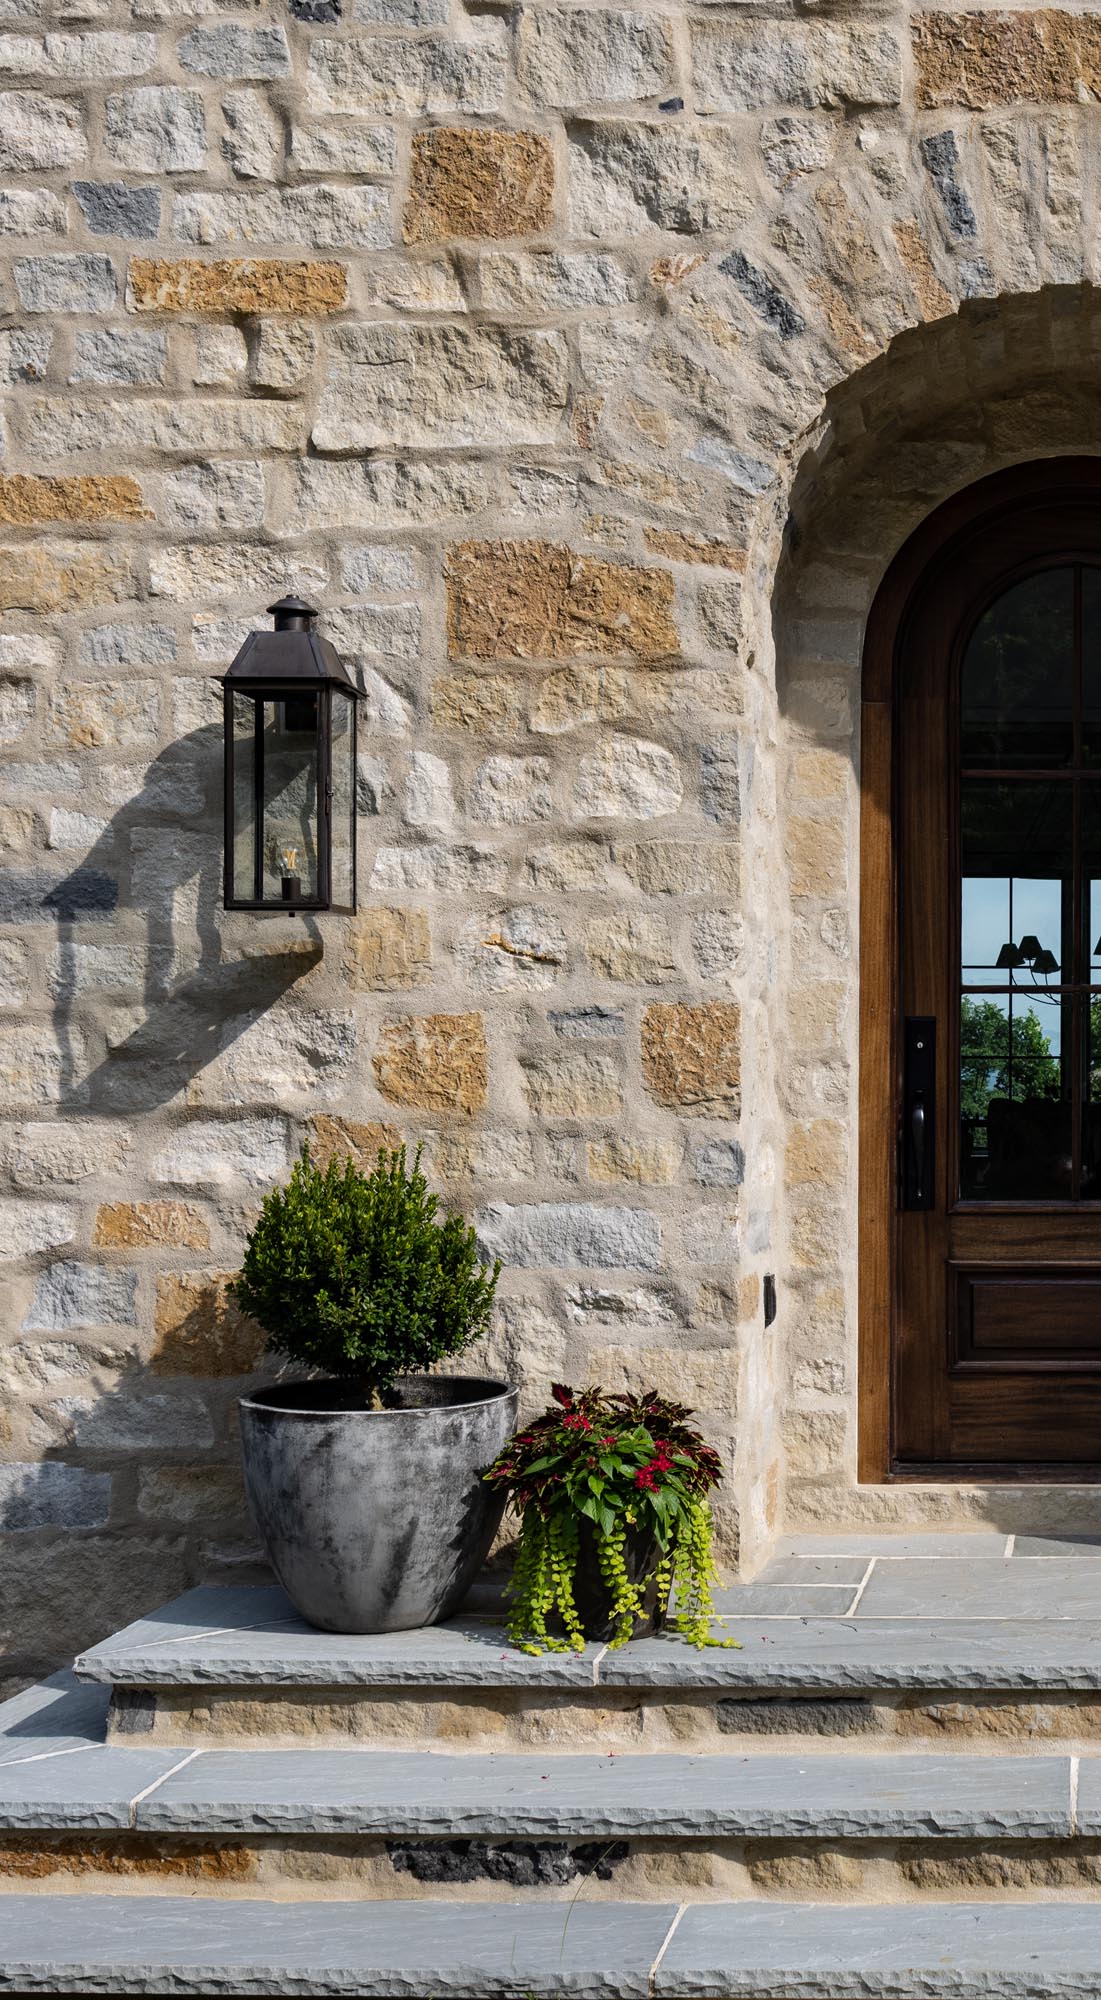
The front door got a little extra attention. We built an arch around the entry. An arched entry was on our list from the start, back when we were gathering inspiration for the exterior. The curve softens the front of the house and makes the entry feel more like the old cottages we love.
The arch is also a nice change from the straight lines of the windows. On the rest of the house, the cedar headers and limestone sills are simple and square, and the arch gives the front door the most presence.
What We’d Tell You If You’re Planning a Stone Exterior
- Decide on the joint early. Overgrouted, standard and dry-stacked stone look completely different, even with the same stone.
- Ask for a sample panel. It’s the easiest way to agree on how much stone shows through the mortar.
- Plan the window and door details with the stone. Things like header thickness and sill size are much easier to get right before the stone goes up.
- Look at the stone in person. Natural stone varies from batch to batch, and photos don’t always show the color well.
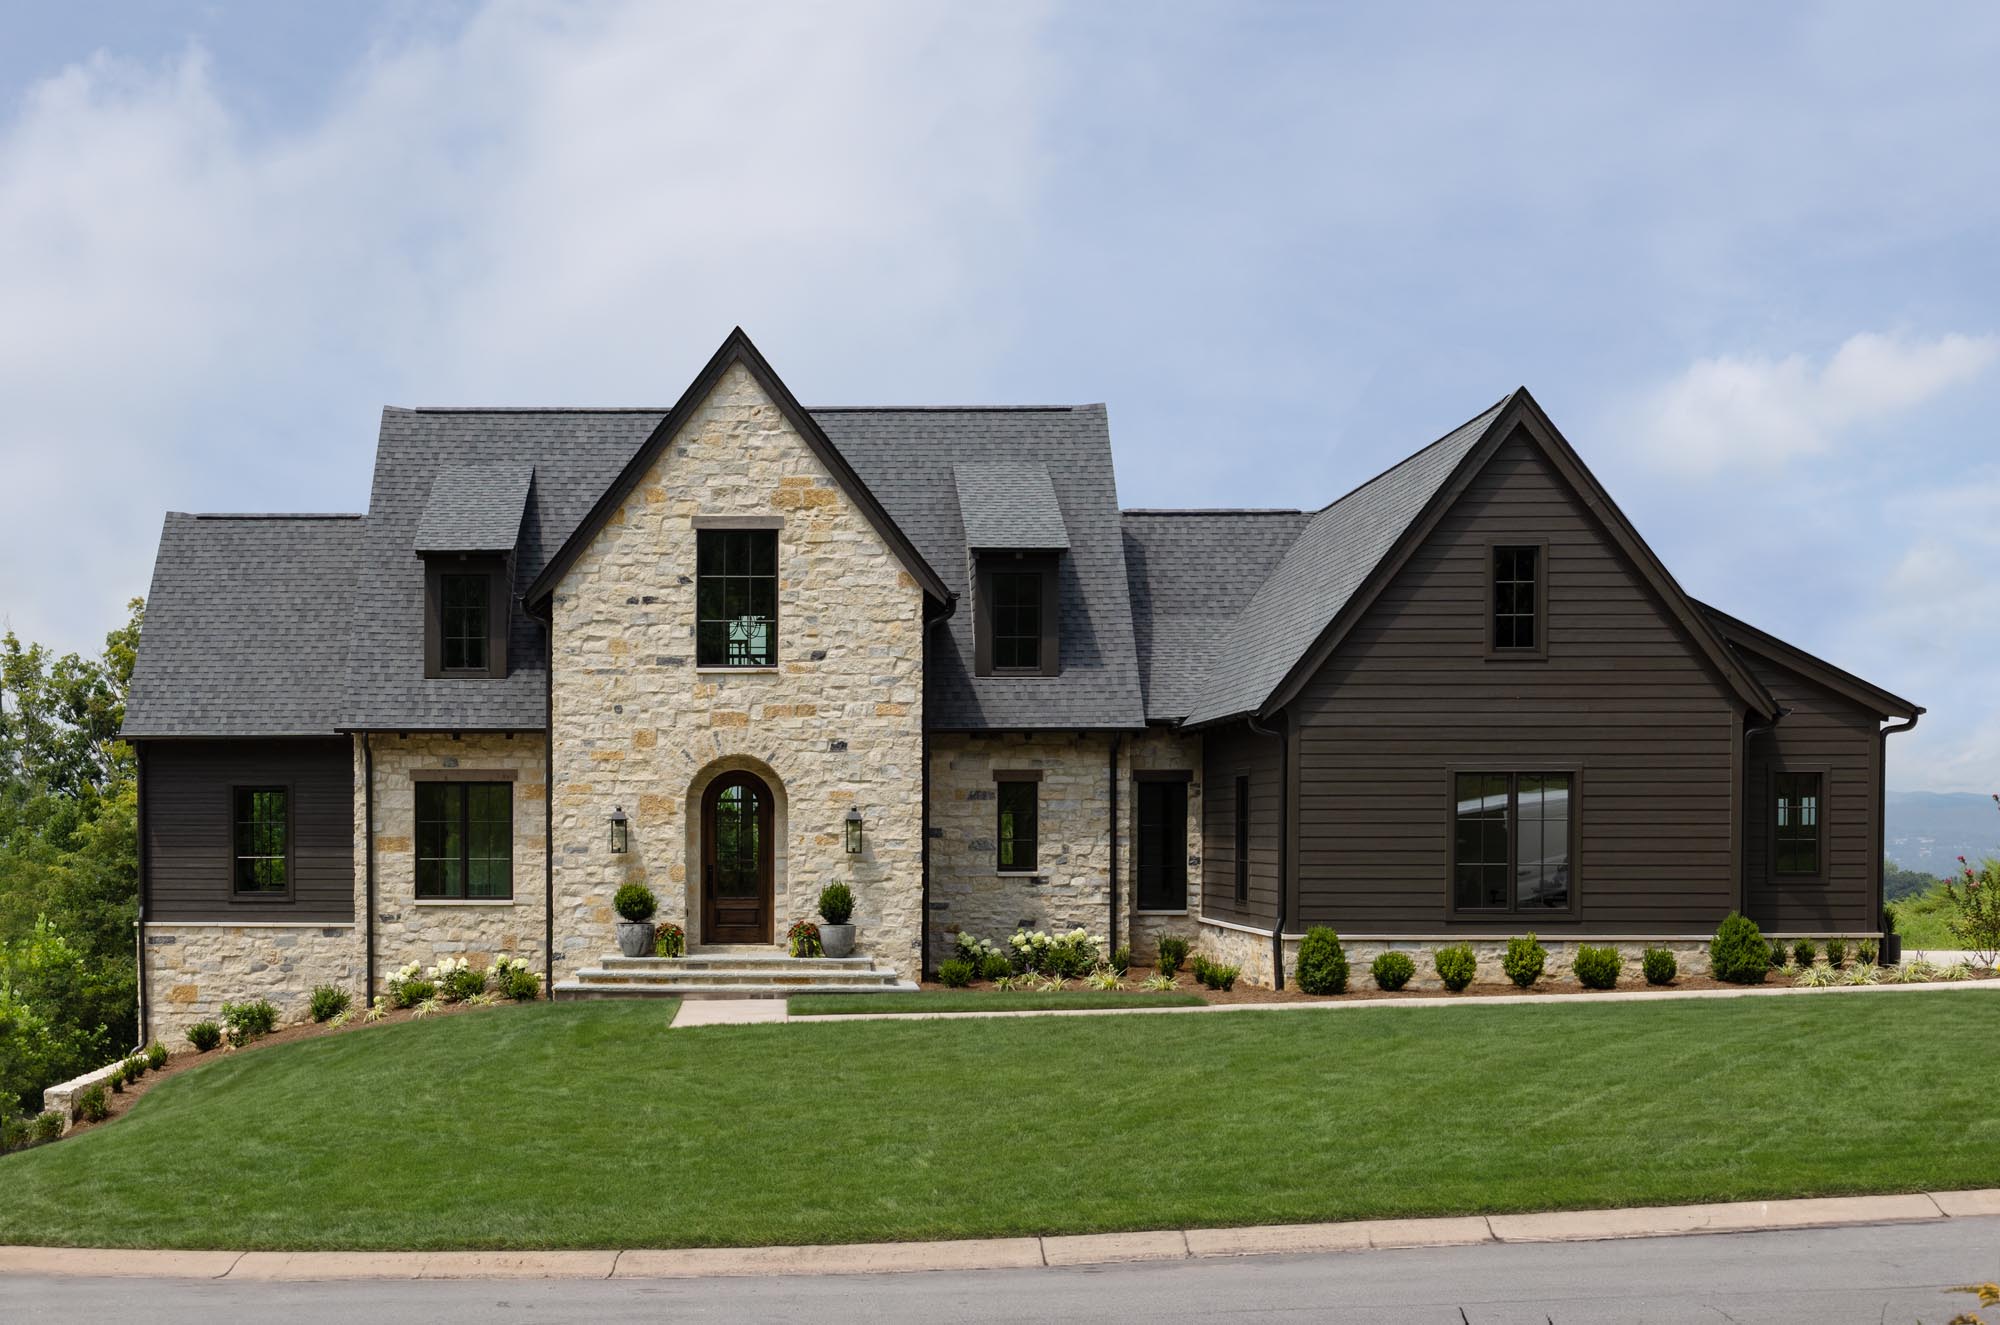
We’re so happy with how the stone turned out. It’s the part of the house that makes it feel like it’s been there a long time. If you’d like a similar look for your own home, you can see the full layout in the Summit house plan or browse all of our house plans.


No Comments