
Brooke has been wanting a new bed for our master bedroom for a while, and she found one from Restoration Hardware that we both really liked. However, there was only one problem. It costs over $4,000! We both agreed that was way more than what we wanted to spend on a bed.
So I decided to build a DIY bed and use the one from Restoration Hardware as inspiration. I’ve built a built-in bunk bed before, but never a freestanding bed. So this was uncharted territory for me, but I was up for the challenge!
I documented the whole process so hopefully you’ll be able to follow along and build your own! Do keep in mind that these plans are for a king-size bed.
Materials and Tools
- Finish Nailer
- Miter Saw
- Tape Measurer
- Wood Glue
- Wood Stain
- Sand Paper
- Wood Filler
- 8 metal corner brackets with screws
- 1 1/4″ Finish Nails
- t-square
- 2″ wood screws
Wood
- 4 pieces of 1″ x 12″ x 8′ oak
- 2 pieces of 1″ x 4″ x 6′ oak
- 2 pieces of 1″ x 4″ x 8′ oak
- 4 pieces of 1″ x 8″ x 8′ oak
- 8 pieces of 1″ x 2″ x 8′ oak
- 3 pieces of 1″ x 3″ x 8′ oak
- 8 pieces of 11/16″ x 8′ oak cove molding
- 1 piece of 3″ x 3″ x 1′ oak
- 4 pieces of 1″ x 3″ x 8′ pine
Step 1: Build the Footboard
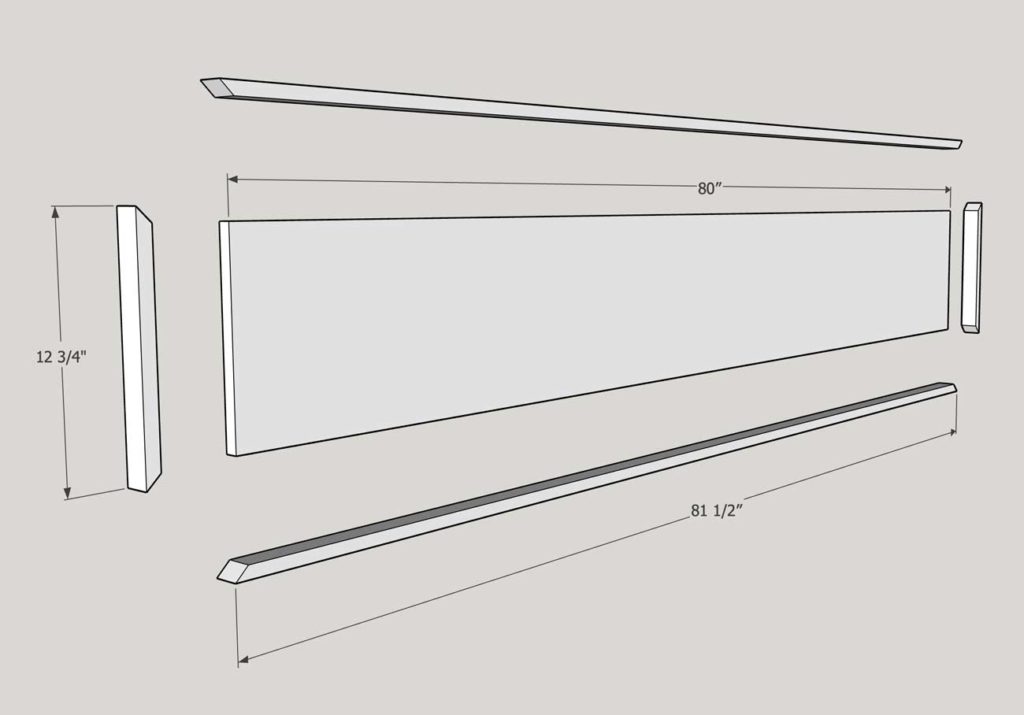
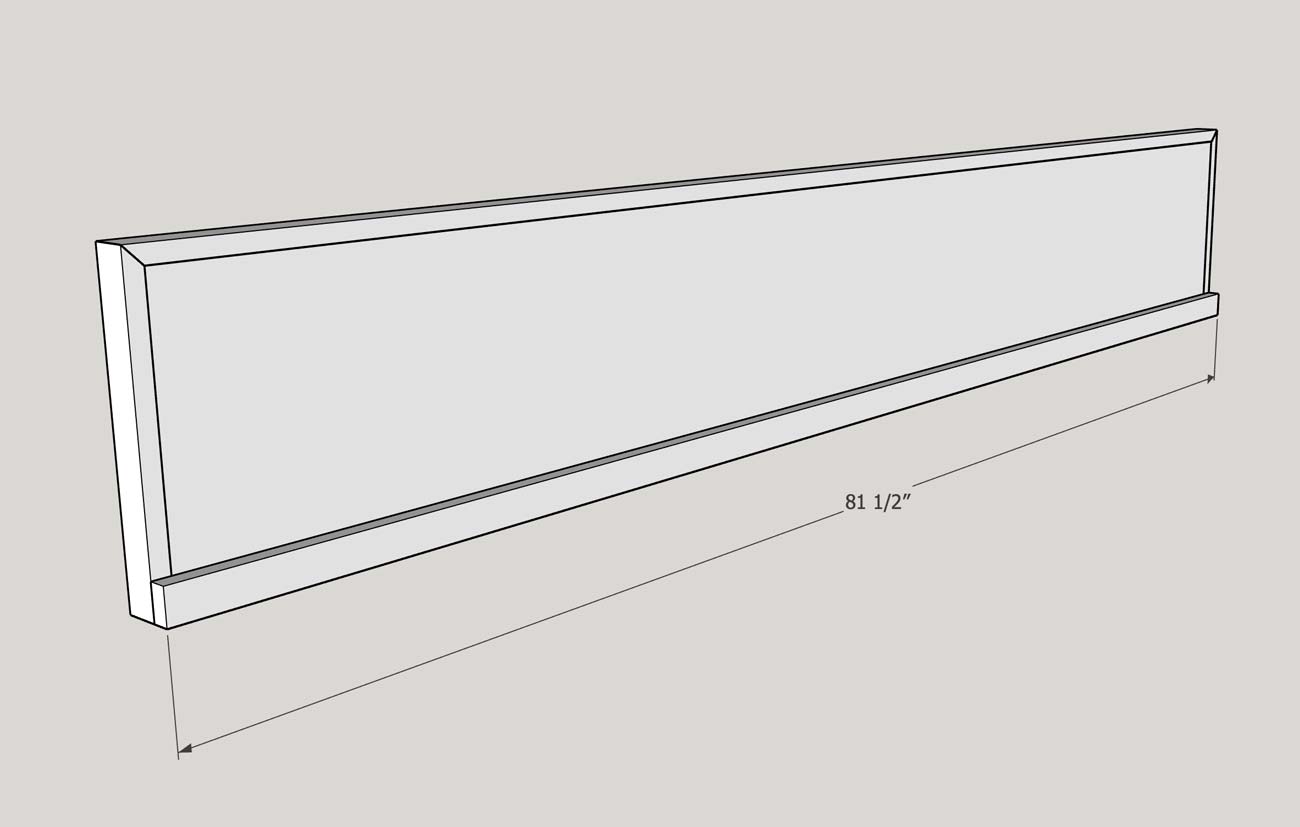
I started this project by building the footboard. I cut one of the 1x12s to 78 1/2″ in length. Then I glued and nailed 1x2s all the way around the edge, making sure they were flush with the back of the 1×12.
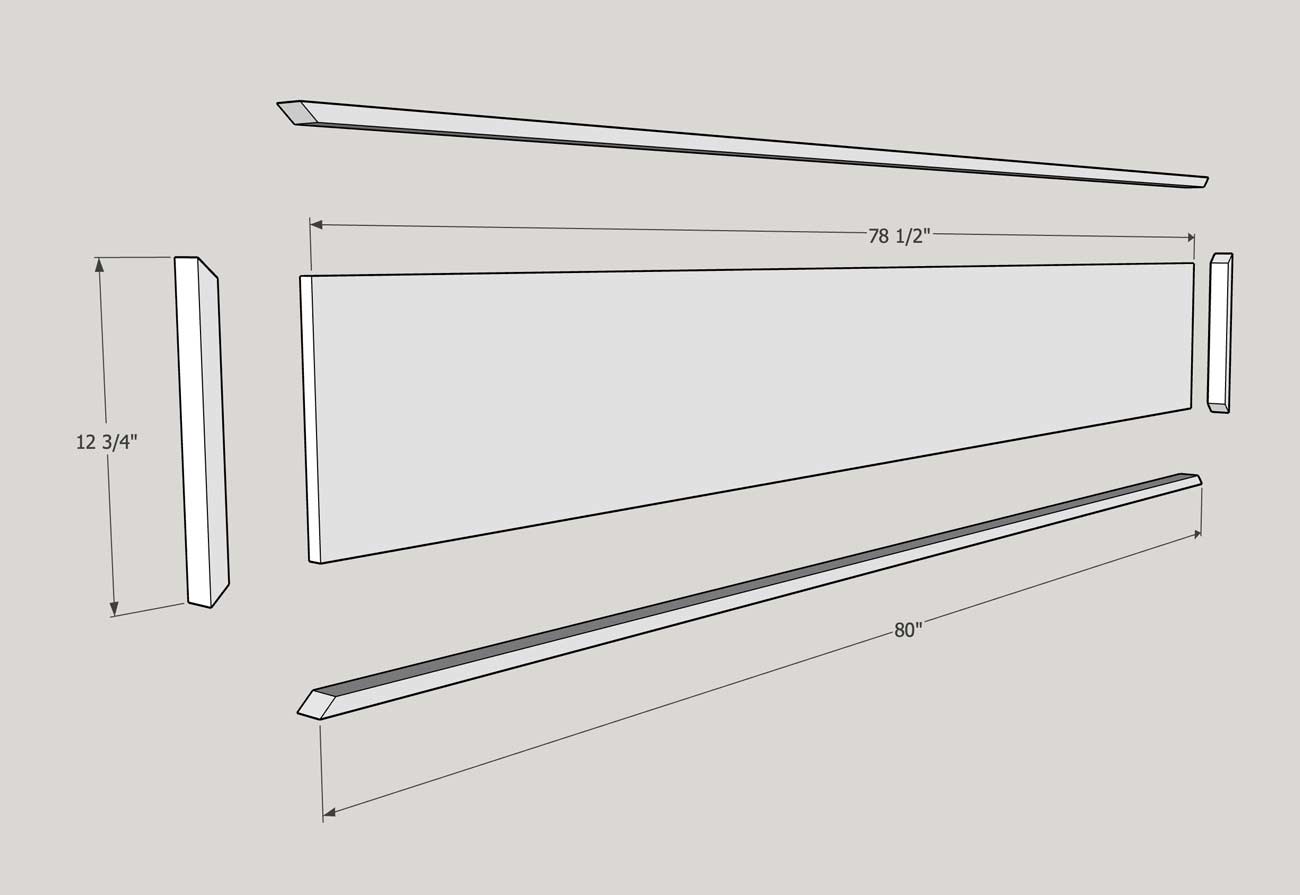
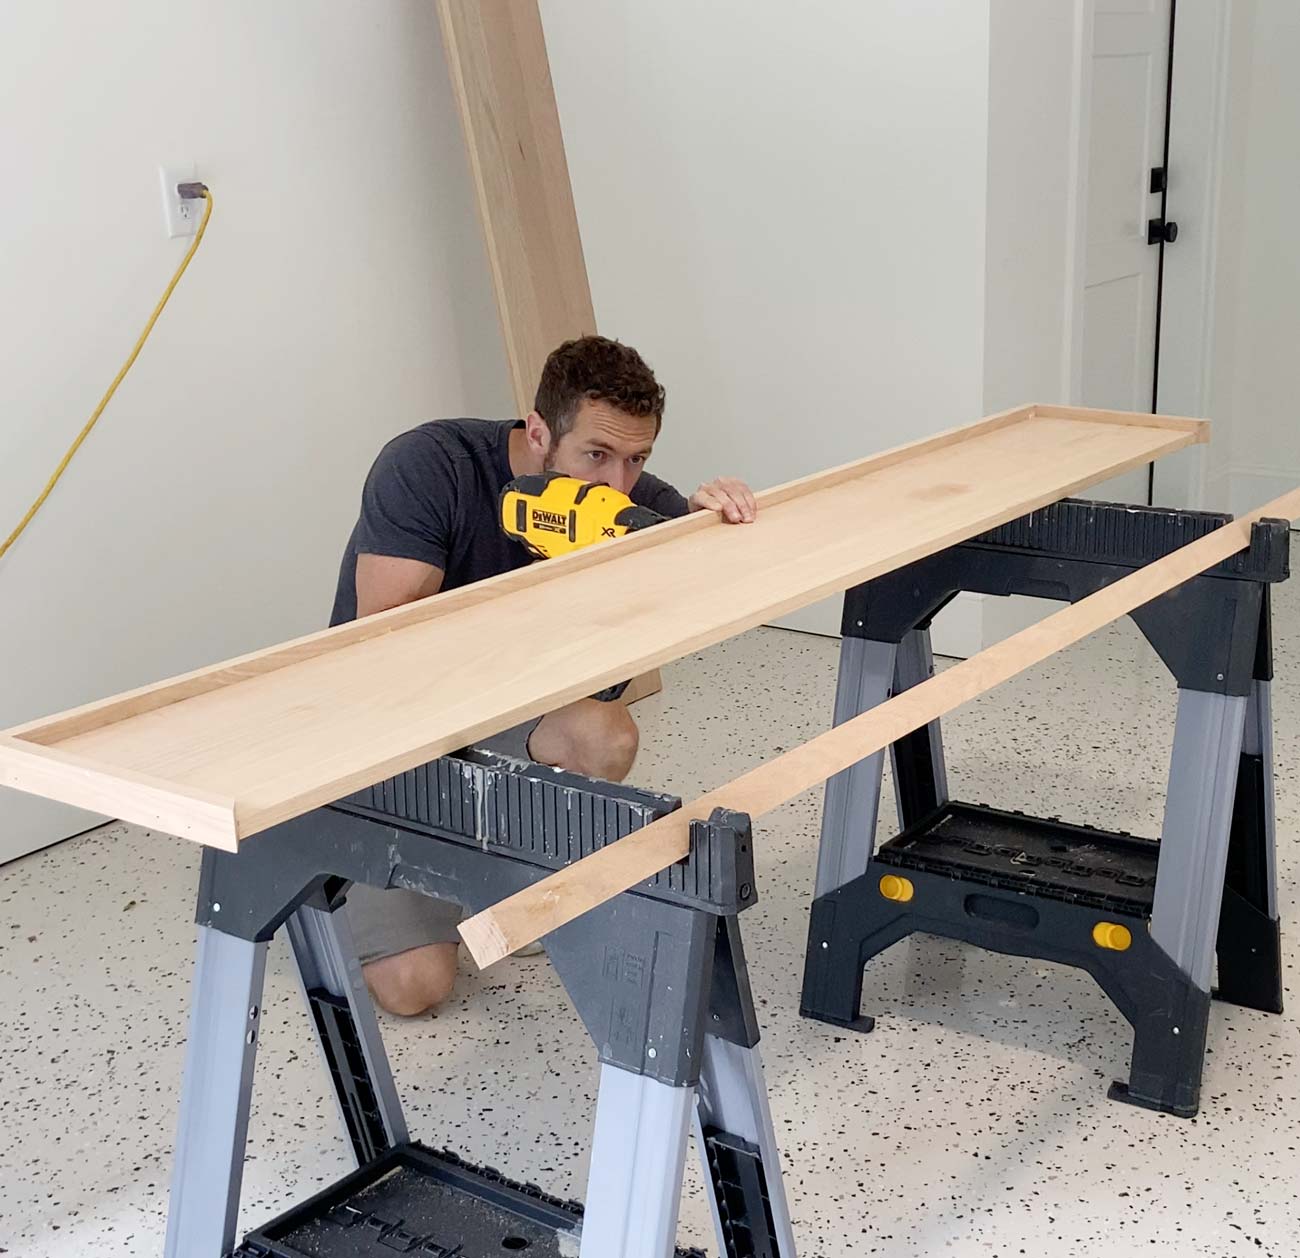
Then I added cove moulding around the inside of the 1x2s. I cut each end of the cove moulding on a 45 degree angle so they would fit together nicely in the corners.
I applied some wood glue to the bottom of each piece of cove molding before placing them.
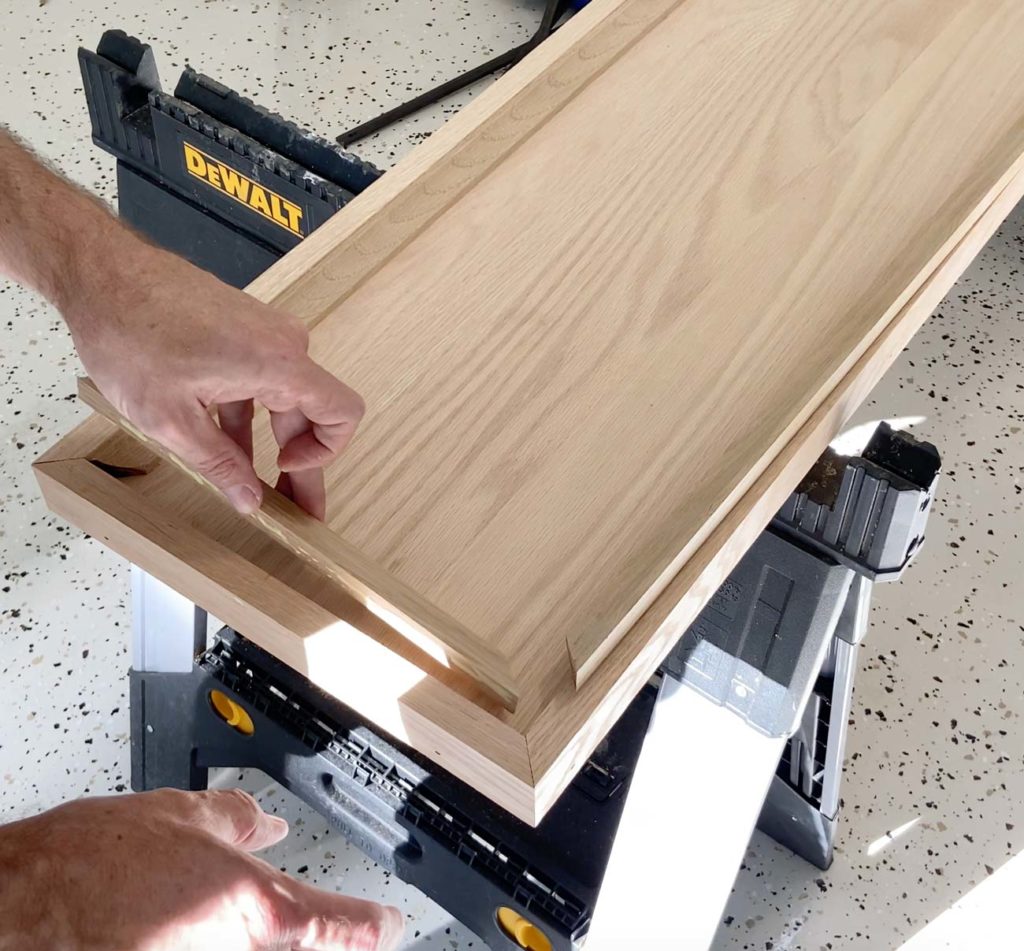
Tip: Cut the cove molding so that they are a snug fit. This will ensure that they fit together well in the corners.
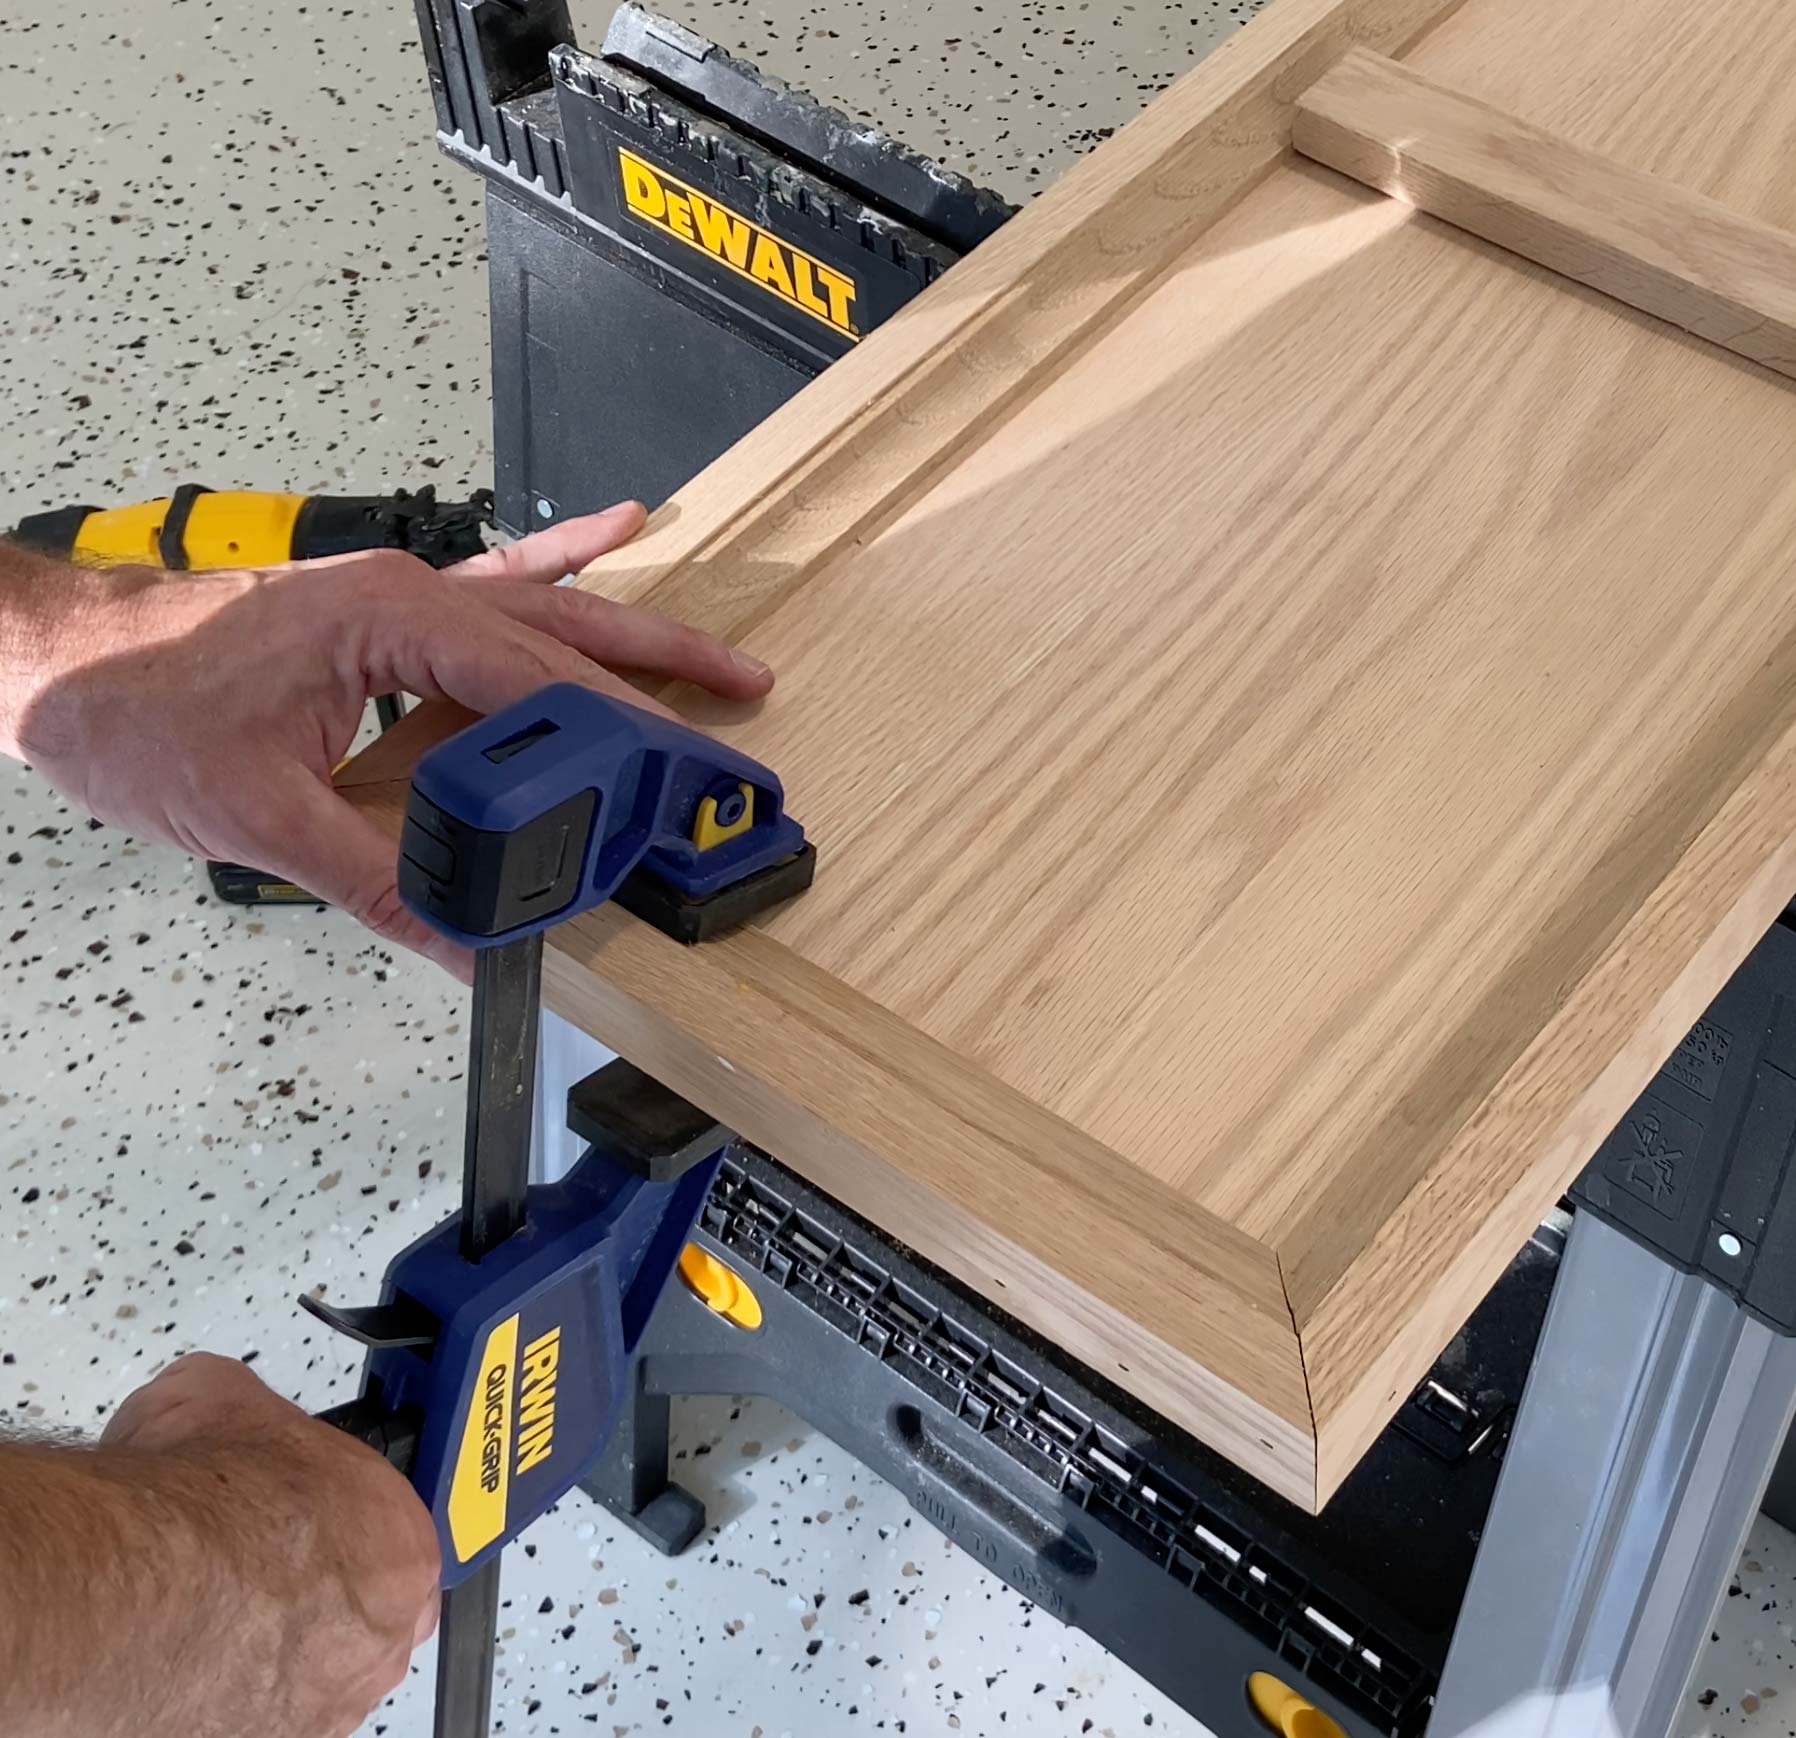
Then I used a clamp to hold them in place while the glue dried.
Step 2: Build the Side Rails
I built the two side rails exactly the same as the footboard. The only difference is that I cut the 1x12s to 80″.
And on the back of each side rail I glued and nailed a piece of 1×2 the full length of the side rail.
Step 3: Build the Headboard
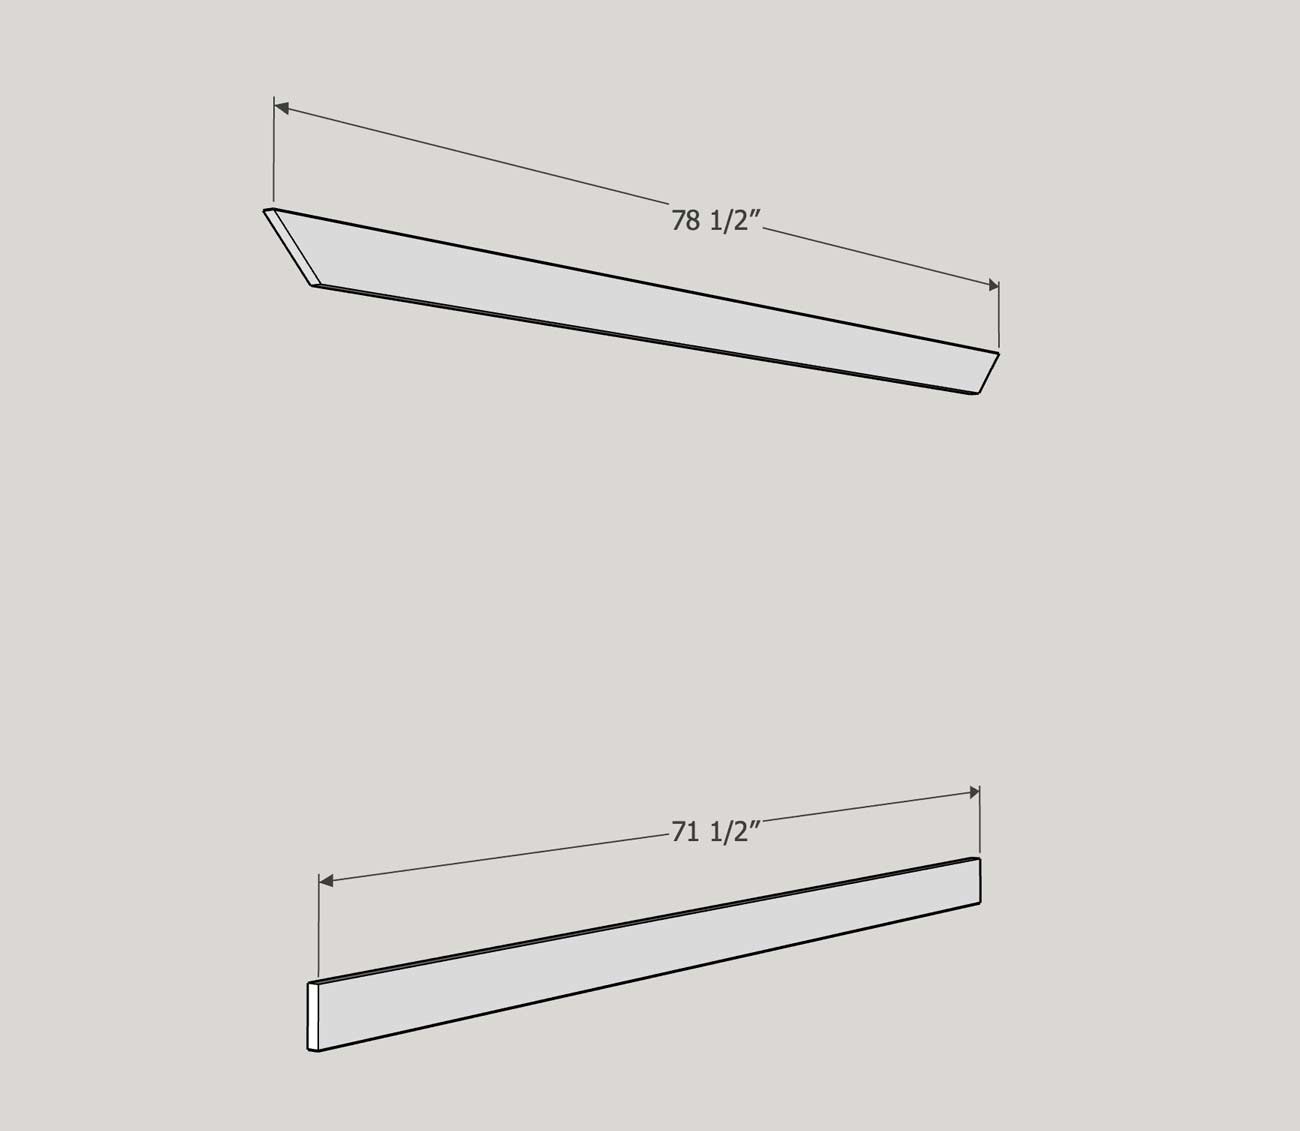
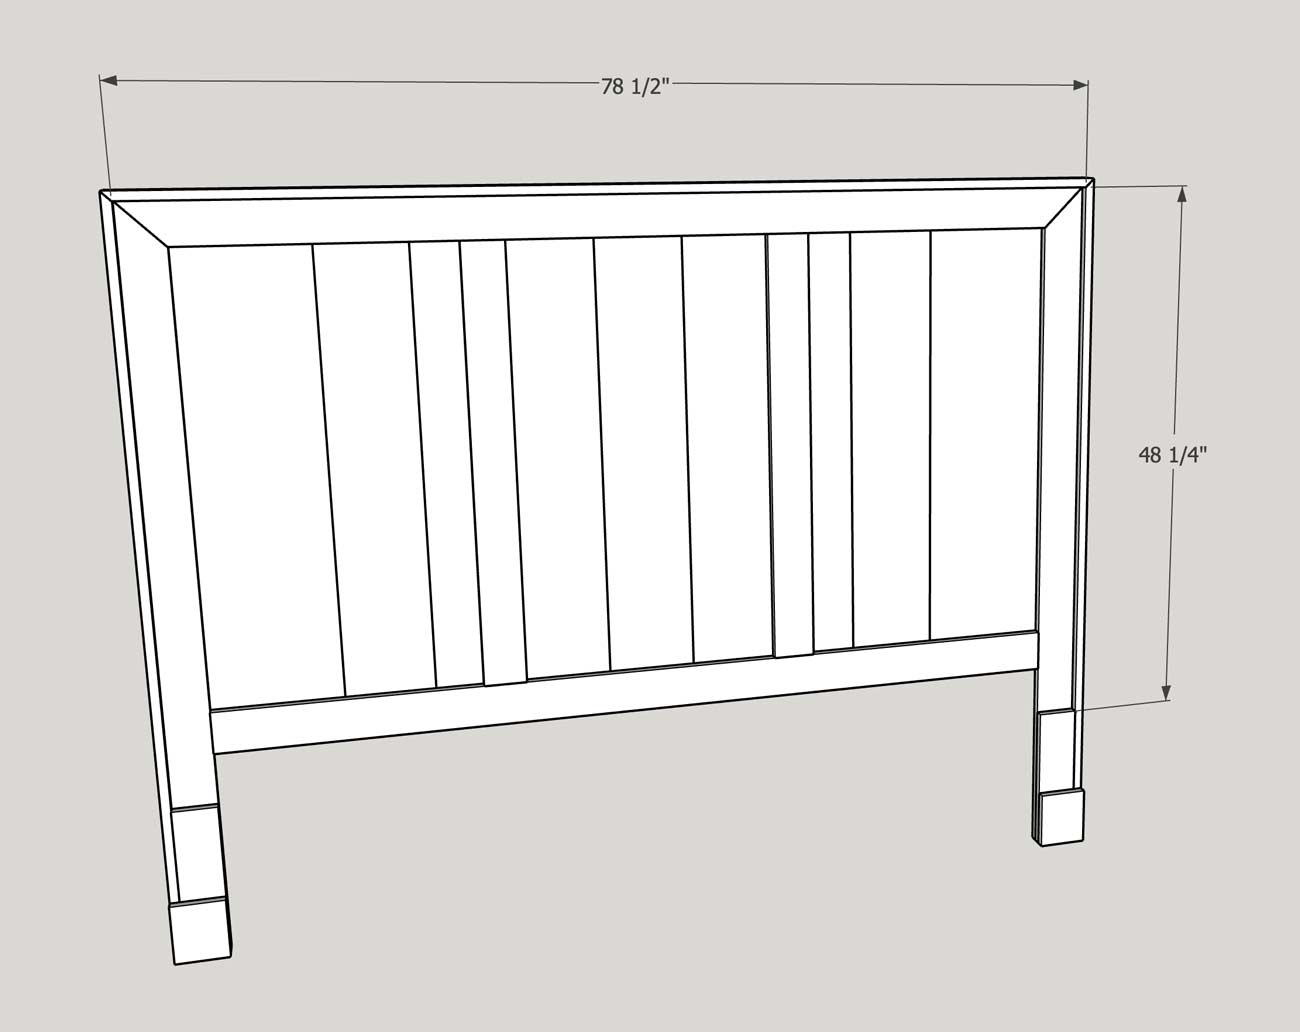
For the headboard, I started by cutting the top and bottom 1x4s. I cut the top one 78 1/2″ long with a 45 degree cut on each end. I cut the bottom one 71 1/2″ long.
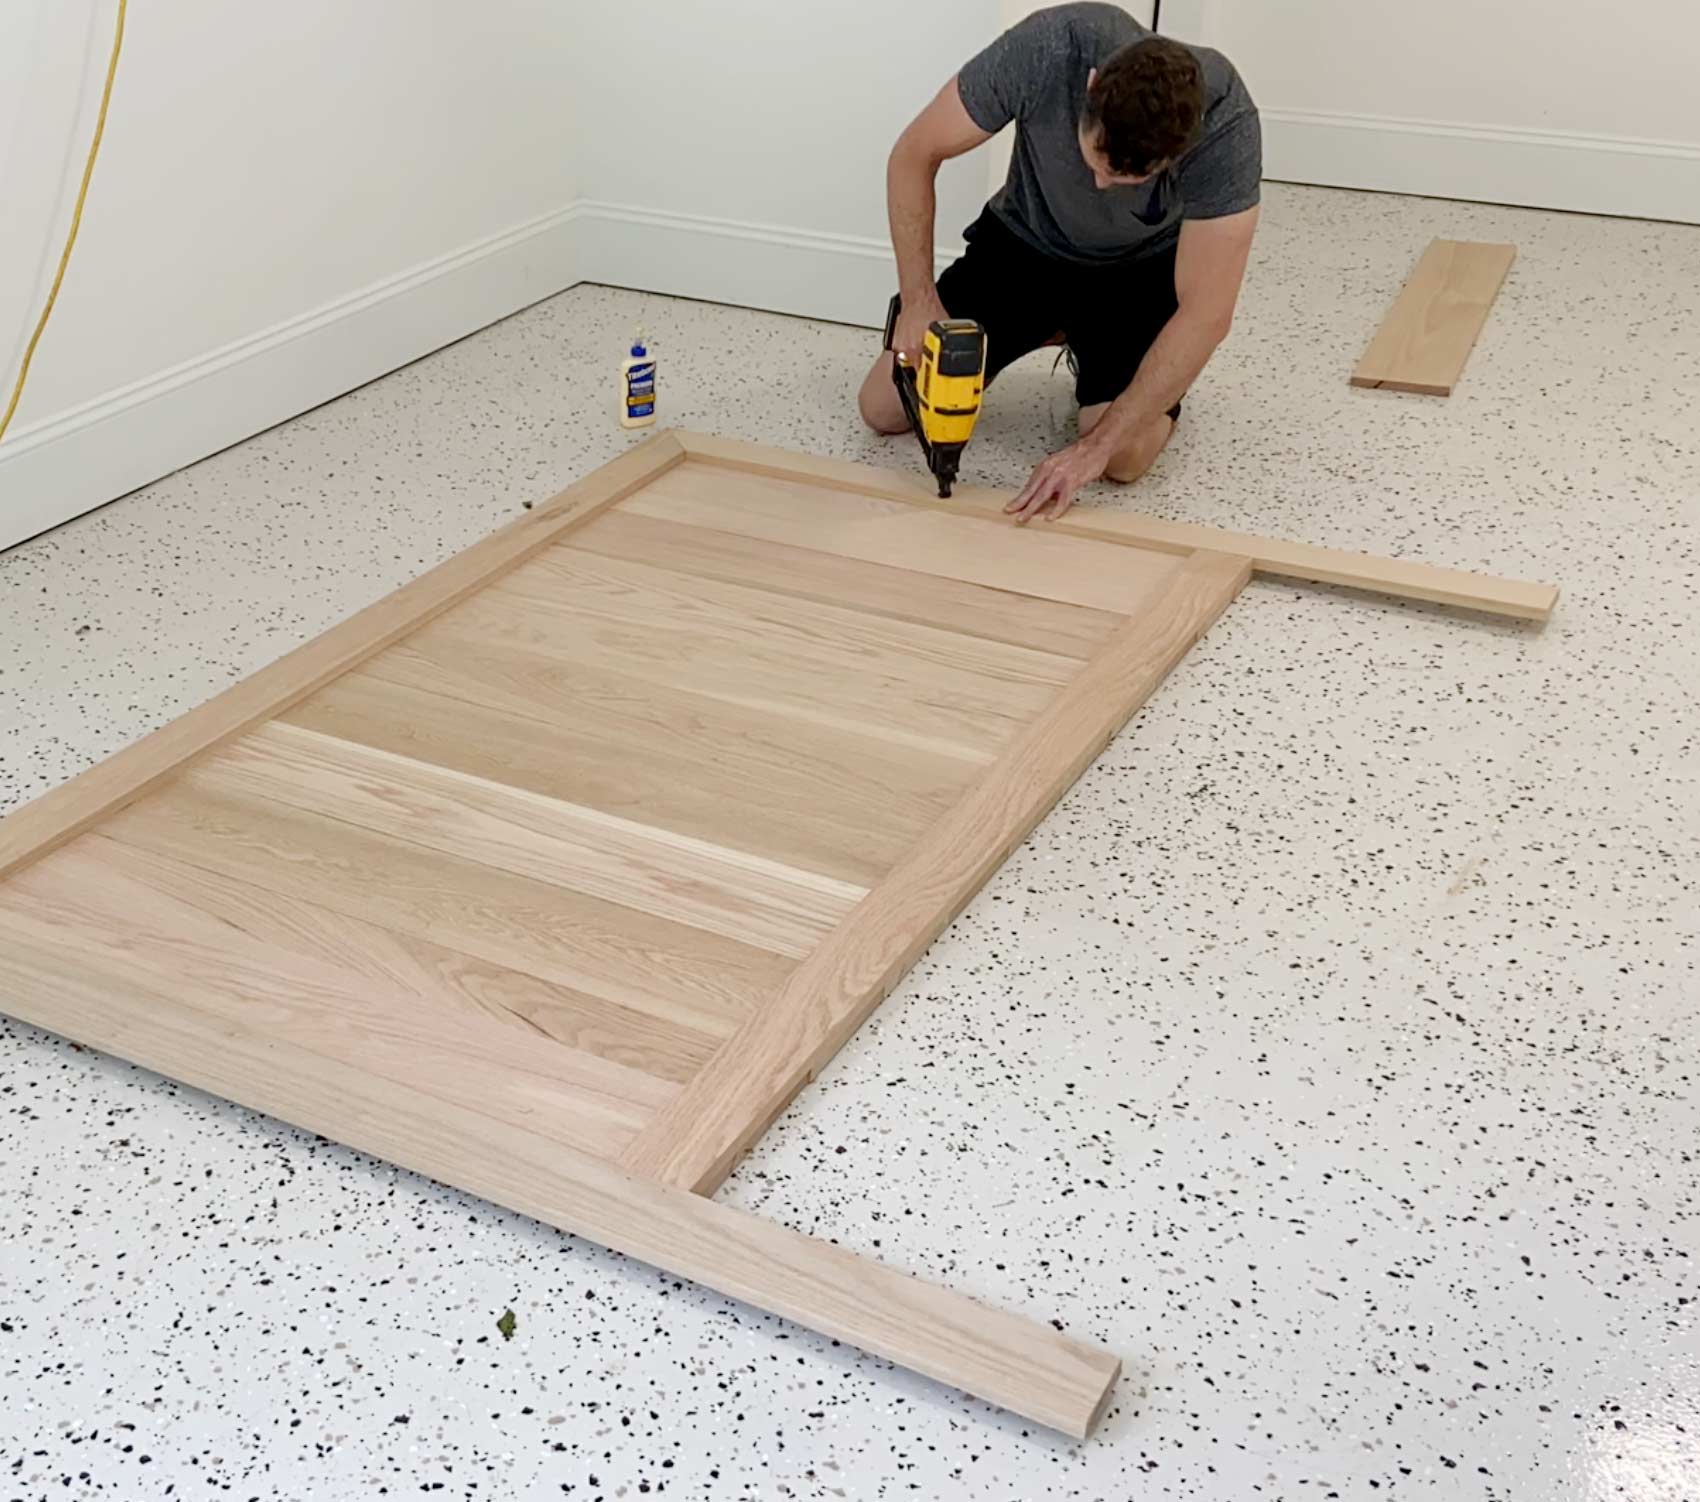
Then I cut 7 pieces of 1×8 and 2 pieces of 1×12 each 44″ long. Starting in the middle of the 1x4s, I used a t-square to make sure the first 1×8 was square with the top and bottom 1x4s.
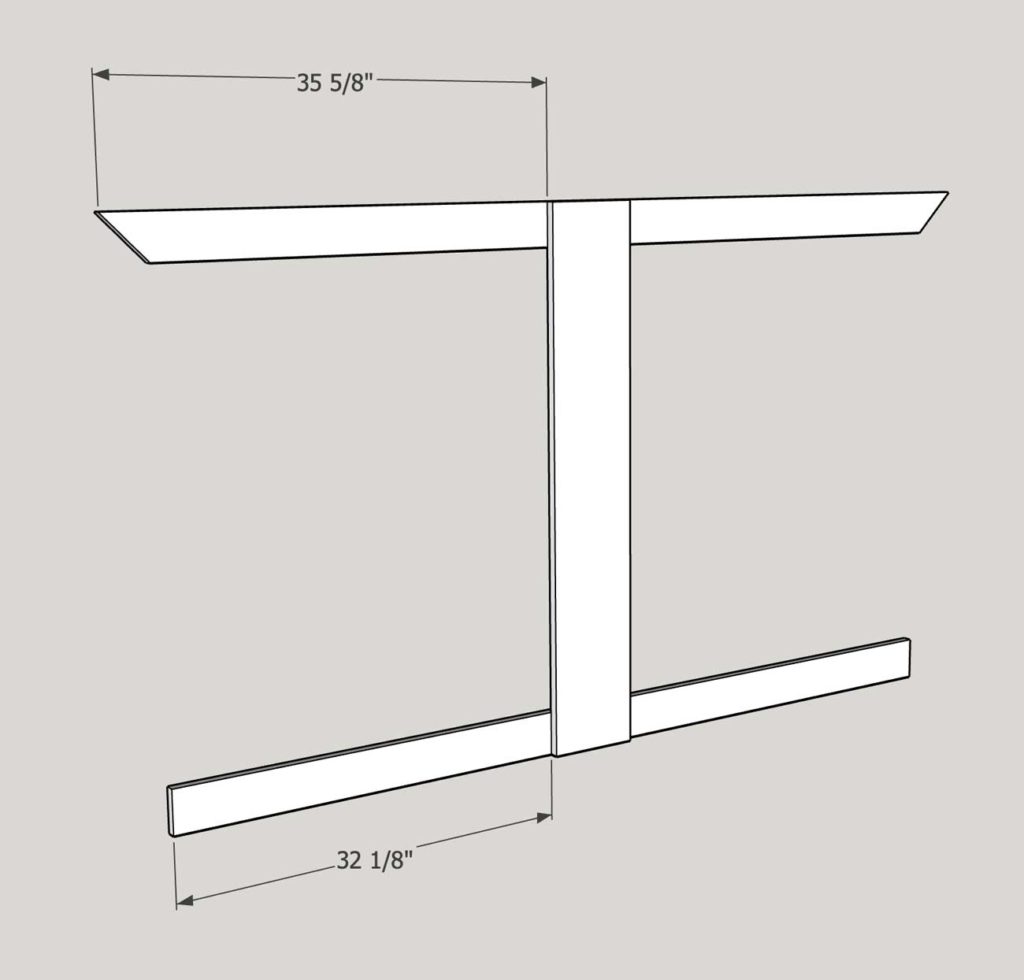
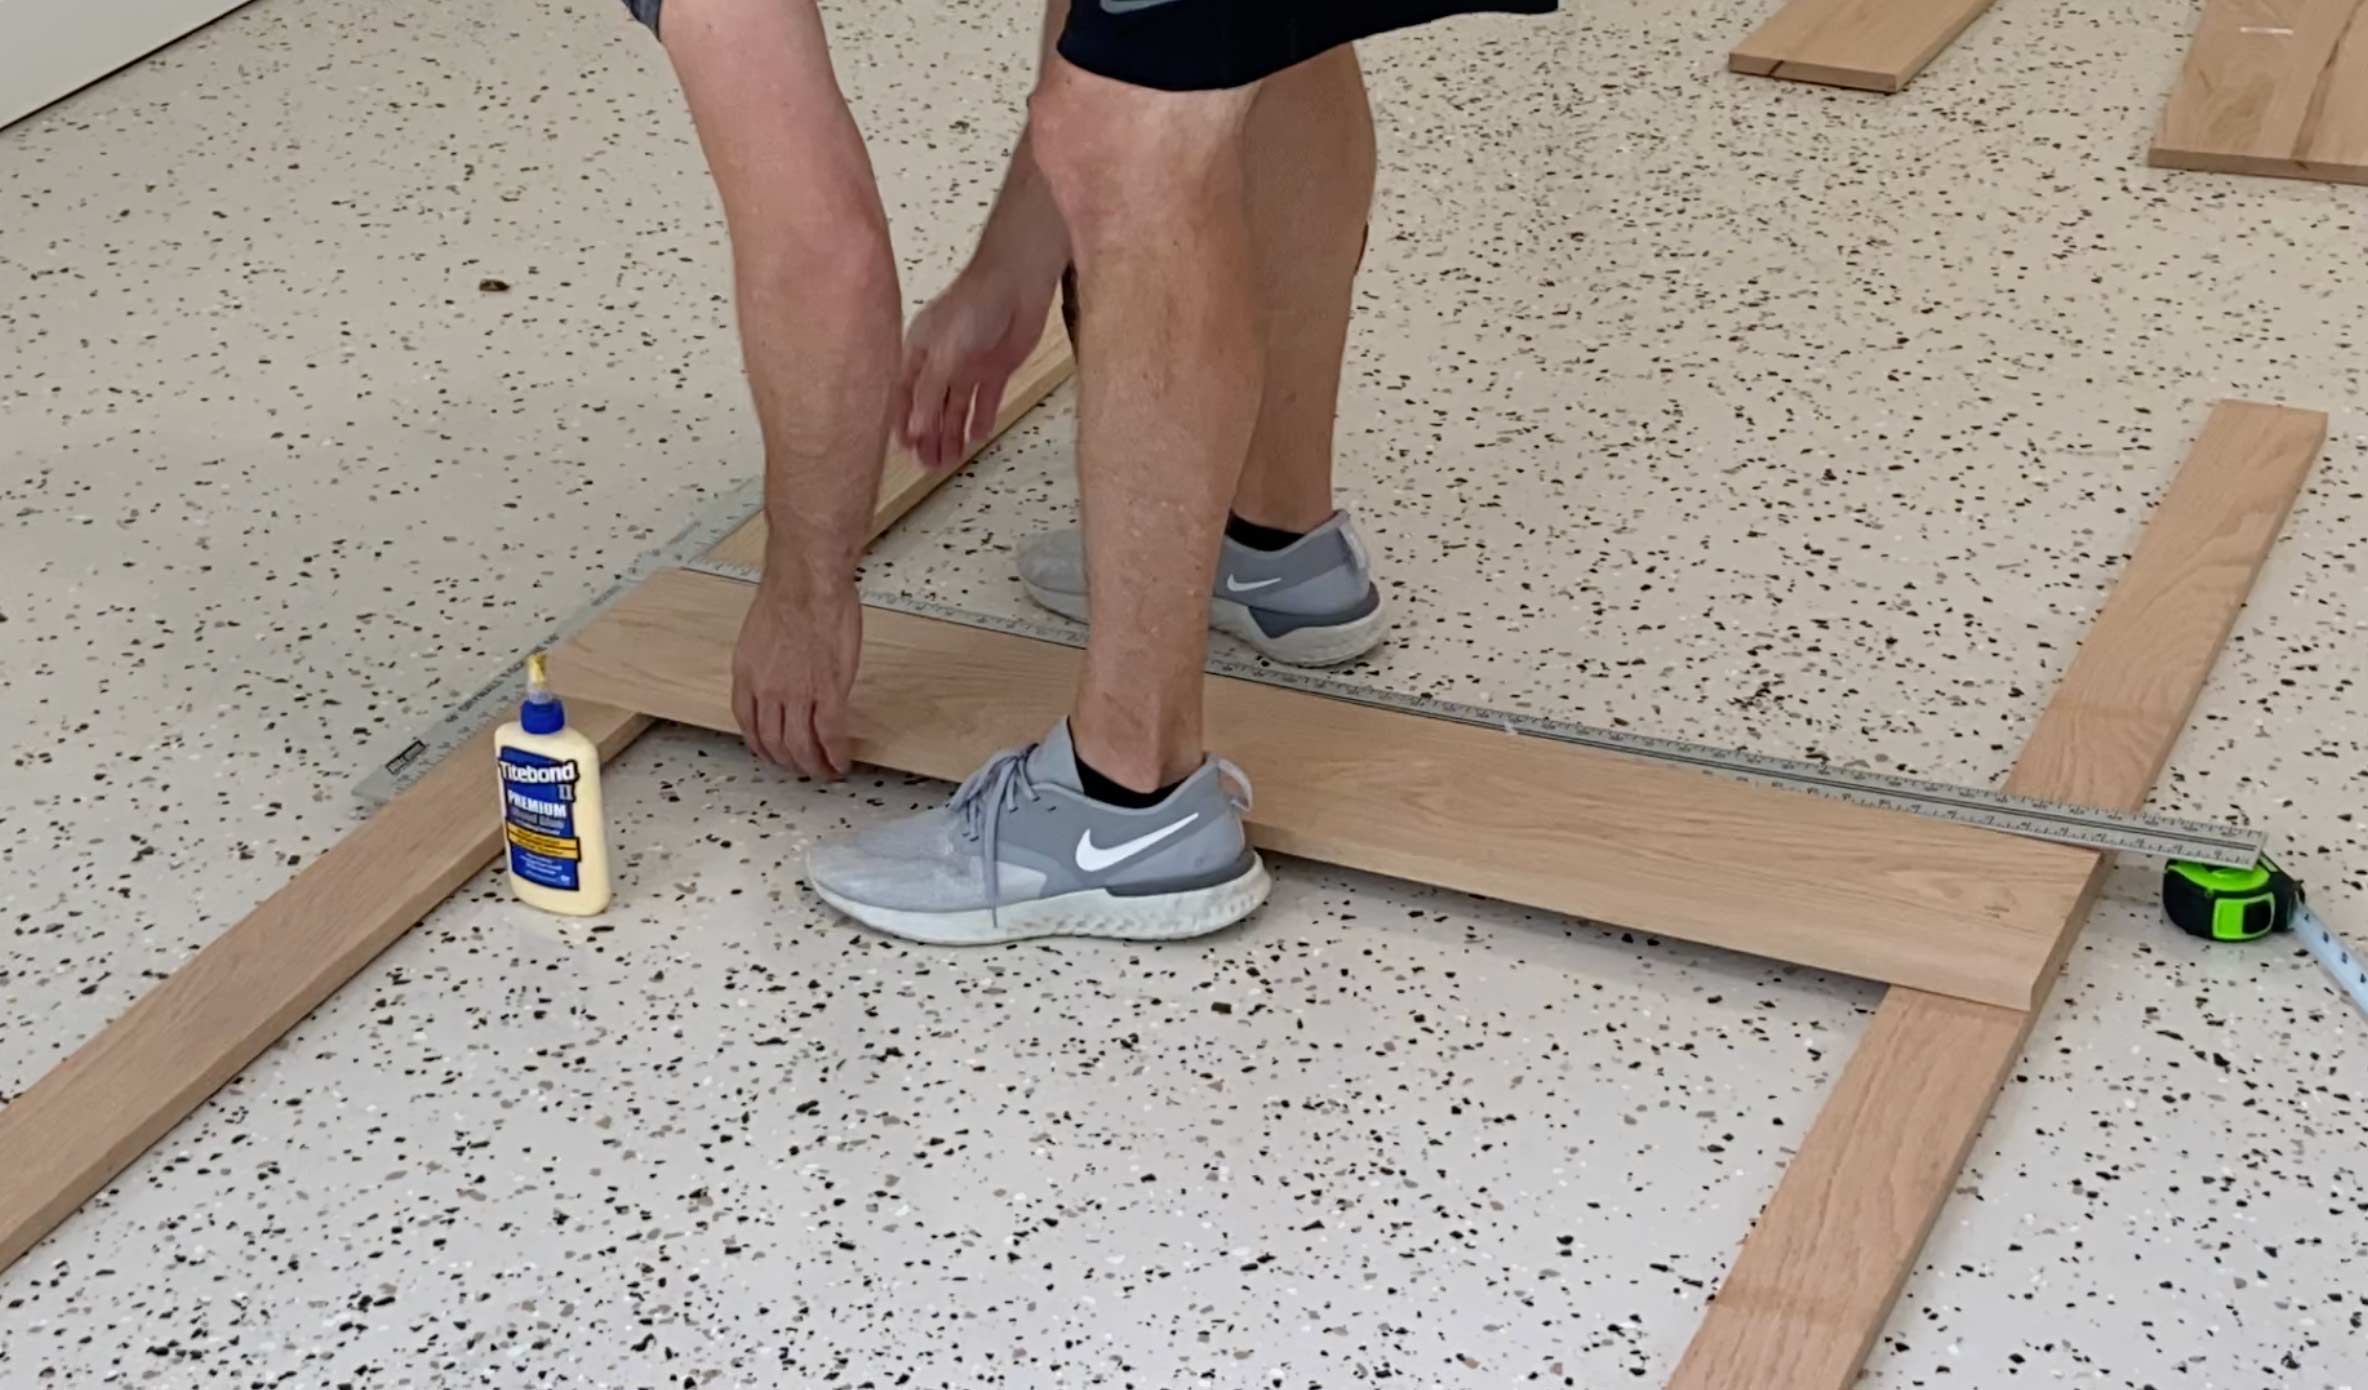
I glued and nailed all of the 1x8s as shown in the diagram. I applied a little glue to the edge of each piece and place to tightly against the previous piece.
Tip: Don’t add too much glue, because it might ooze our and get on the front of the headboard.
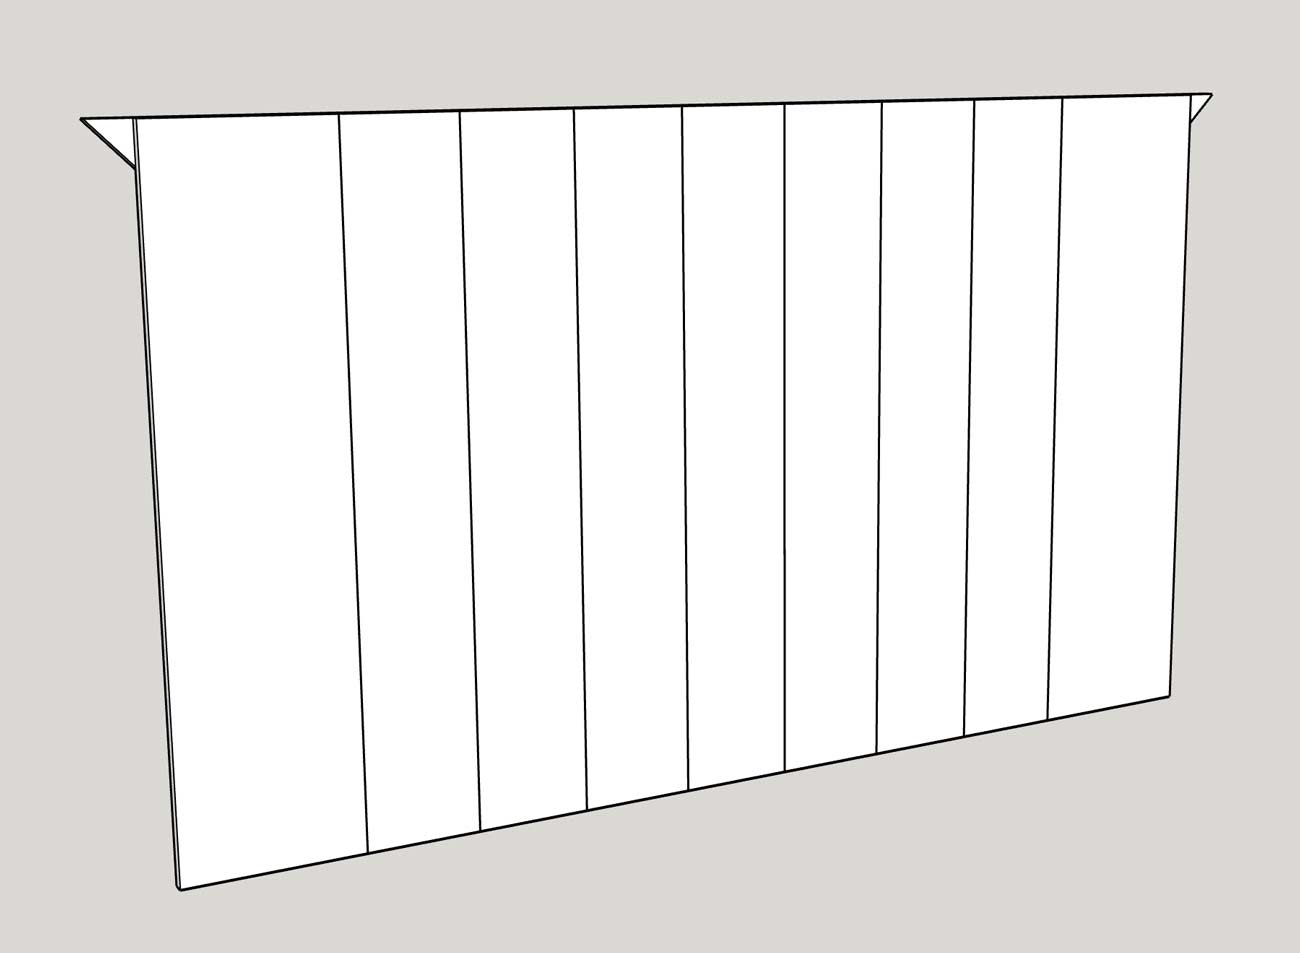
The last two pieces I added were the 1x12s.
I flipped the headboard over and cut two more pieces of 1×4 61″ long with a 45 degree angle on one end.
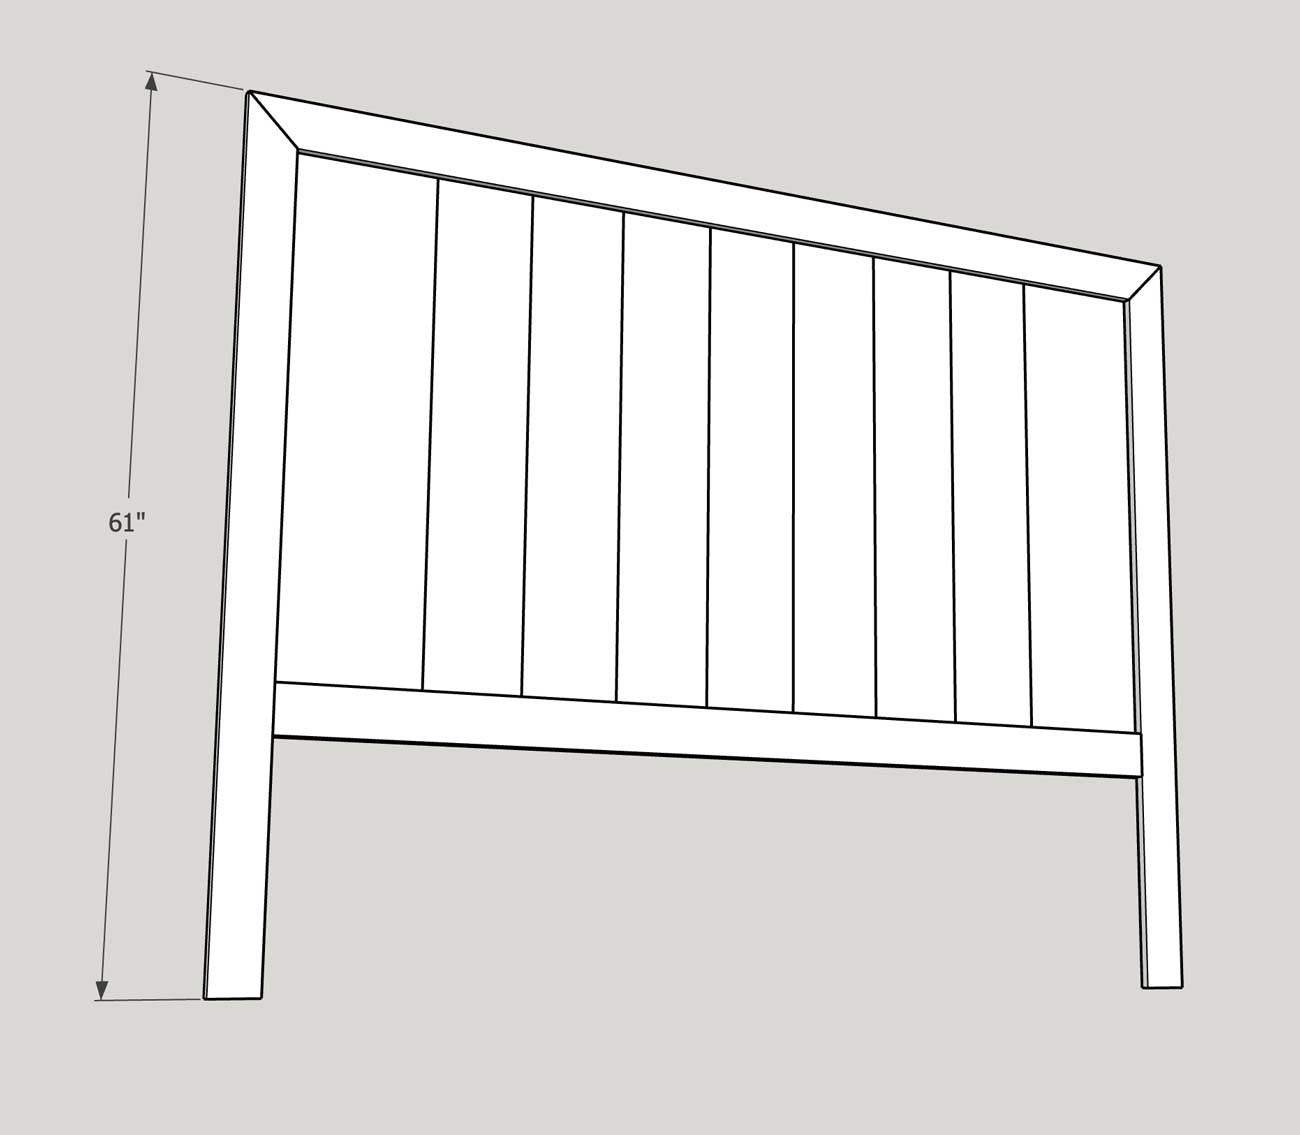
Then I nailed and glued them in place as shown in the diagram.
Next, I added two vertical pieces of 1×4 to create the division of the three panels.
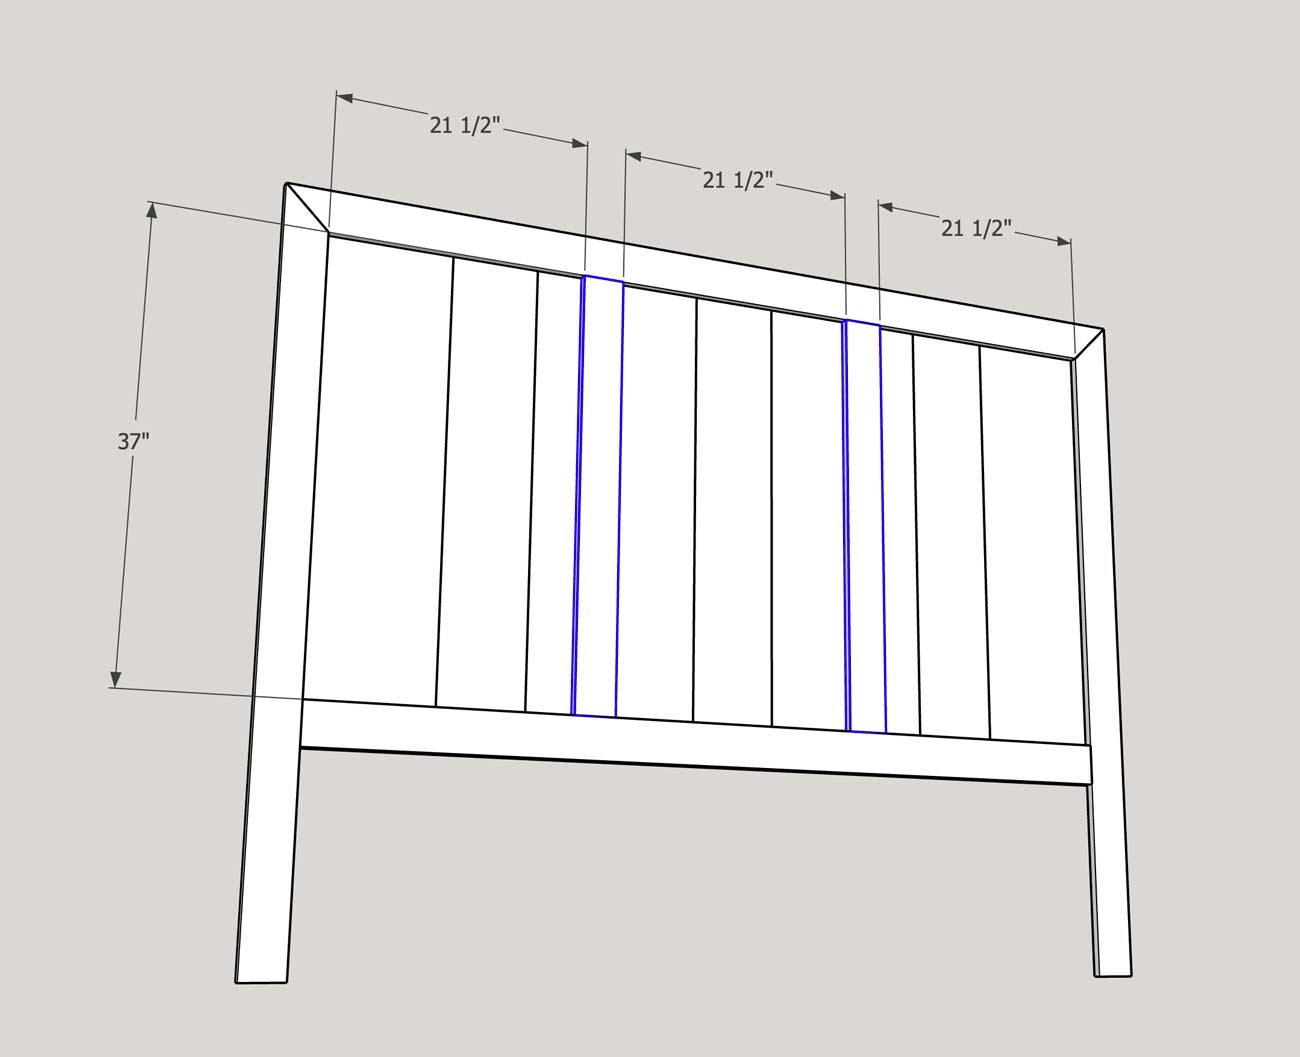
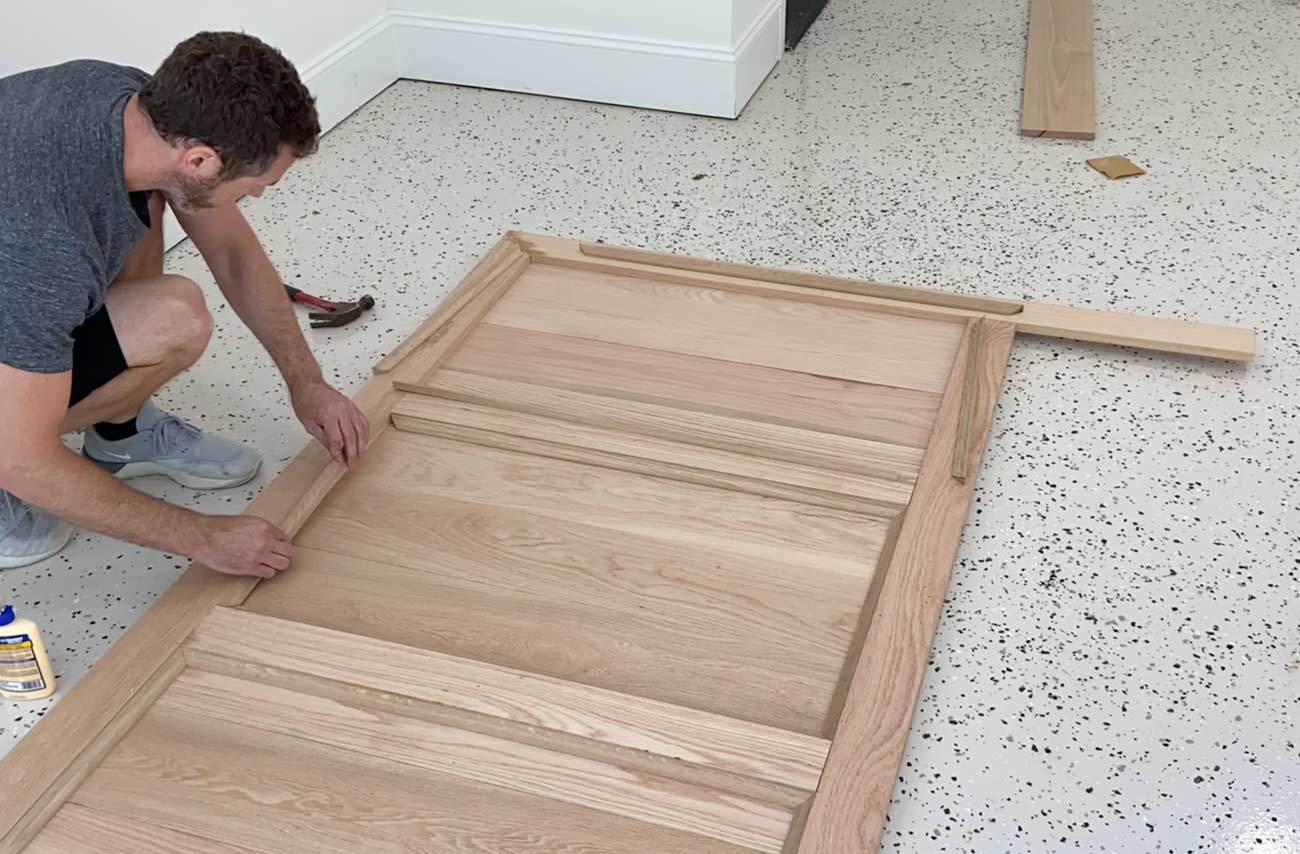
Then in the same style as the footboard and side rails, I added cove moulding around the inside of each panel.
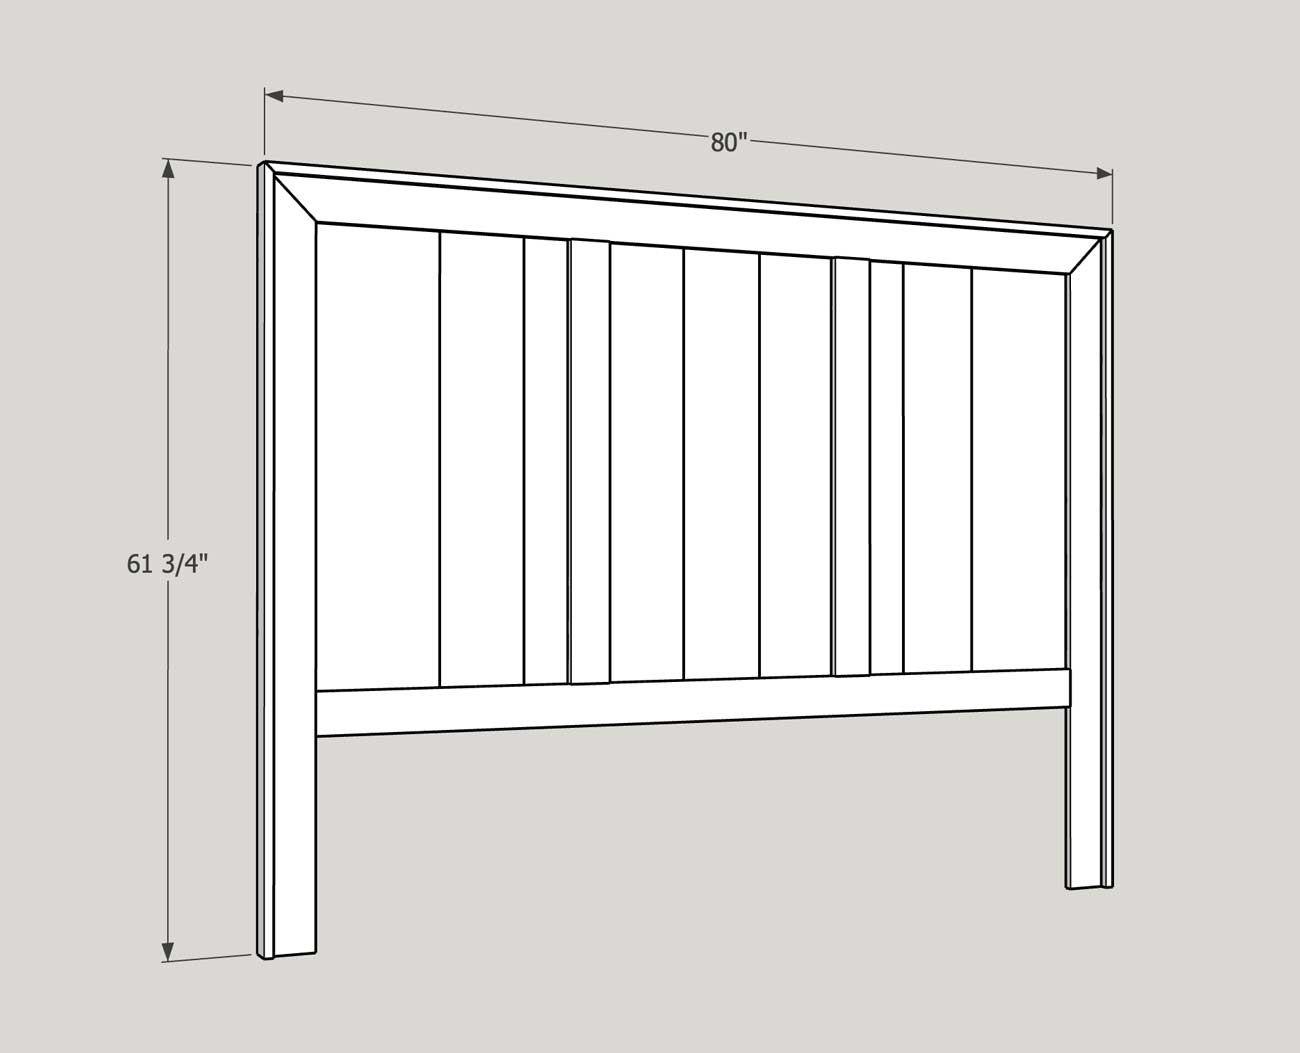
To give the headboard some thickness, I added a piece of 1×3 to the top and sides with it overlapping 3/4″ on the front. I cut the top piece 80″ long with a 45 degree angle on each end, and the side pieces 61 3/4″ long with a 45 on one end.
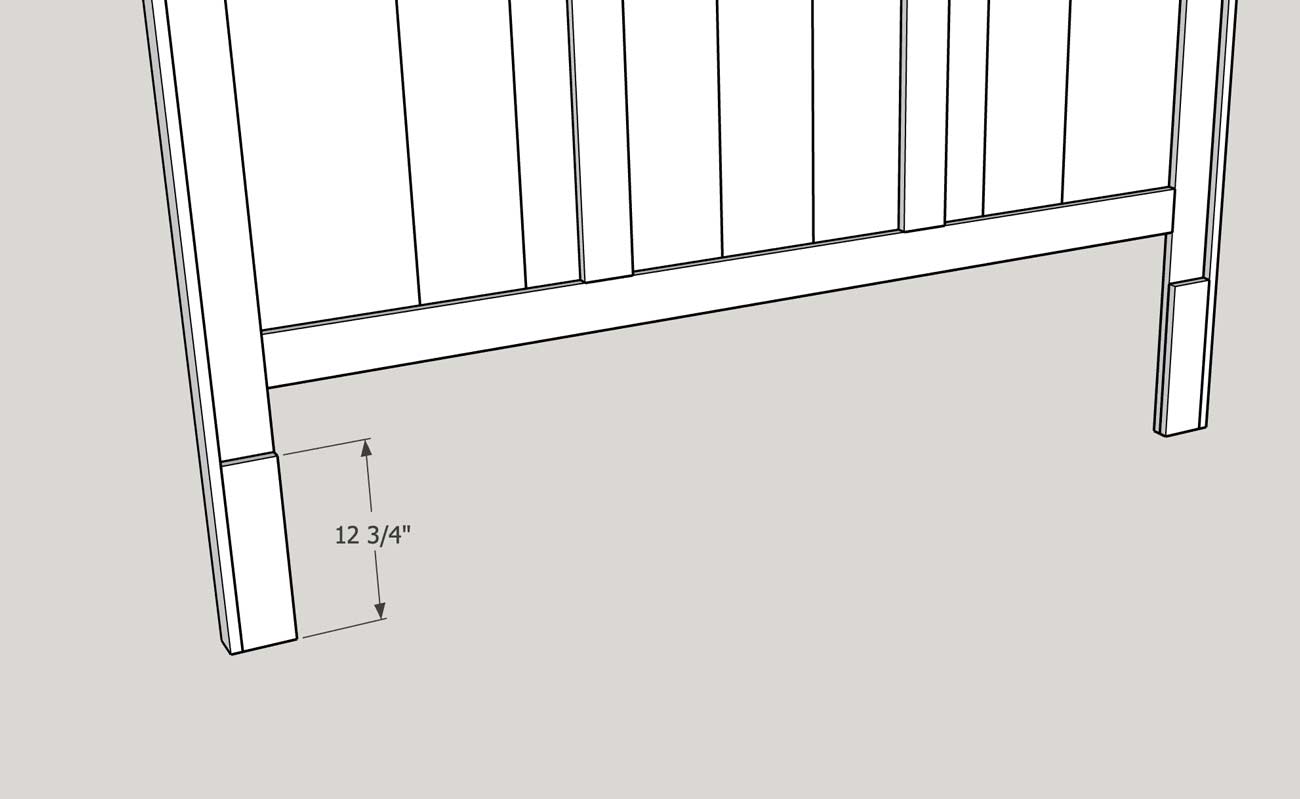
Next I added two pieces of 1×3 to the bottom of each leg. This added strength to where the side rails attach.
Then using some scrap 1×8, I cut two pieces to 4 1/2 x 5″. I nailed and glued one to the bottom front of each leg. This gave the side rails something to sit on.
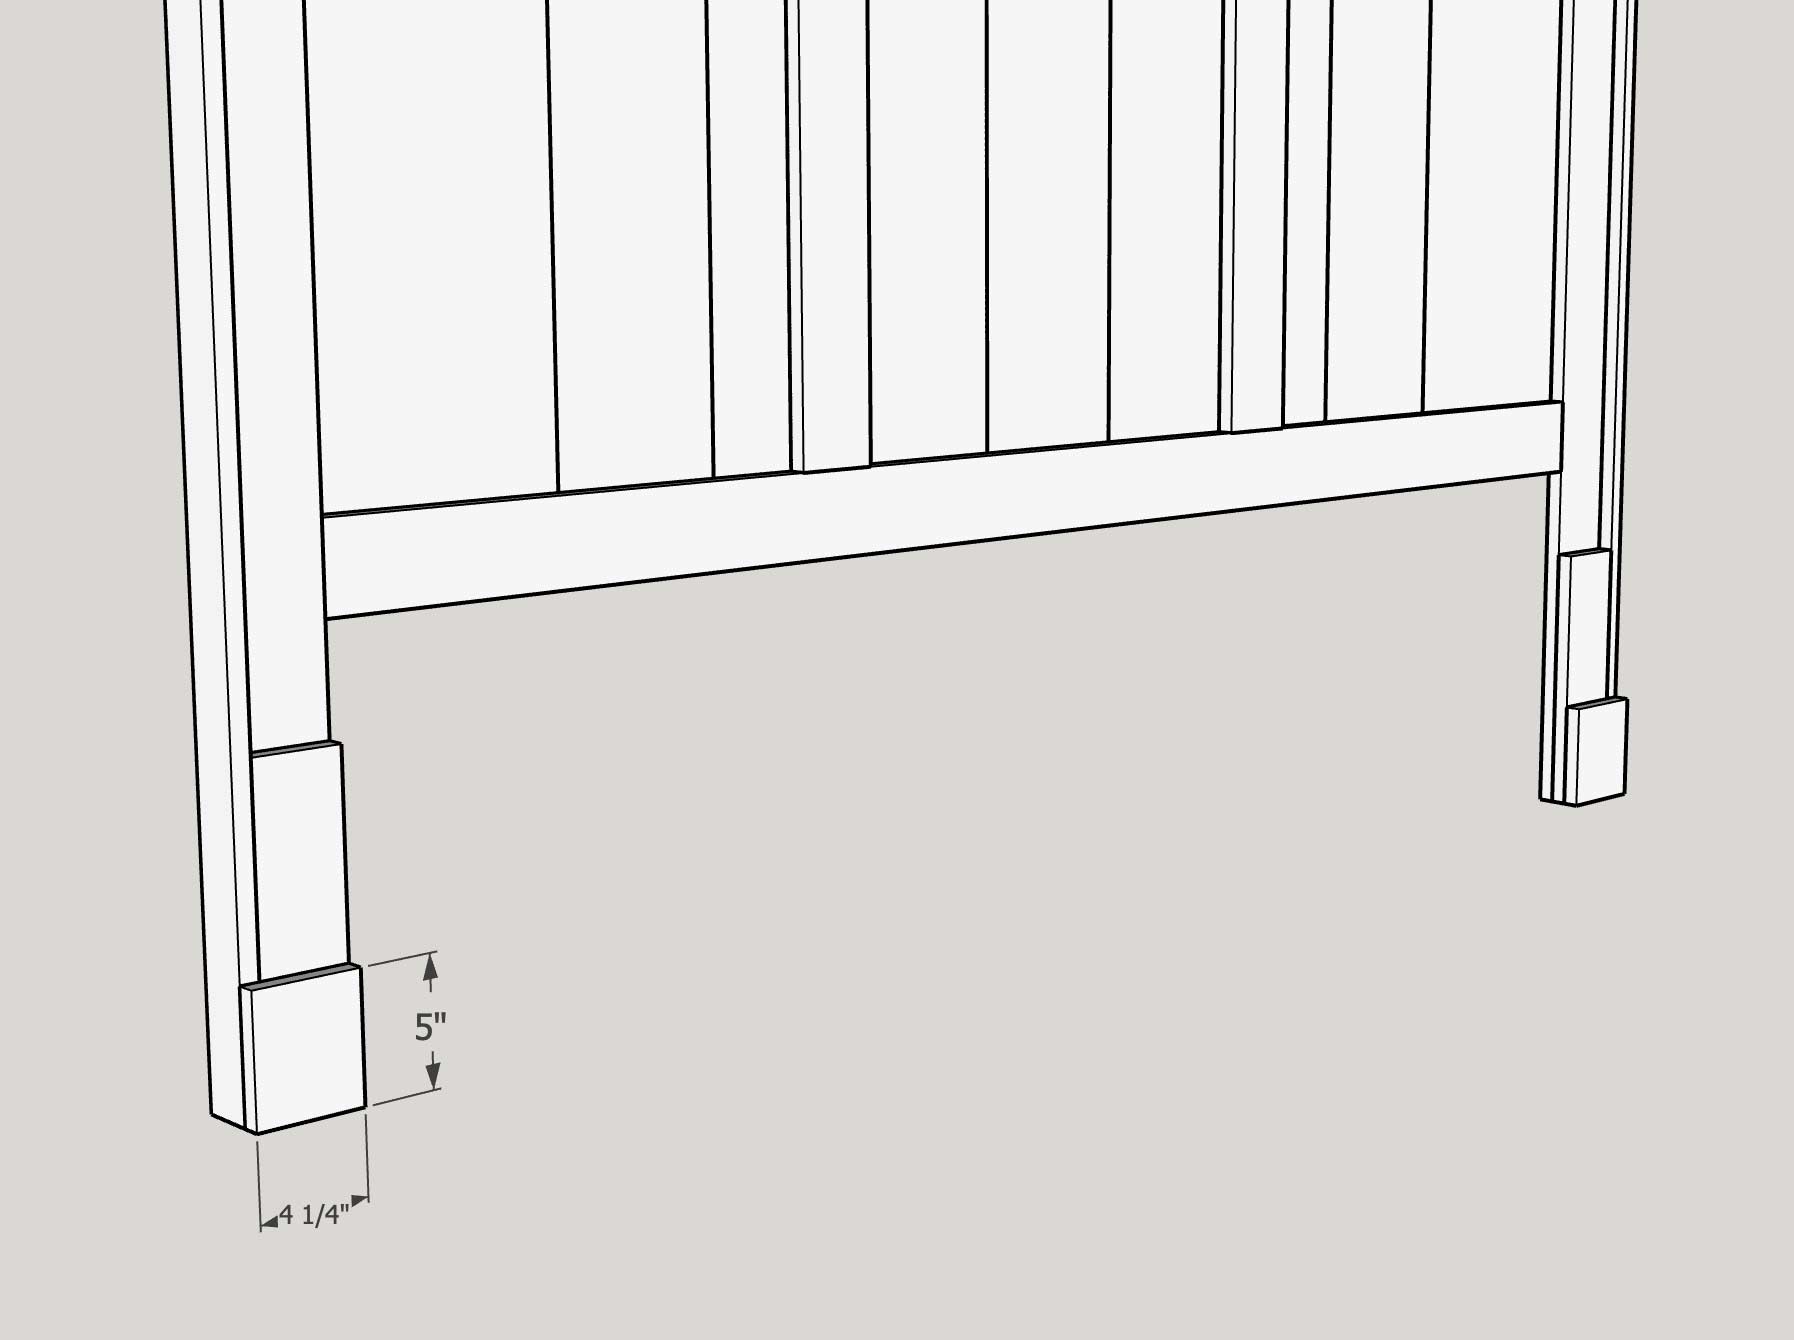
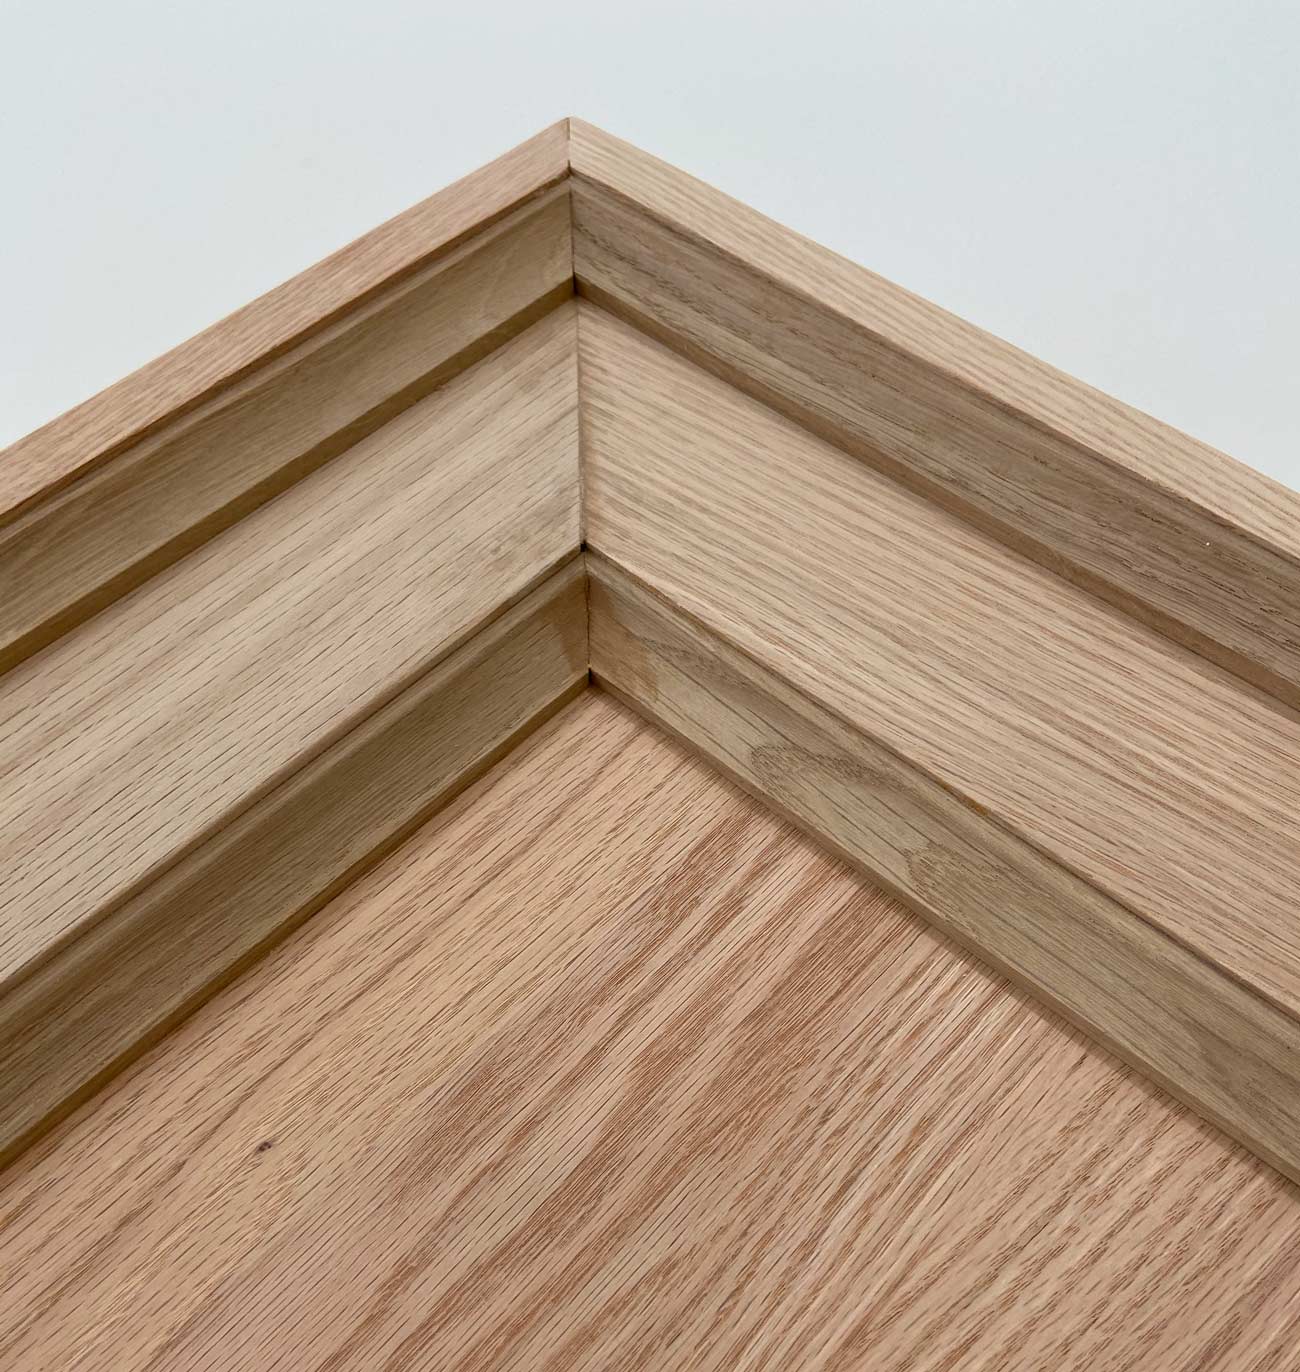
And for the final touch of detail for the headboard, I added cove molding around the inside of the 1×3 as shown in the diagram.
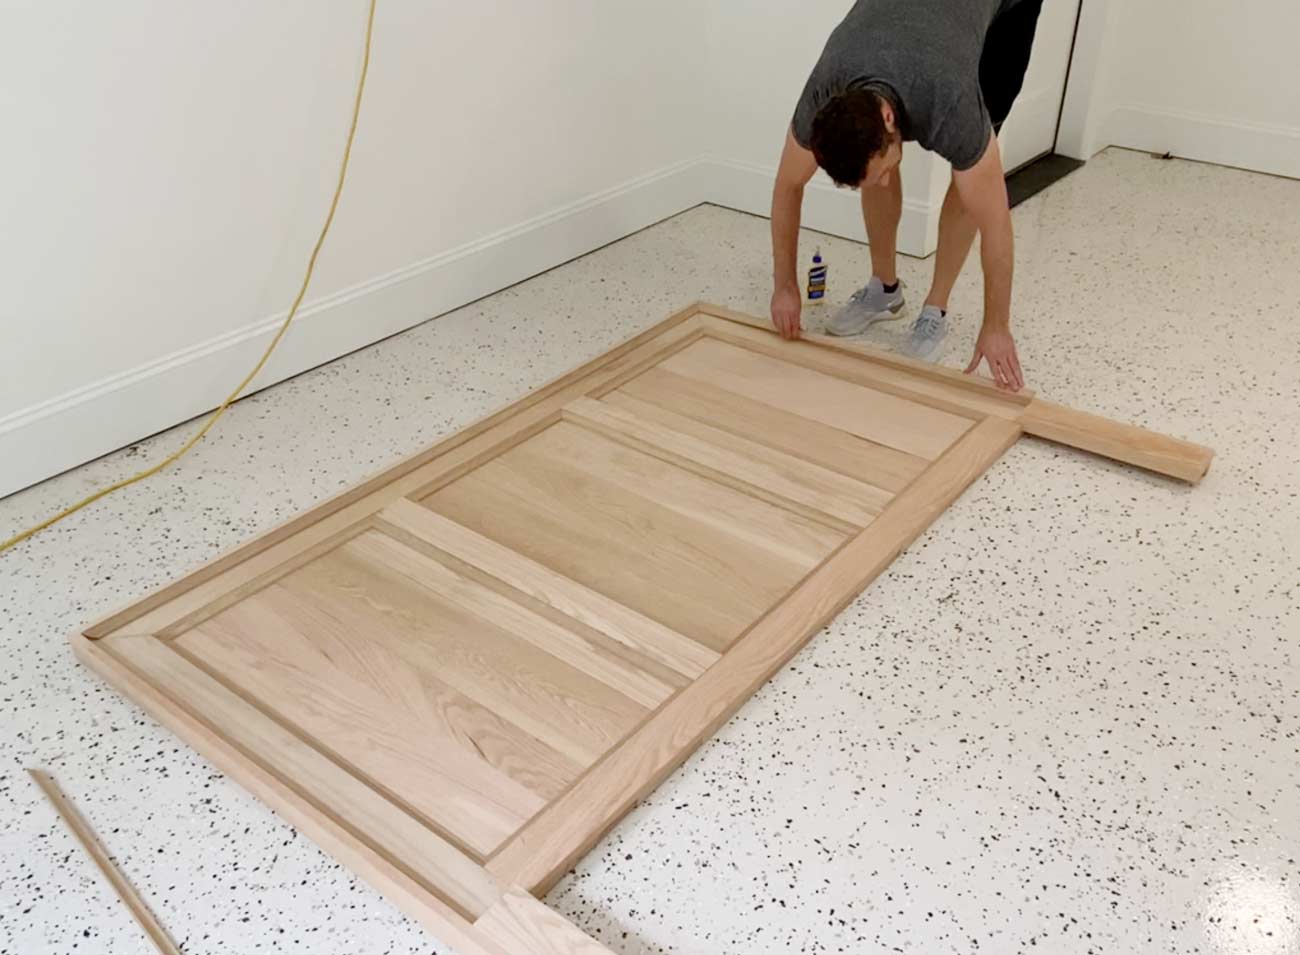
Here is a closeup look at the upper right hand corner of the headboard. This will give you an idea of what the corners should look like.
Step 4: Build the Legs
This was by far the easiest part of the process. To create the legs for the foot of the bed, I cut two pieces of 3×3 5 inches long. Pretty simple!
Later in the tutorial, I’ll show you how I attached them.
Step 5: Fill Nail Holes and Sand
After I had built all of the pieces for the bed, I filled all of the holes using wood hole filler.

First, I used medium grit sandpaper and went over all of the corners to knock off any splinters and make the edges not so sharp.
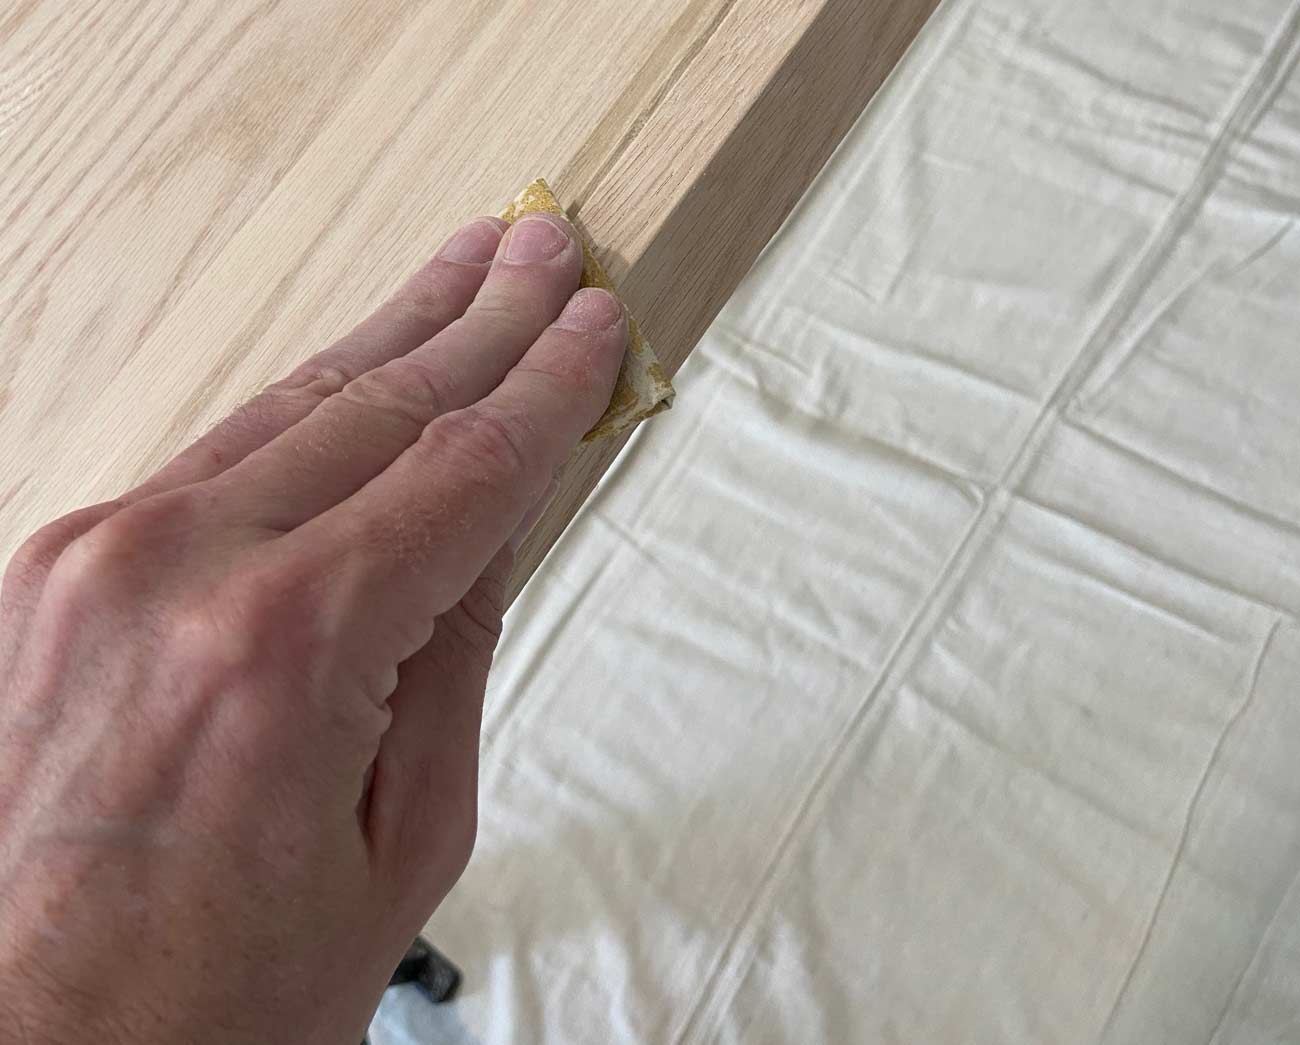
Then I used fine sandpaper to go over the faces of all the pieces until the wood was smooth to the touch.
Step 6: Apply Stain
Deciding what stain to use was very difficult for us. We were torn between going with a natural look or very dark. But in the end, we stuck to our original plan of a dark bed for more contrast and chose Ebony by Minwax.
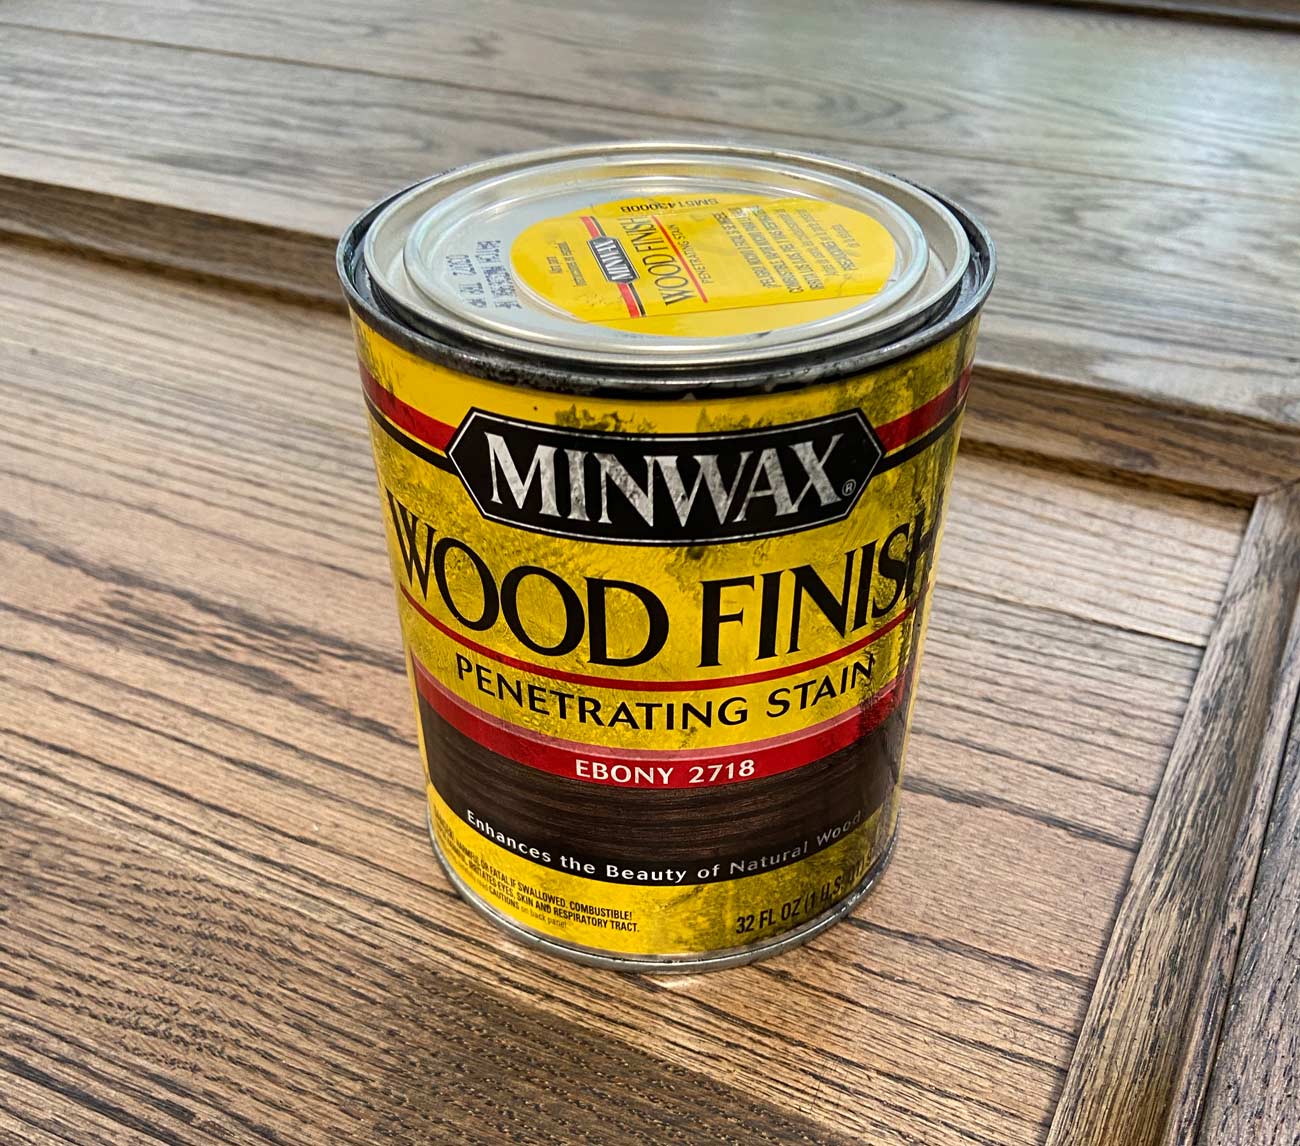
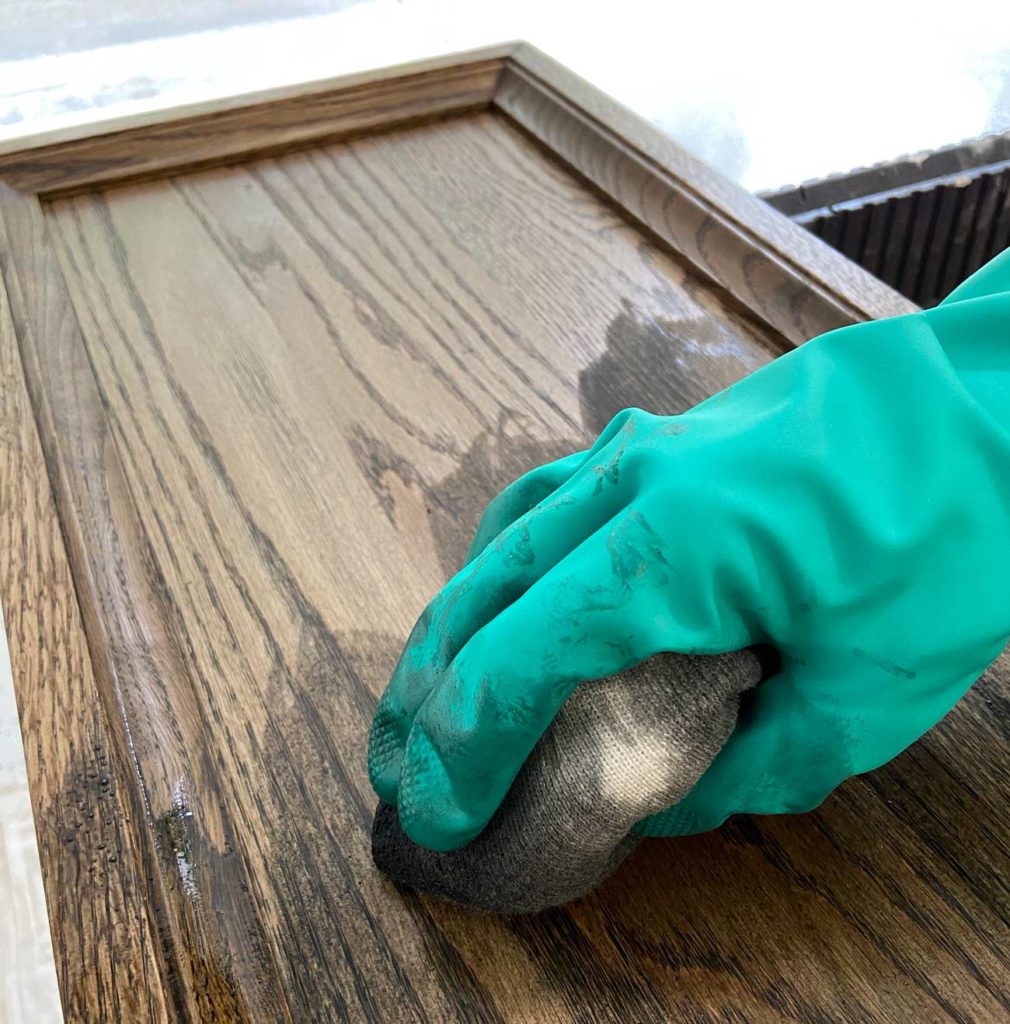
I applied three coats of stain using a cloth.
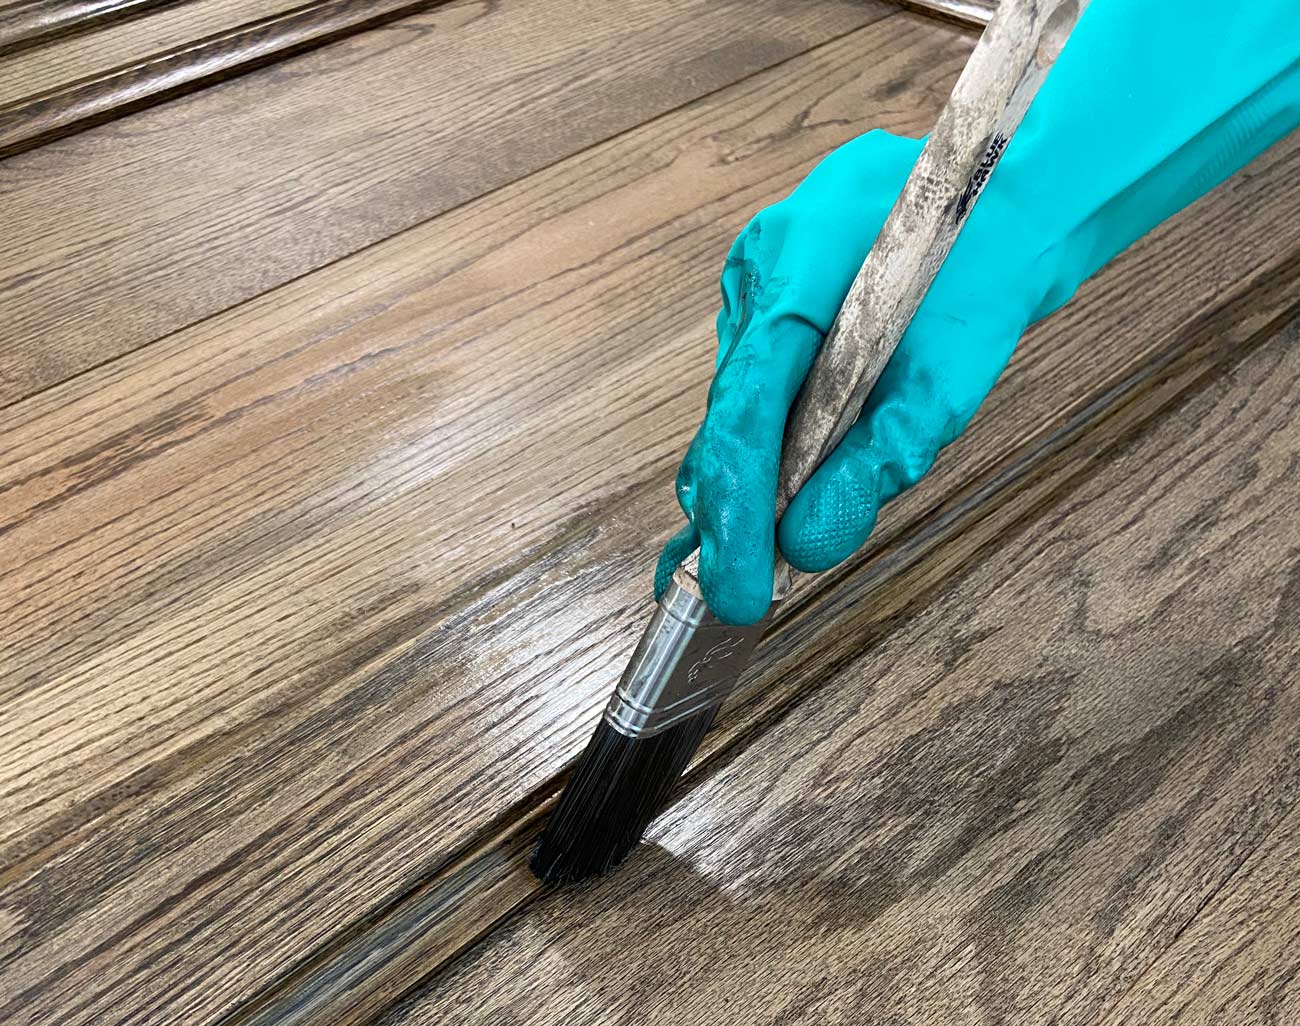
And I used a brush to get in all of the crevices and corners.
Step 7: Assemble the Bed
After the stain had dried, I carried all of the pieces up to our bedroom but I did have to get some help with the headboard because it is super heavy. Oak is a very heavy wood!
Here’s how the four main pieces of the bed fit together.
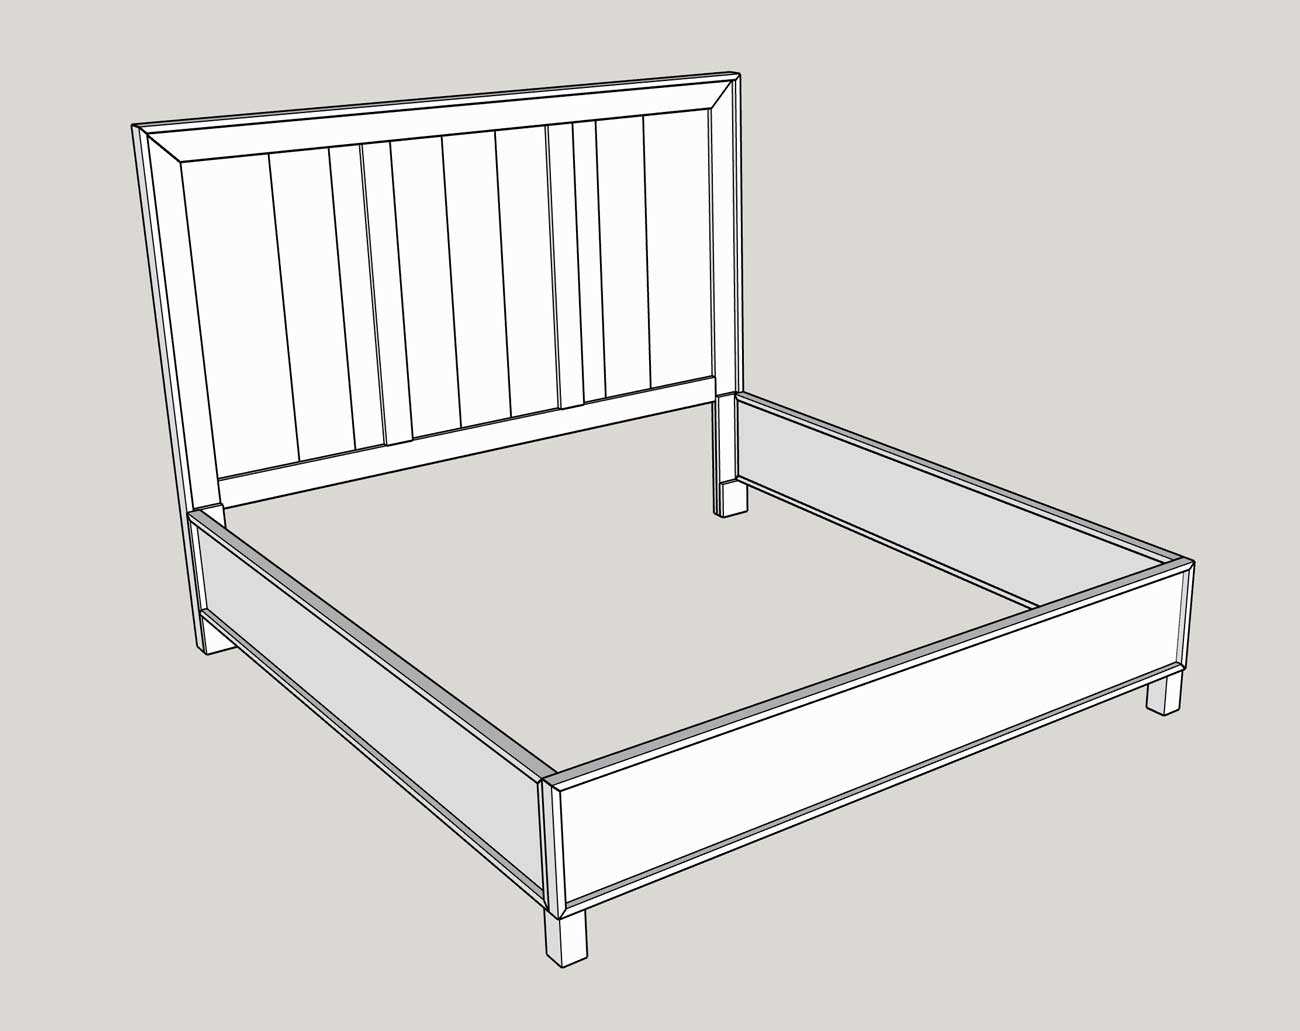
I connected each inside corner with two metal brackets, placing one near the top and one near the bottom.
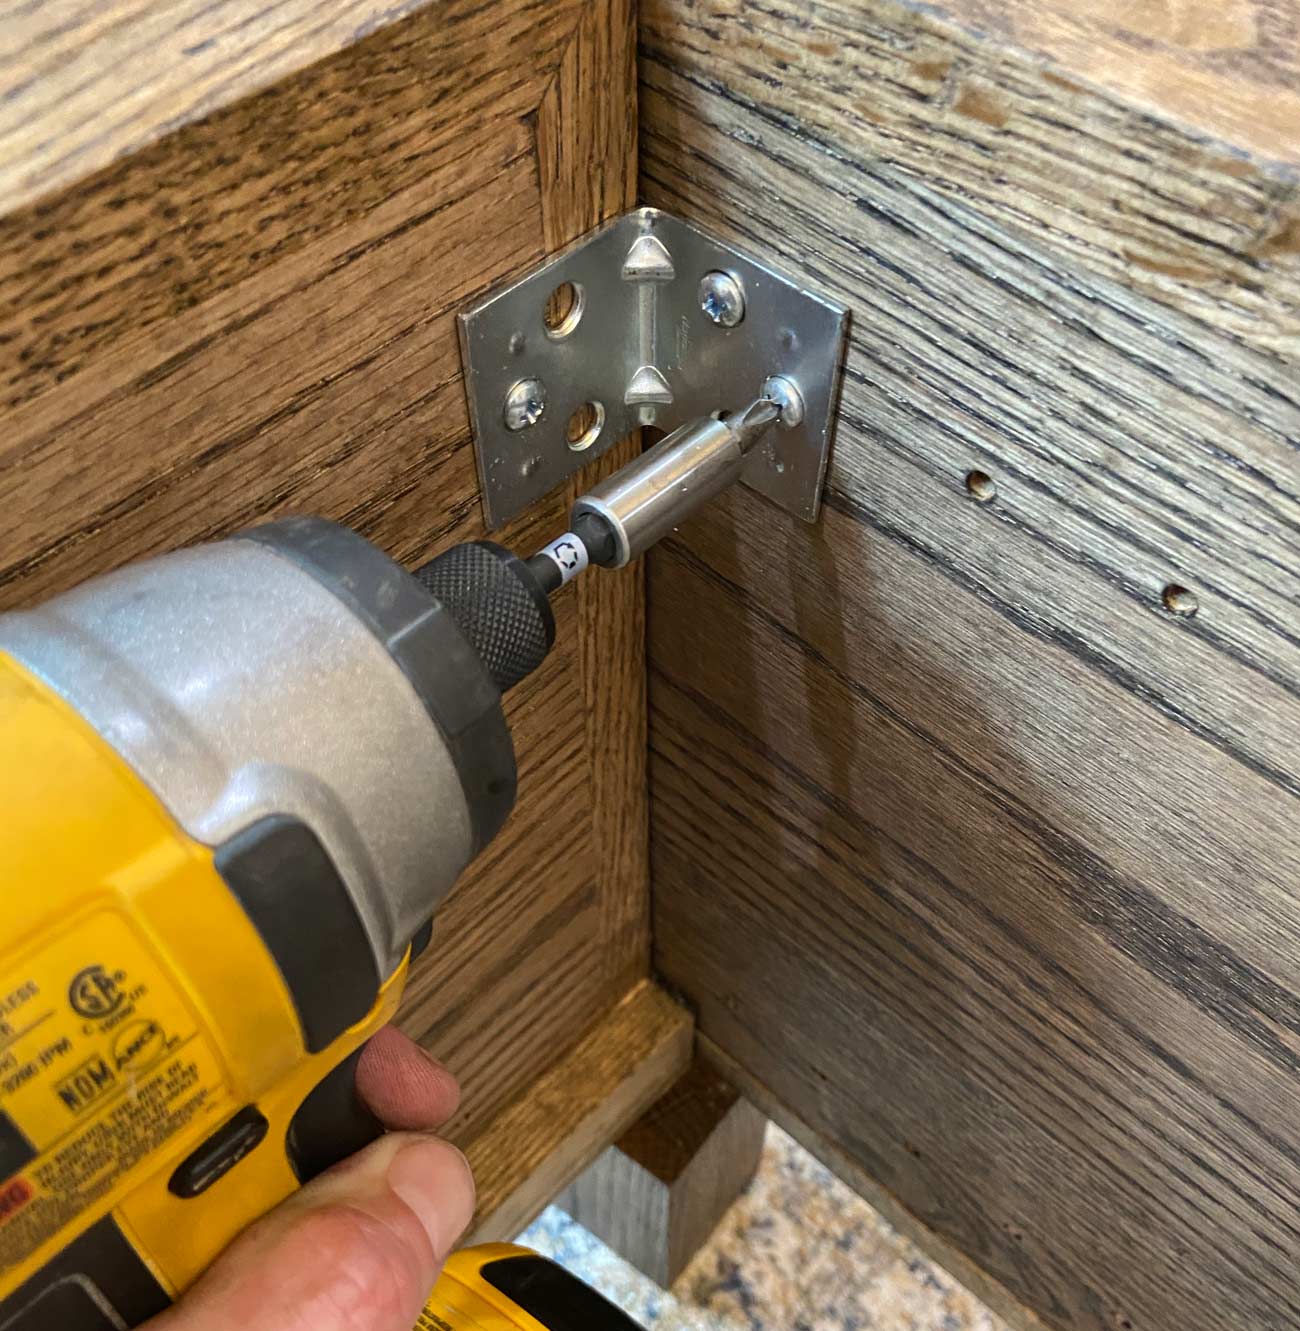
I placed the two legs under each corner where the side rail and footboard intersected and set them in 1/4″ from the outside edges. Once I had them lined up properly, I drilled a hole from the top down through the slat support into the top of the leg.
Then I drilled a 2″ screw through the hole into the leg, and I hand tightened the leg until it was snug against the bottom of the side rail and footboard.
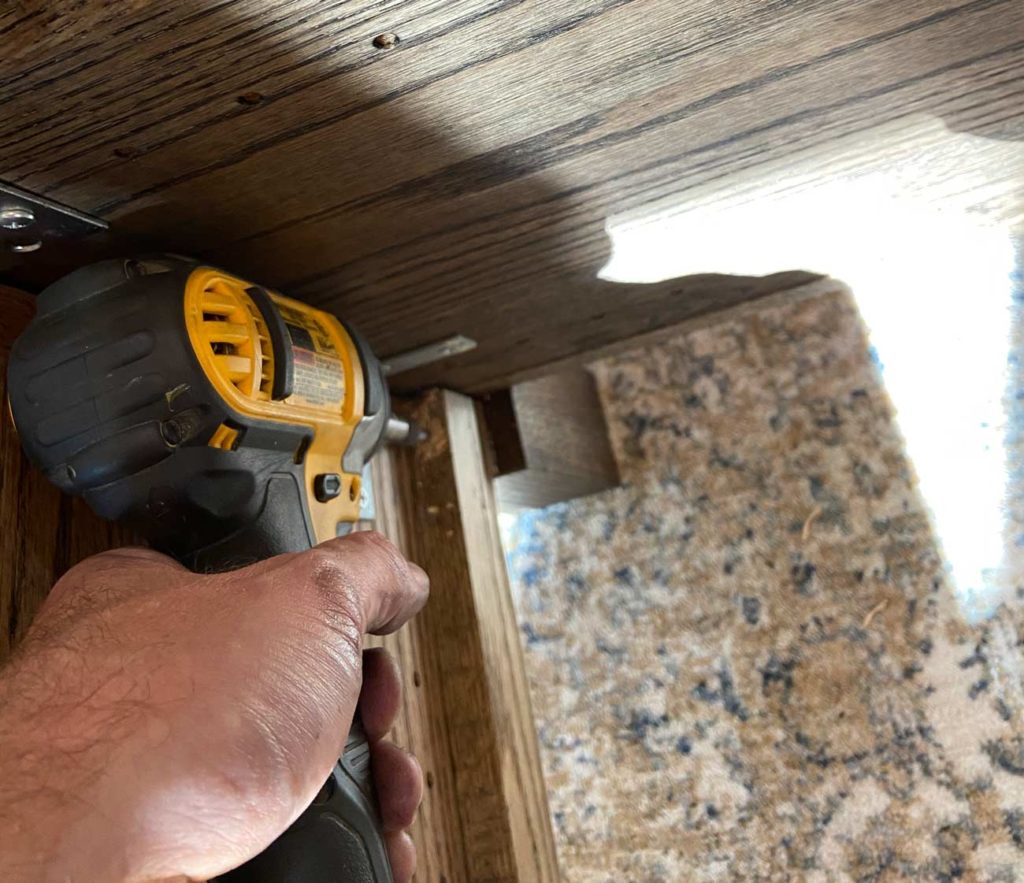
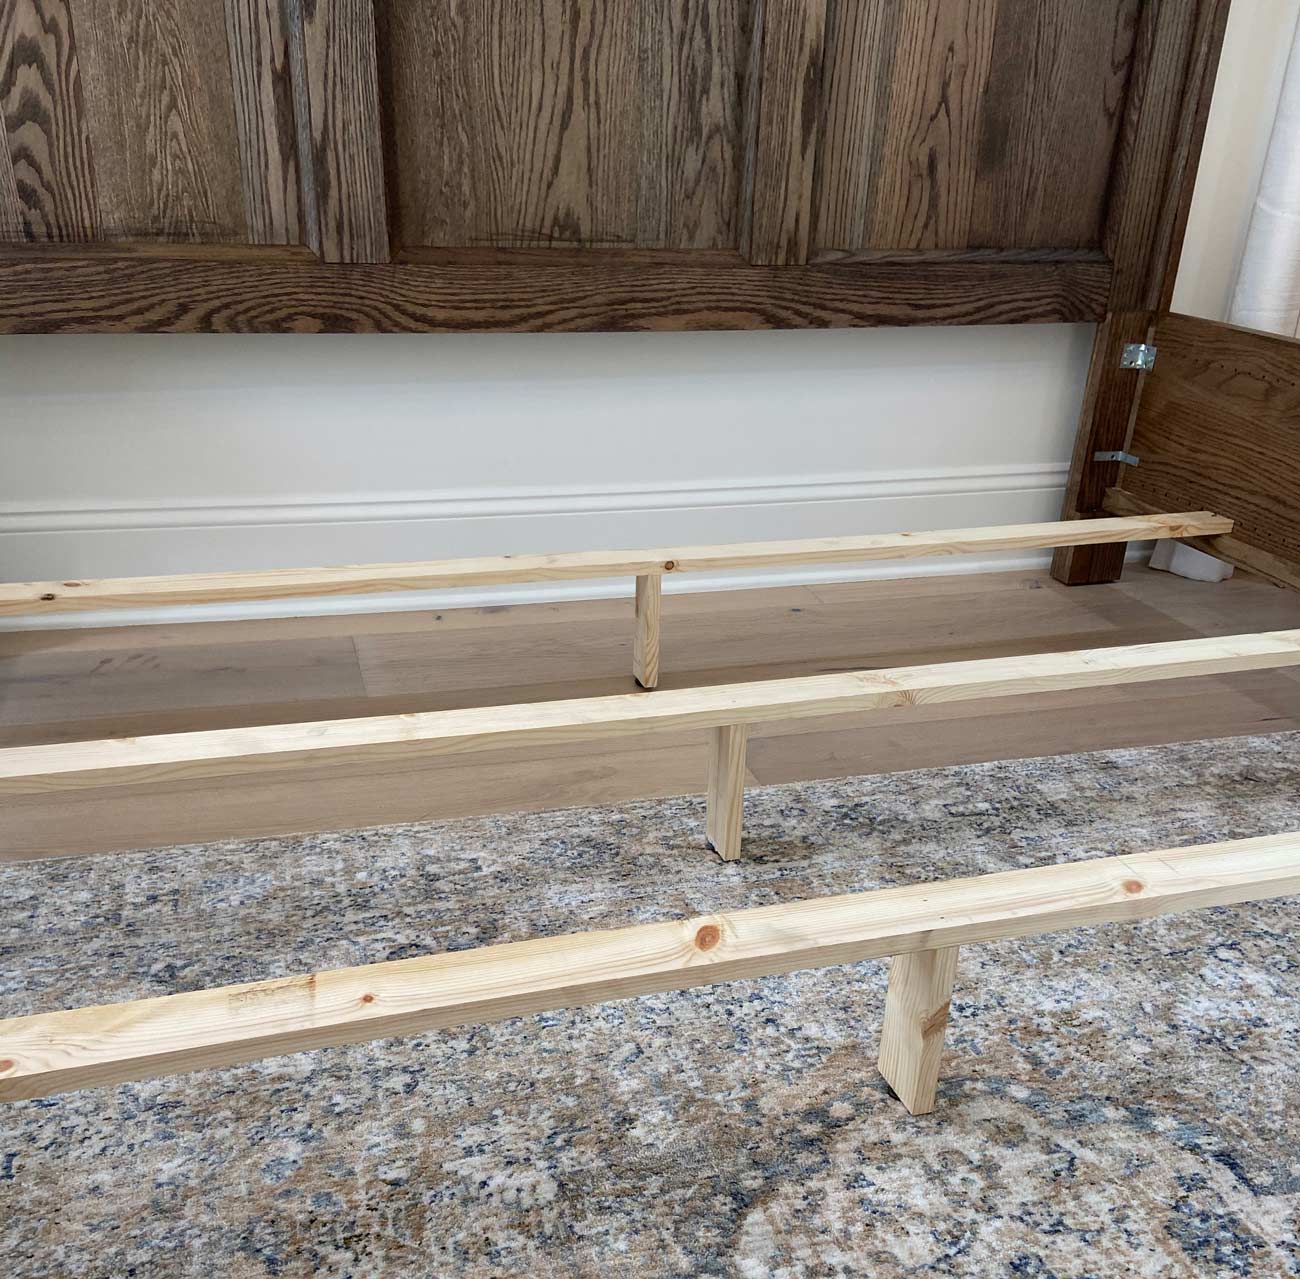
Next, I added 4 slats running across between the rails for the box springs to sit one. For these, I used a cheap pine 1×3 board. I cut each of them 77″ long and screwed them in place, spacing them out about 18″.
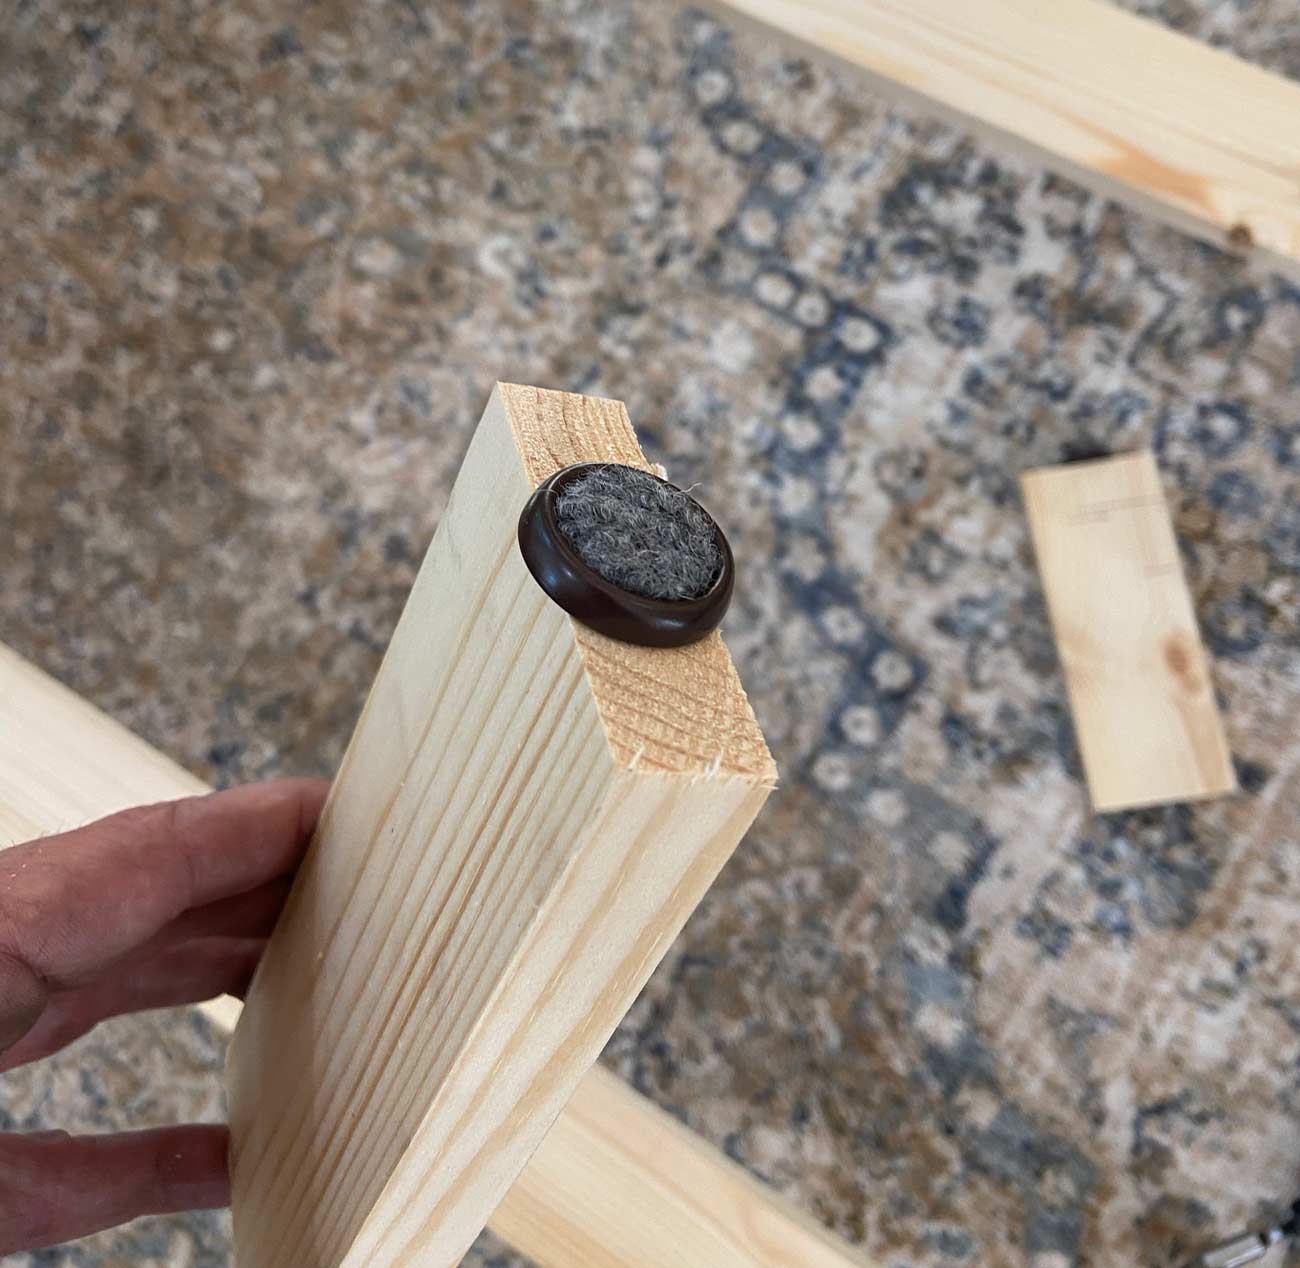
For additional support, I cut four 5″ pieces from the same wood and added a furniture leg pad to each one. Then I glued and nailed them to the bottom middle of each slat as you can see below.
Final Thoughts
And that’s it! I was able to build this for around $400, and I probably could have built it for less if I would have shopped around more for the wood.
I really enjoyed this project and it only took me two days, and I spent the majority of the first day rounding up material and tools.
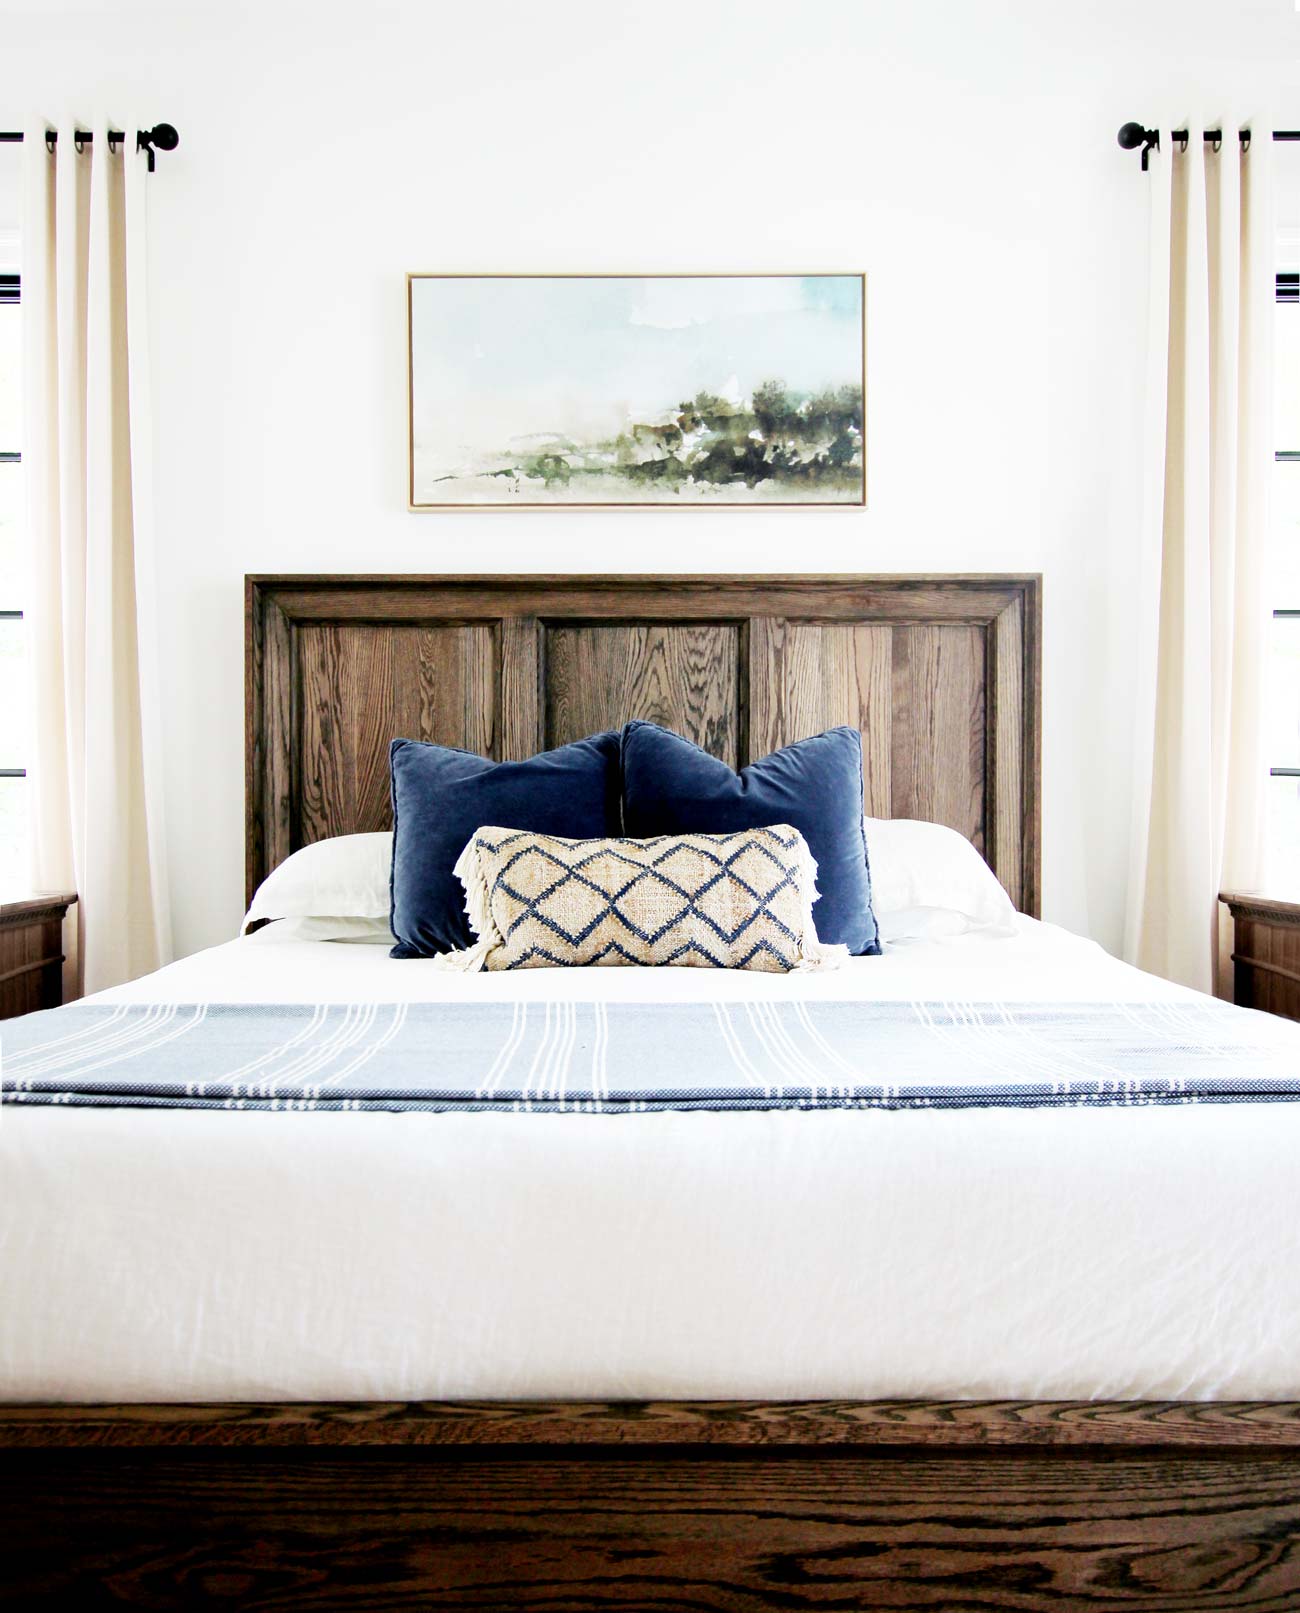
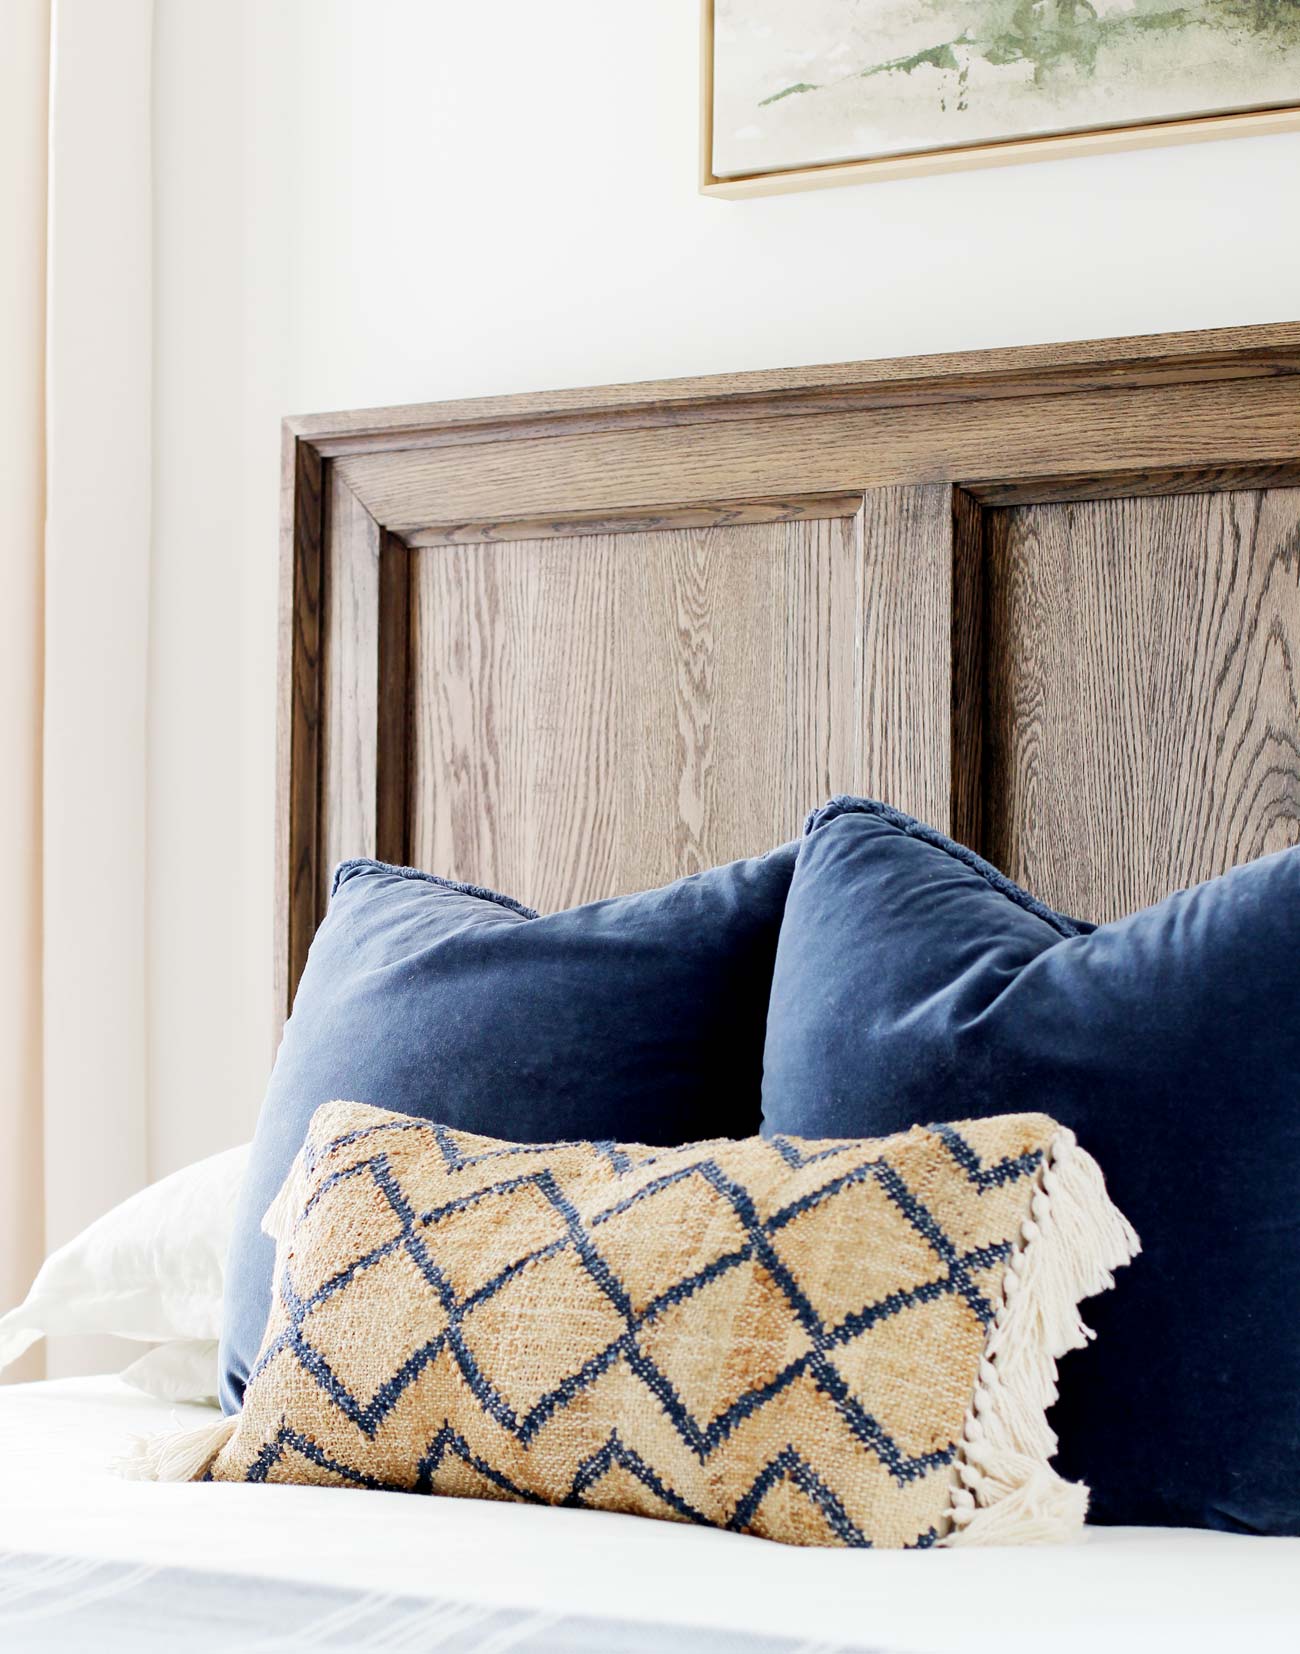
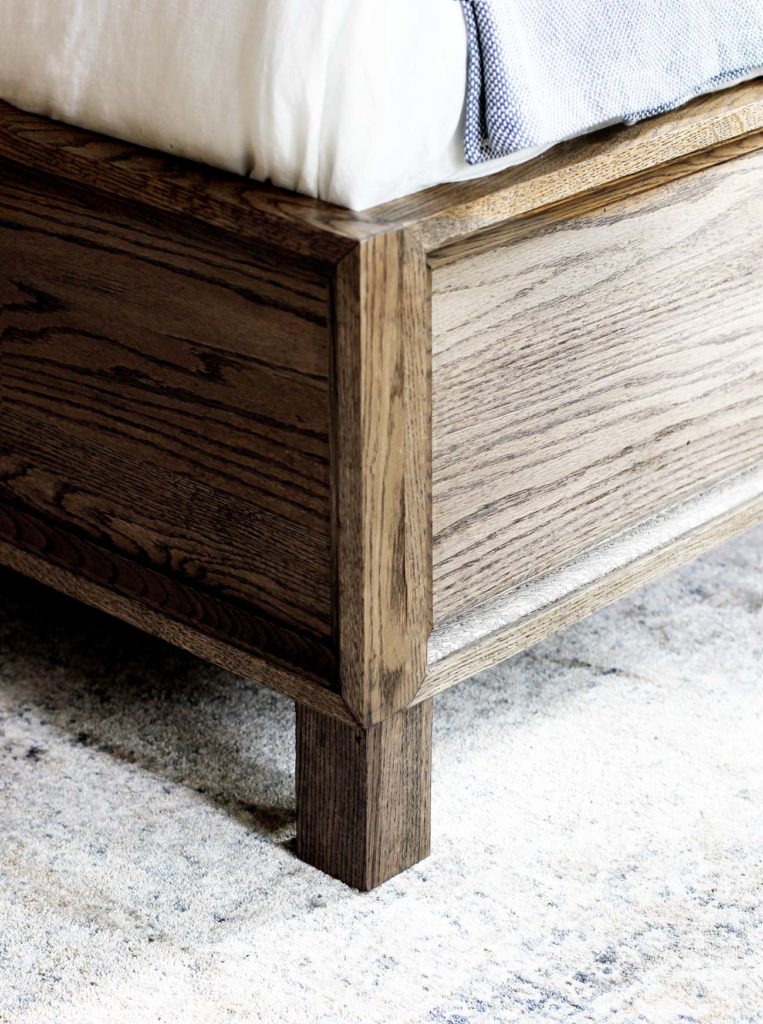
Here’s a few more photos of the finished bed. Good luck building!


46 Comments
Holy cow this is incredible! Turned out so beautiful! And thanks for the awesome step by step…maybe one day we will attempt this 🙂
June 20, 2020 at 4:19 pmThanks Anna! Glad you like it.
June 20, 2020 at 4:41 pmWow! Thank you for sharing my creative juices are flowing. I was just yesterday looking for a new king bed online and astonished at how much they cost and for the rustic look..Could build 4 for the price of yours..Very thankful you made this post.
July 25, 2020 at 2:56 pmCan you share how to adjust this to a queen size bed and did you use a mattress and boxspring? Thank you in advance!
June 20, 2020 at 6:30 pmI’ll be adding how to do other sizes to the article very soon. Yes, we are using a boxspring and matress.
June 20, 2020 at 8:17 pmGreat! Thank you!
June 20, 2020 at 8:20 pmThank you! We’re also looking forward to the adjustment to a queen size bed. It is beautiful!
July 12, 2020 at 4:59 amIs this a king?
November 6, 2020 at 10:43 pmAbsolutely beautiful!
June 20, 2020 at 7:12 pmThanks!!!
June 20, 2020 at 8:18 pmSooo beautiful!!! You are so talented!
June 20, 2020 at 10:33 pmThank you so much. 🙂
June 22, 2020 at 2:54 amThat’s a great project. Made with your own hands. With solid wood materials. From your local store. Not China. And no warning labels stating that it might be harmful in the state of California! Bravo!
June 21, 2020 at 1:01 amThanks! Those are all advantages of building your own furniture. 🙂
June 22, 2020 at 2:56 amLordy That’s beautiful. Great job!!! This is classic and will last for years. I have the RH King James bed and while I do like it, I wish it was higher on the legs and it is not made quality wood. It’s not real solid wood.
June 26, 2020 at 2:25 pmThank you so much. We feel pretty optimistic about it lasting for a long time, or at least until Brooke wants something different. Lol!
June 26, 2020 at 2:32 pmHow much did the bed frame cost to build?
July 3, 2020 at 7:57 pmThe total cost was about $400.
July 7, 2020 at 2:27 pmThis is stunning. I’m in awe of your talent and creativity.
July 22, 2020 at 5:46 pmIf you are able to provide plans for a full size bed as well as a twin size bed, that would be amazing.
Thanks so much!
Stunning job! My daughter and son-in-law just made a lounger inspired my RH! Great job on your gorgeous work ! You nailed it on the look
July 25, 2020 at 12:15 pmHello Kelly! That is so cool and I bet it looks amazing! Thank you for the kind words.
July 25, 2020 at 11:30 pmHENRY… KEEP UP THE FABULOUS…”HONEY DO’S” HAVE ANY GUYS WITH YOUR DNA AVAILABLE FOR MEETING ME… KELLY YOU TWO ARE WONDERFUL! PAMELA JAMES
July 26, 2020 at 2:51 pmHenry – Outstanding job!
July 27, 2020 at 11:54 amThanks!
July 30, 2020 at 3:29 pmThanks for the great article and instructions. I adjusted the sizing down to a queen on my own. I would suggest that you review the materials list. In the instructions you list cutting 1x4s, but in the material list you only show 1x3s. I made my purchase off of the material list and had to adjust slightly due to the differences in 1×3 from 1×4 during the build. Otherwise it was all great. We ended up using Poplar wood to match our cabinets. This was my first official furniture build and your easy instructions gave me the confidence to do the build. It came out fantastic! Thanks!
July 30, 2020 at 2:40 pmYou’re welcome. 🙂 So sorry about the typo, but glad you were able to catch it and make it work.
July 30, 2020 at 3:31 pmLove this bed and going to make it in 2 weeks. Just curious about the cut list. Was the cut list updated from the typo or do I still need to make the adjustment listed in the comments? Thanks so much!
March 2, 2021 at 2:22 pmStunning! Any ideas on how you could modify this for a mattress that doesn’t have a box spring? Could you modify the legs to raise the slats?
August 29, 2020 at 9:02 pmThanks. I wouldn’t recommend making the legs longer. You should raise the 1×2 in the second part of step 2. This is what the slats rest on.
August 30, 2020 at 1:21 pmBeautiful! Will you still be posting plans to make it in queen size?
October 31, 2020 at 3:58 pmYes, we are working on it. Sorry for the delay.
November 6, 2020 at 10:50 pmHello,
What size bed are these measurements for?
November 6, 2020 at 10:31 pmHi. Yes, it is a king.
November 6, 2020 at 10:51 pmHenry…. A quick question…and not just because I just drove 30 minutes each way to a specialty lumber yard to get some great boards for your design… How do you get one 78.5” footboard, two 80” side rails, AND two 44” headboard pieces out of 3 pieces of 1”x12”x8’?
November 29, 2020 at 7:24 pmHi Crawford. Oh no! You’re right. There should be one more 1×12. I’ve corrected the material list. So sorry about that.
November 29, 2020 at 7:34 pmThanks. I really appreciate your design and thoughtfulness to put it out for everyone to use. Keep it up. I am making mine out of Black Cherry. I will let you know how it goes.
November 29, 2020 at 7:41 pmI guess that wood prices have risen since you purchased your wood. I went to Lowe’s and priced out your list and it came to over $1,000! The only cost effective way to build this would be to go with pine. Not really a good choice for quality wood; and the pine came to almost $500.
Any thoughts or suggestion’s? Thanks
January 27, 2021 at 7:01 pmI’m looking at the plans for this, and am getting confused at the measurements for the 2x1s… if you’re cutting those at 45s along the 1” dimension, wouldn’t you just extend the length of the 2×1 an additional two inches?
February 3, 2021 at 1:30 pmFor example, the footboard diagram you show has the side 2x1s at 12 and 3/4 when it’s being mounted to 12”, but the 2×1 mounted on the 78 and 1/2” dimension is 80”. I would think that both 2x1s should just be 2” longer than what they’re being nailed to… can you help me out here?
Keep in mind that the actual dimensions of a 1×2 is 3/4″ x 1 1/2″. And a 1×12 is 3/4″ x 11 1/4″.
February 3, 2021 at 1:41 pmDo you think pine wood would work ok for this project? seems like oak is in very short supply.. cant find all the boards needed for this 🙁
February 26, 2021 at 6:49 pmHi Olena. Yes, pine should work just fine. However, Oak does take stain better.
February 27, 2021 at 11:11 pmThat was my main concern with pine.. I’m not sure if it’ll have the same tint as yours (i really like it).. i guess i’ll have to test couple of them on pine and see how it looks before staining the whole thing. I got your plan pdf and cant wait to start! Thank you for putting this up on here 🙂
March 4, 2021 at 5:50 pmyou would need to apply wood conditioner to the pine prior to staining, in order to avoid blotching or streaking of the stain. I would use oil based stain and conditioner on pine to minimize raising of the grain. Some sanding will be needed between coats of stain and after each coat of clear finish. I would use oil based polyurethane, but others would work too.
September 22, 2021 at 4:45 pmThis is beautiful and amazing!!! Thank you for this great tutorial.
September 5, 2021 at 12:02 amQuestion: Could I use 3/4″ plywood for the headboard if I want to upholster inside the frame?
You’ve inspired me to try this plan. Our King mattress and Box springs have been sitting on the floor for over a year. Did you consider using Bedlock hardware so it could be taken apart easily?
February 2, 2022 at 12:40 amWhen do the Queen size dimensions get posted?
May 16, 2022 at 3:27 pm