

Henry and I are planning on doing a plaster hood in our new build kitchen. We love the sleek modern aesthetic a plaster hood adds to a kitchen.
The only problem we are having at this point is finding someone to actually do the plaster hood. Obviously, plaster is a material that isn’t commonly used today. Plaster walls can be found in older home, but now it’s usually something home owners want to replace. Therefore, there isn’t much need for people to know how to apply and work with plaster in todays home building or remodeling field. But, I think it’s making a come back. Call it a trend maybe, but if it is, it’s one trend I want to be part of!
Henry loves a good challenge and is determined to tackle this project. It should be a fun one and help us save a little money. Stay tuned for details on the progress. In the meantime, here is where we’re at in the planning and design process, and of course a few inspirational pictures of plaster hoods.
Our Design
Henry has already started the initial design of the hood. Our hood insert is 21″ x 46″, so it has to be designed and constructed around those dimensions.
Here is a 3D model of the framing so far and what it should look like when it’s covered.

As I mentioned earlier, what we love about plaster hoods is how clean and minimal they look. They seem to flow right into the walls and ceiling.
Our design is aimed to keep things as clean and simple as possible. The sides will go straight up, and there will be a subtle swoop in the front.
Th difficult part of taking on this project is that there is no info online about how to build a plaster hood, but when we’re finished, there will be. We’ll make sure to document the process and post a full tutorial.

As of now, the plan is to frame the hood out of wood and cover it in sheetrock. Then a coat of special adhesive will be applied to allow the plaster to stick.
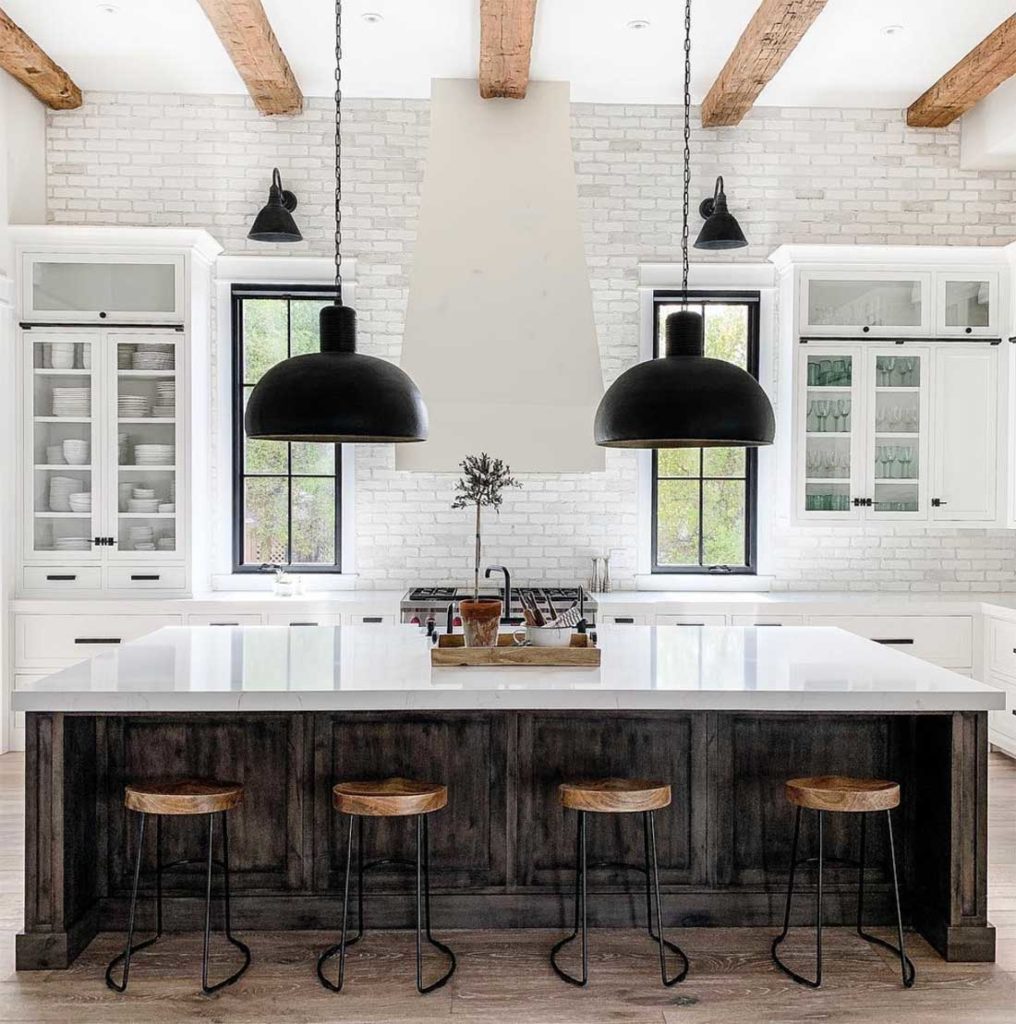
Inspiration and Completed Look
When it’s all said and done, here is what the plaster vent hood should look like:

I love how sleek the hood looks in this kitchen by Macallan Homes . You can also see the subtle color and sheen variations of the venetian plaster. It’s not overpowering and adds just the right amount of texture.
Here is another beauty. This is by Parkes & Lamb Interiors and it seems to have more similar proportions to our design so far.

We’re 90% sure the look you see above is what we’ll be going with, but there are other shapes we like as well: like this one by Jami Lancaster Design
You’ll notice on this one, that the sides are tapered at the top instead of going straight up. It’s a subtle difference at first glance, but I think it can change the overall look.
The kitchen range hood has always been my favorite part of the kitchen. So I’m excited to see this project get underway. Once we are 100% sure on the shape, Henry will start framing so we can get it hung and have it ready for the drywall crew.


17 Comments
I really love this look! The concern I have is plaster is porous and soaks in everything. I grew up with plaster walls. What will you topcoat it with to protect it and make it easy to clean, especially kitchen grease?
September 27, 2019 at 3:48 pmThanks! That’s a great question. We’re still in the research phase, but I’ve read somethings about plaster being a good moisture barrier. Maybe it depends on the type of plaster. Considering how many plaster hoods are out there, there must be a good solution. Once we get more into it, I’ll report back.
September 27, 2019 at 11:36 pmSo we have built our hood out of wood and I’m trying to figure out how to finish. I called a plaster guy whose business is about an hour from here in Portland OR. He described a 3 part process and said with the right primer, this could be applied right to the plywood – no sheet-rocking. Since it is a small job and the main cost would be the travel of the tradesperson, the guy offered to walk me through it so i could do on my own AND pack up small quantities of the supplies needed to do it for me. I havent taken him up on the offer yet because i saw Jenny Komenda’s hood/brick project on instagram where she finished with limewash and i was thinking about that as an easier option. Anway, youve inspired me to go back to plaster planning! Ill let you know how it goes. ThAnks for the post.
September 29, 2019 at 7:31 pmHello Alison!
October 3, 2019 at 10:55 pmYes, please let me know how it goes. We are for sure going to attempt this, so we can use all the help we can get!
How’s the plaster hood going? We’re building a home and I can’t wait to see the details of your hood.
December 14, 2019 at 7:33 pmHello Linda! The only thing left is applying the plaster, but we have had to wait until they finish the final coat of pain. It will be this coming week. We will have so many tutorials coming out after the first of the year.
December 14, 2019 at 11:28 pmHi there,
I’m about to start in on our own plaster hood and wondering details about the type of plaster you ended up using and any lessons learned or tips. I’ve been hoping you’ll do an update soon!
January 13, 2020 at 4:36 amHello Roxie!
It has been so crazy around here, so we had to leave this as one of the last things of the build. We are actually working on this week and will update you as soon as we know! Thank you for following along.
January 27, 2020 at 1:42 pmCan you share how you plan for the width of the design you went with for the hood? For example, if you have a 36″ range, would the width of the hood be 36″ or do you need to go a bit wider? Thanks in advance! You have been such an inspiration for me with my new build. I appreciate all of your posts.
January 26, 2020 at 6:17 amHi Kim!
You want your hood to at least or wider than your range. It also depends on the width of the insert you get. On our hood, we also took in consideration how much space we wanted the hood and the windows. Hope this makes sense.
January 27, 2020 at 1:43 pmHi! We are also in the midst of figuring out a plaster hood for our kitchen remodel. Eagerly awaiting your details and tutorials. Thanks so much for putting all of this out there!
February 8, 2020 at 5:33 amHello Karen!
Just wanted to make sure you saw the tutorial?
February 27, 2020 at 9:11 pmI’d love to know what type/brand of range hood insert you chose. We are ready to buy one (new build home), but have never had an insert before. In the past we have used an exposed stainless steel range hood. There doesn’t seem to be a lot of options in the 36″ size for inserts. Thanks!
February 26, 2020 at 6:31 pmHello Lynsey! There is a complete tutorial/article that we just posted a couple of days ago. It gives all of the info. Hope this helps!
February 27, 2020 at 9:12 pmWhat kind/brand of plaster did you use? We have our hood all framed out and cement board on. I am just not sure which type of plaster to use. Any advise?
September 17, 2020 at 7:12 pmWe also did a plaster hood just as your tutorial.We did put 1/4 inch sheetrock and drywall to the hood.
January 11, 2021 at 5:17 amWe are now ready for the plaster, which we bought the same one in the tutorial. Getting the right person out
has been the hardest! I’m trying to get the drywall company to finish the hood with plaster. Thank you so much for your tutorial, it was extremely helpful.
What did you use underneath the hood to attach insert to?
May 8, 2022 at 12:07 am